# How to use RRS-AWS + Environment construction
This page explains how to use RRS-AWS.
RRS-AWS is a system or website for running simulations on AWS.
::: warning
Please enable Javascript to use RRS-AWS.
:::
### Table of Contents
[Build Environment](#Build-Environment)
[Accounts](#Accounts)
[Login and Logout](#LoginampLogout)
[Agent Submission](#Agent-Submission)
[Scenario](#Scenario)
[Simulations](#Simulations)
[Simulations Results](#Simulations-Results)
[Batch Run](#Batch-Run)
[Delete Environment](#Delete-Environment)
## Build Environment
### AWS
::: warning
This is written based on the AWS as of October 2021. It may differ slightly with future updates.
:::
::: warning
To build the environment, you need an Amazon Web Services account.
For details, please refer to [ Setting up your AWS Environment](https://aws.amazon.com/getting-started/guides/setup-environment/module-one/).
:::
::: info
In this tutorial, we will assume that the language is English and the region is set to us-east-1.
You can change the language and region as needed.
:::
1. Download rrs-aws.yml
```
curl -LO https://maslab.aitech.ac.jp/~k19016kk/rrs-aws.yml
```
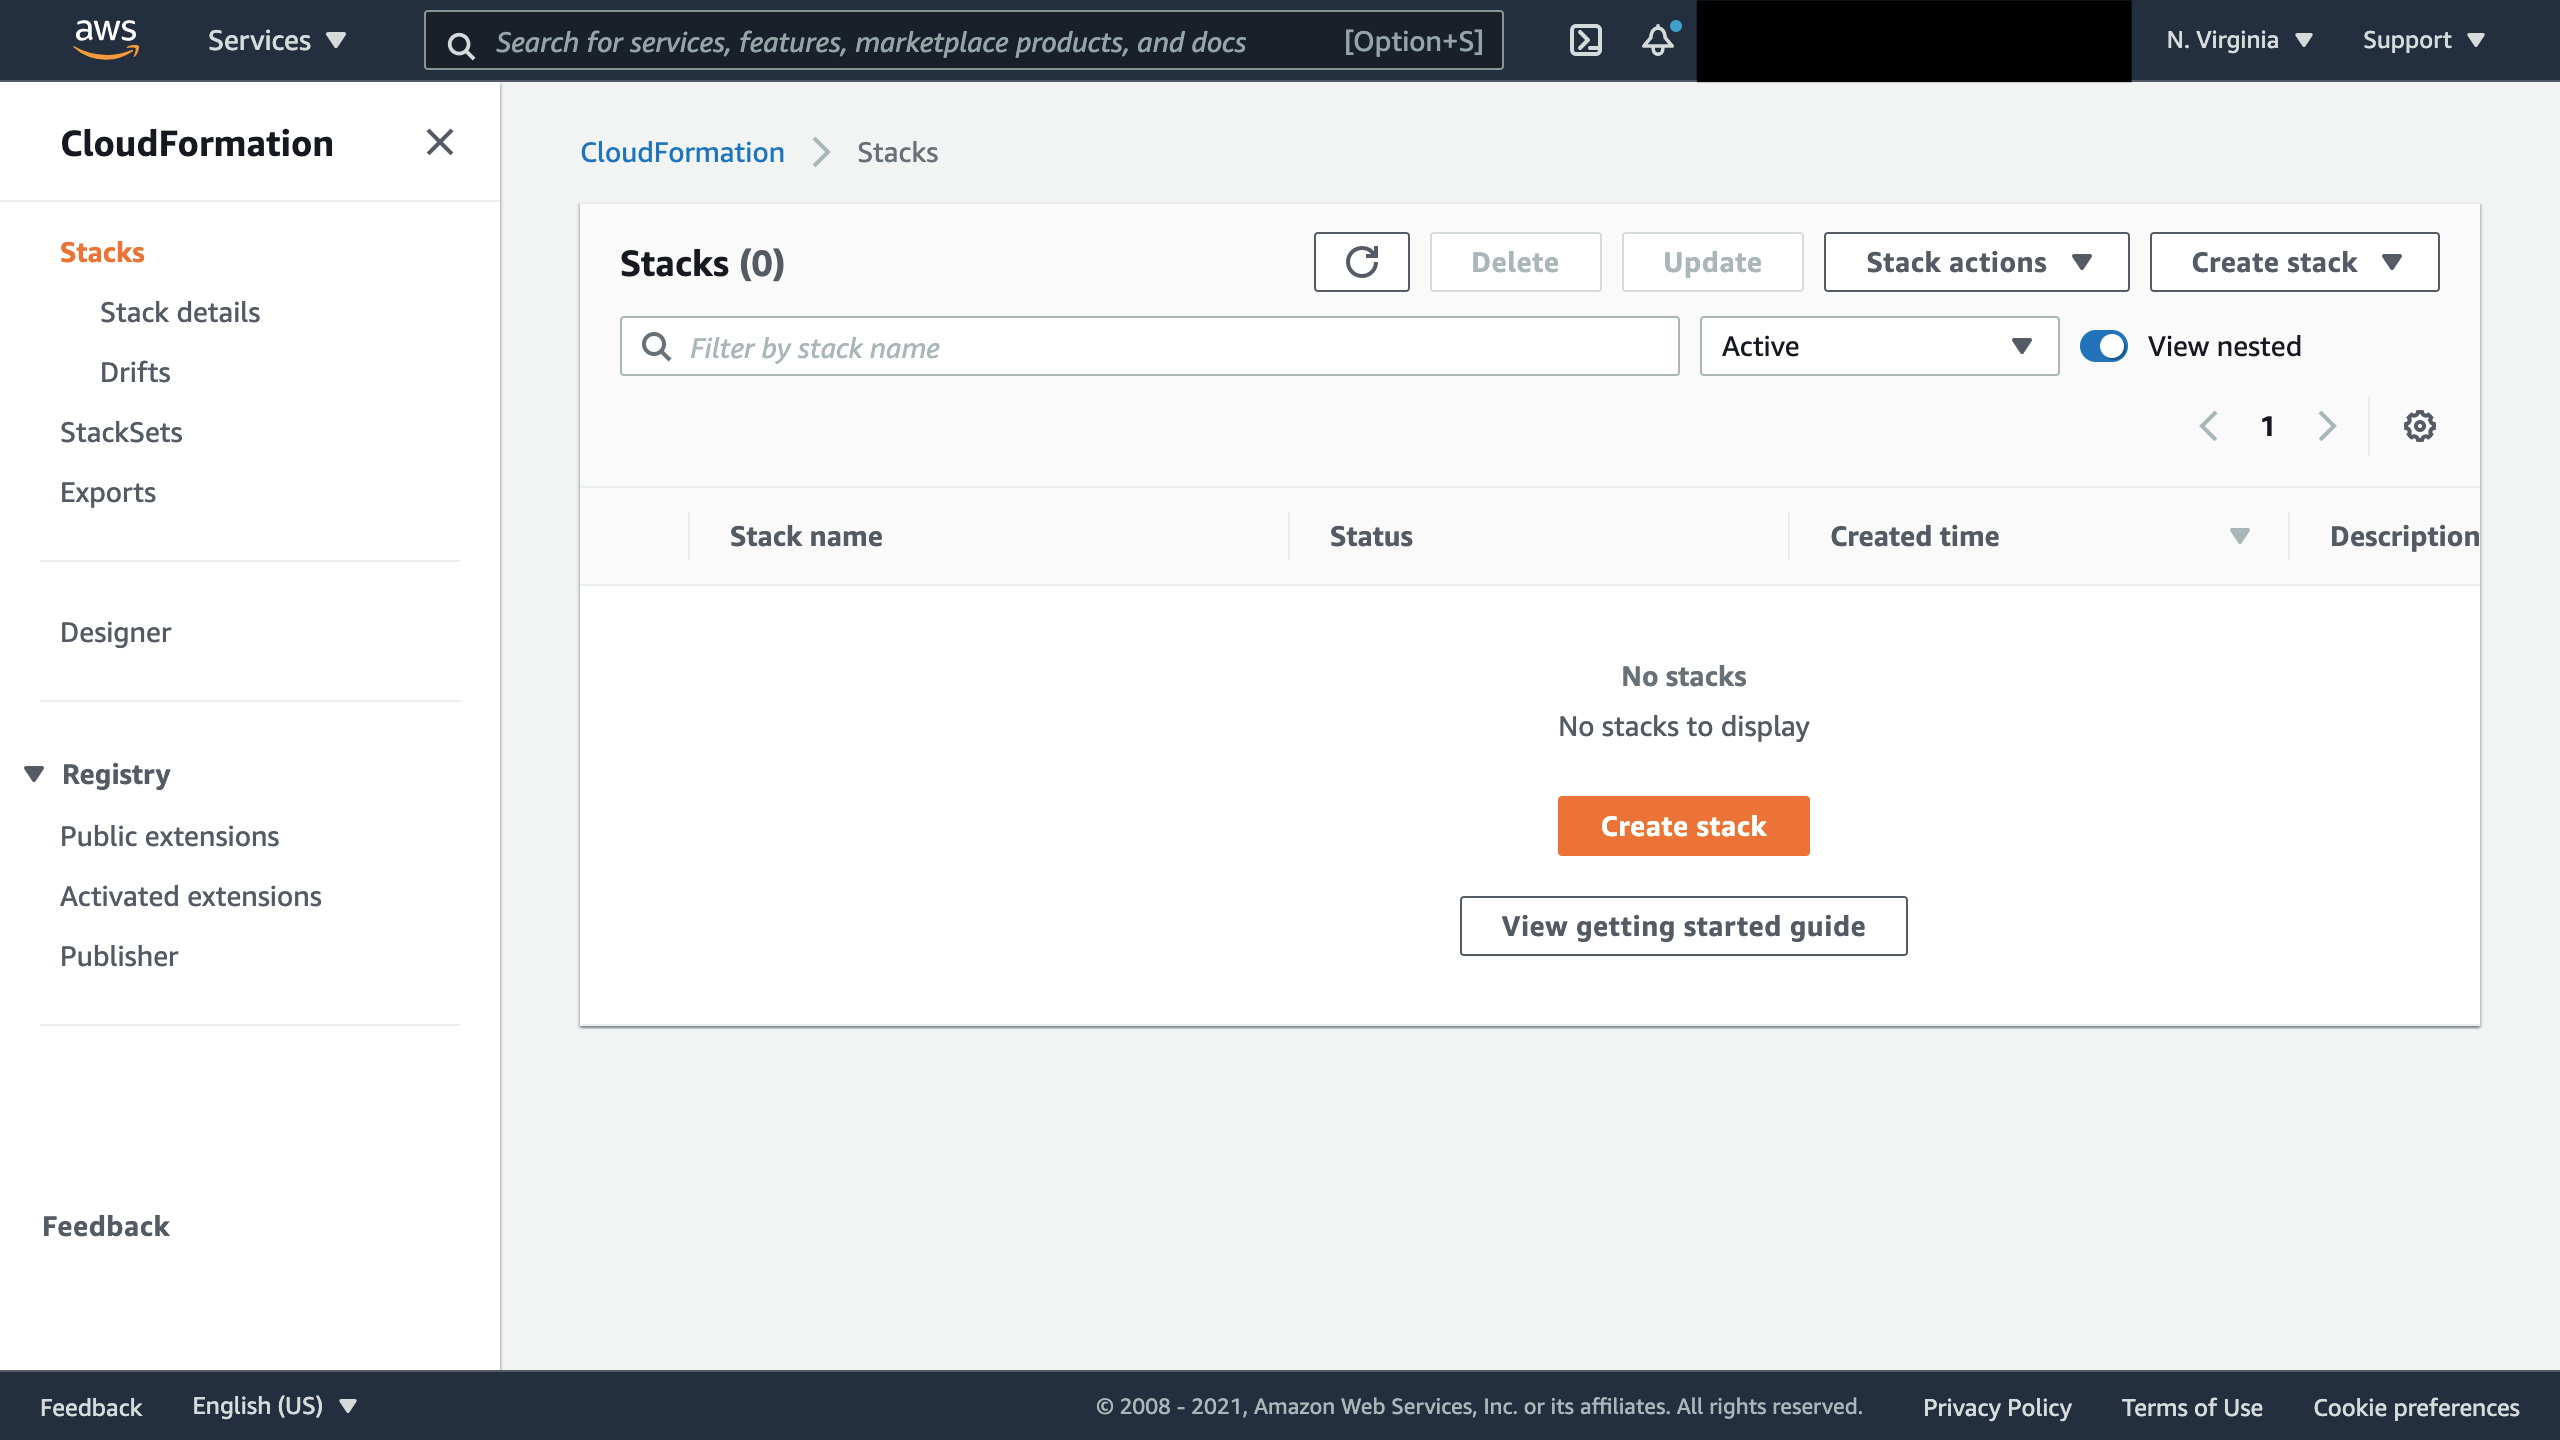
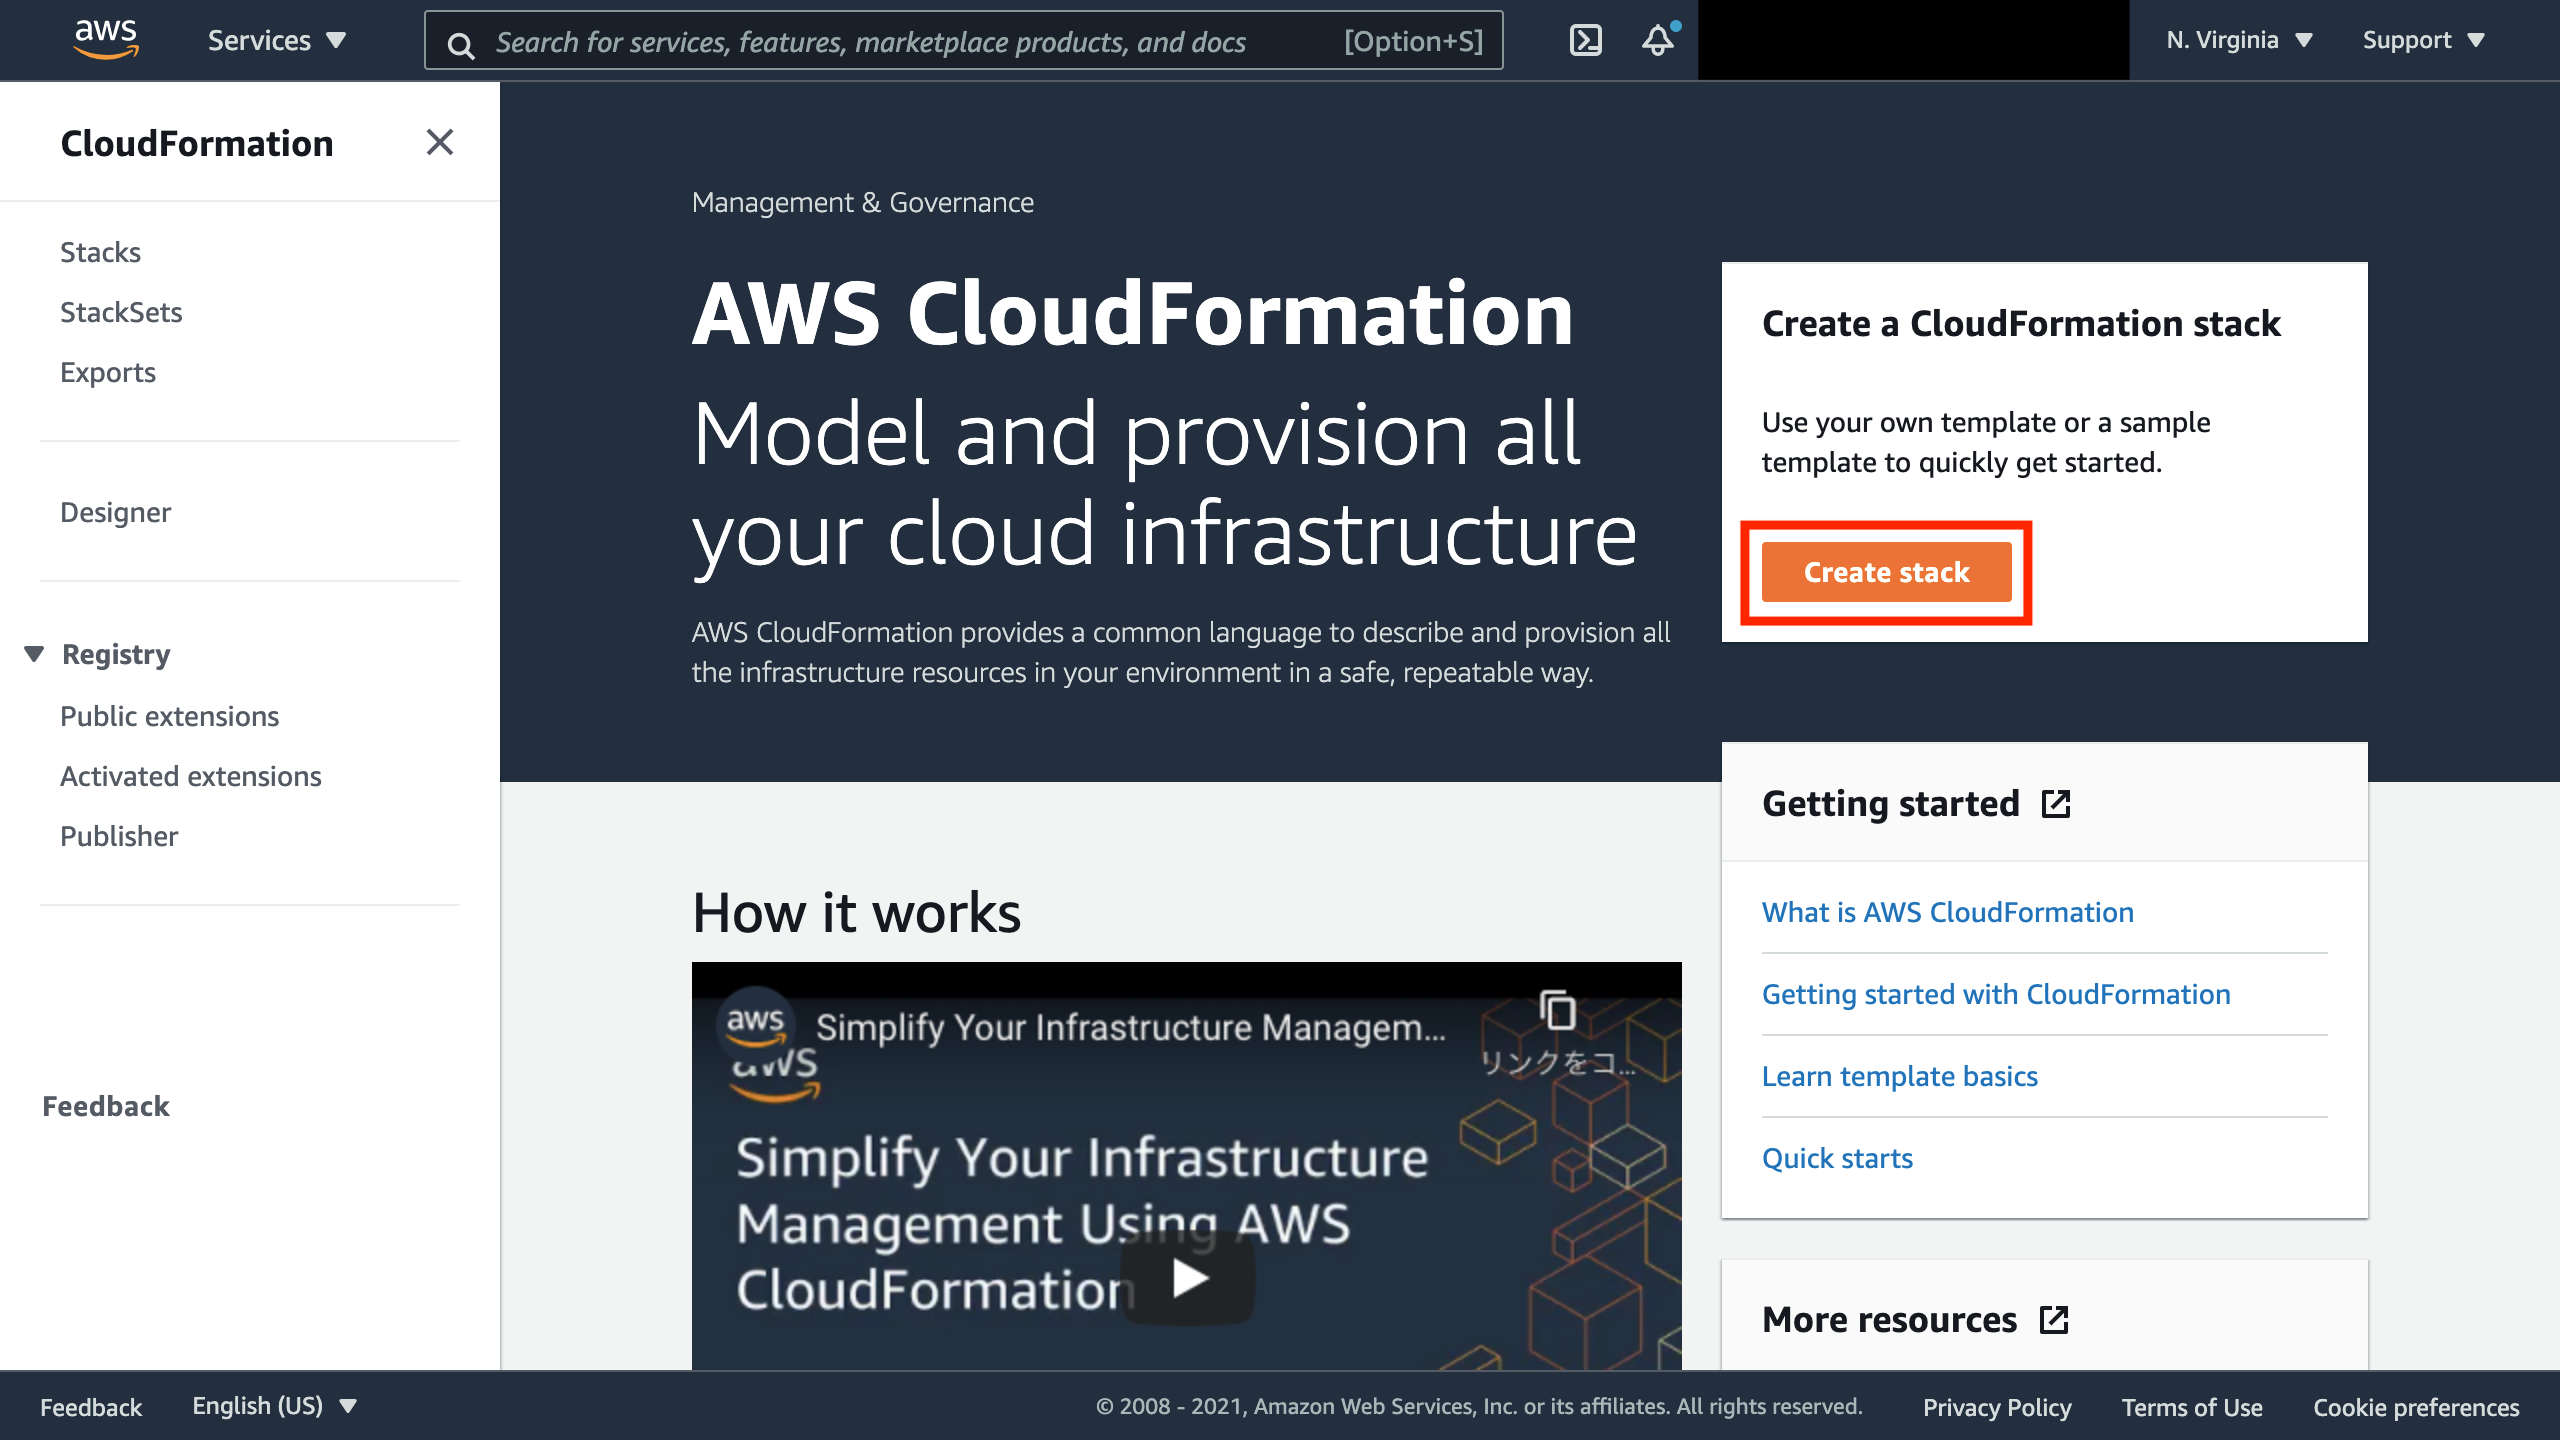
2. Go to [Cloud Formation](https://console.aws.amazon.com/cloudformation/)
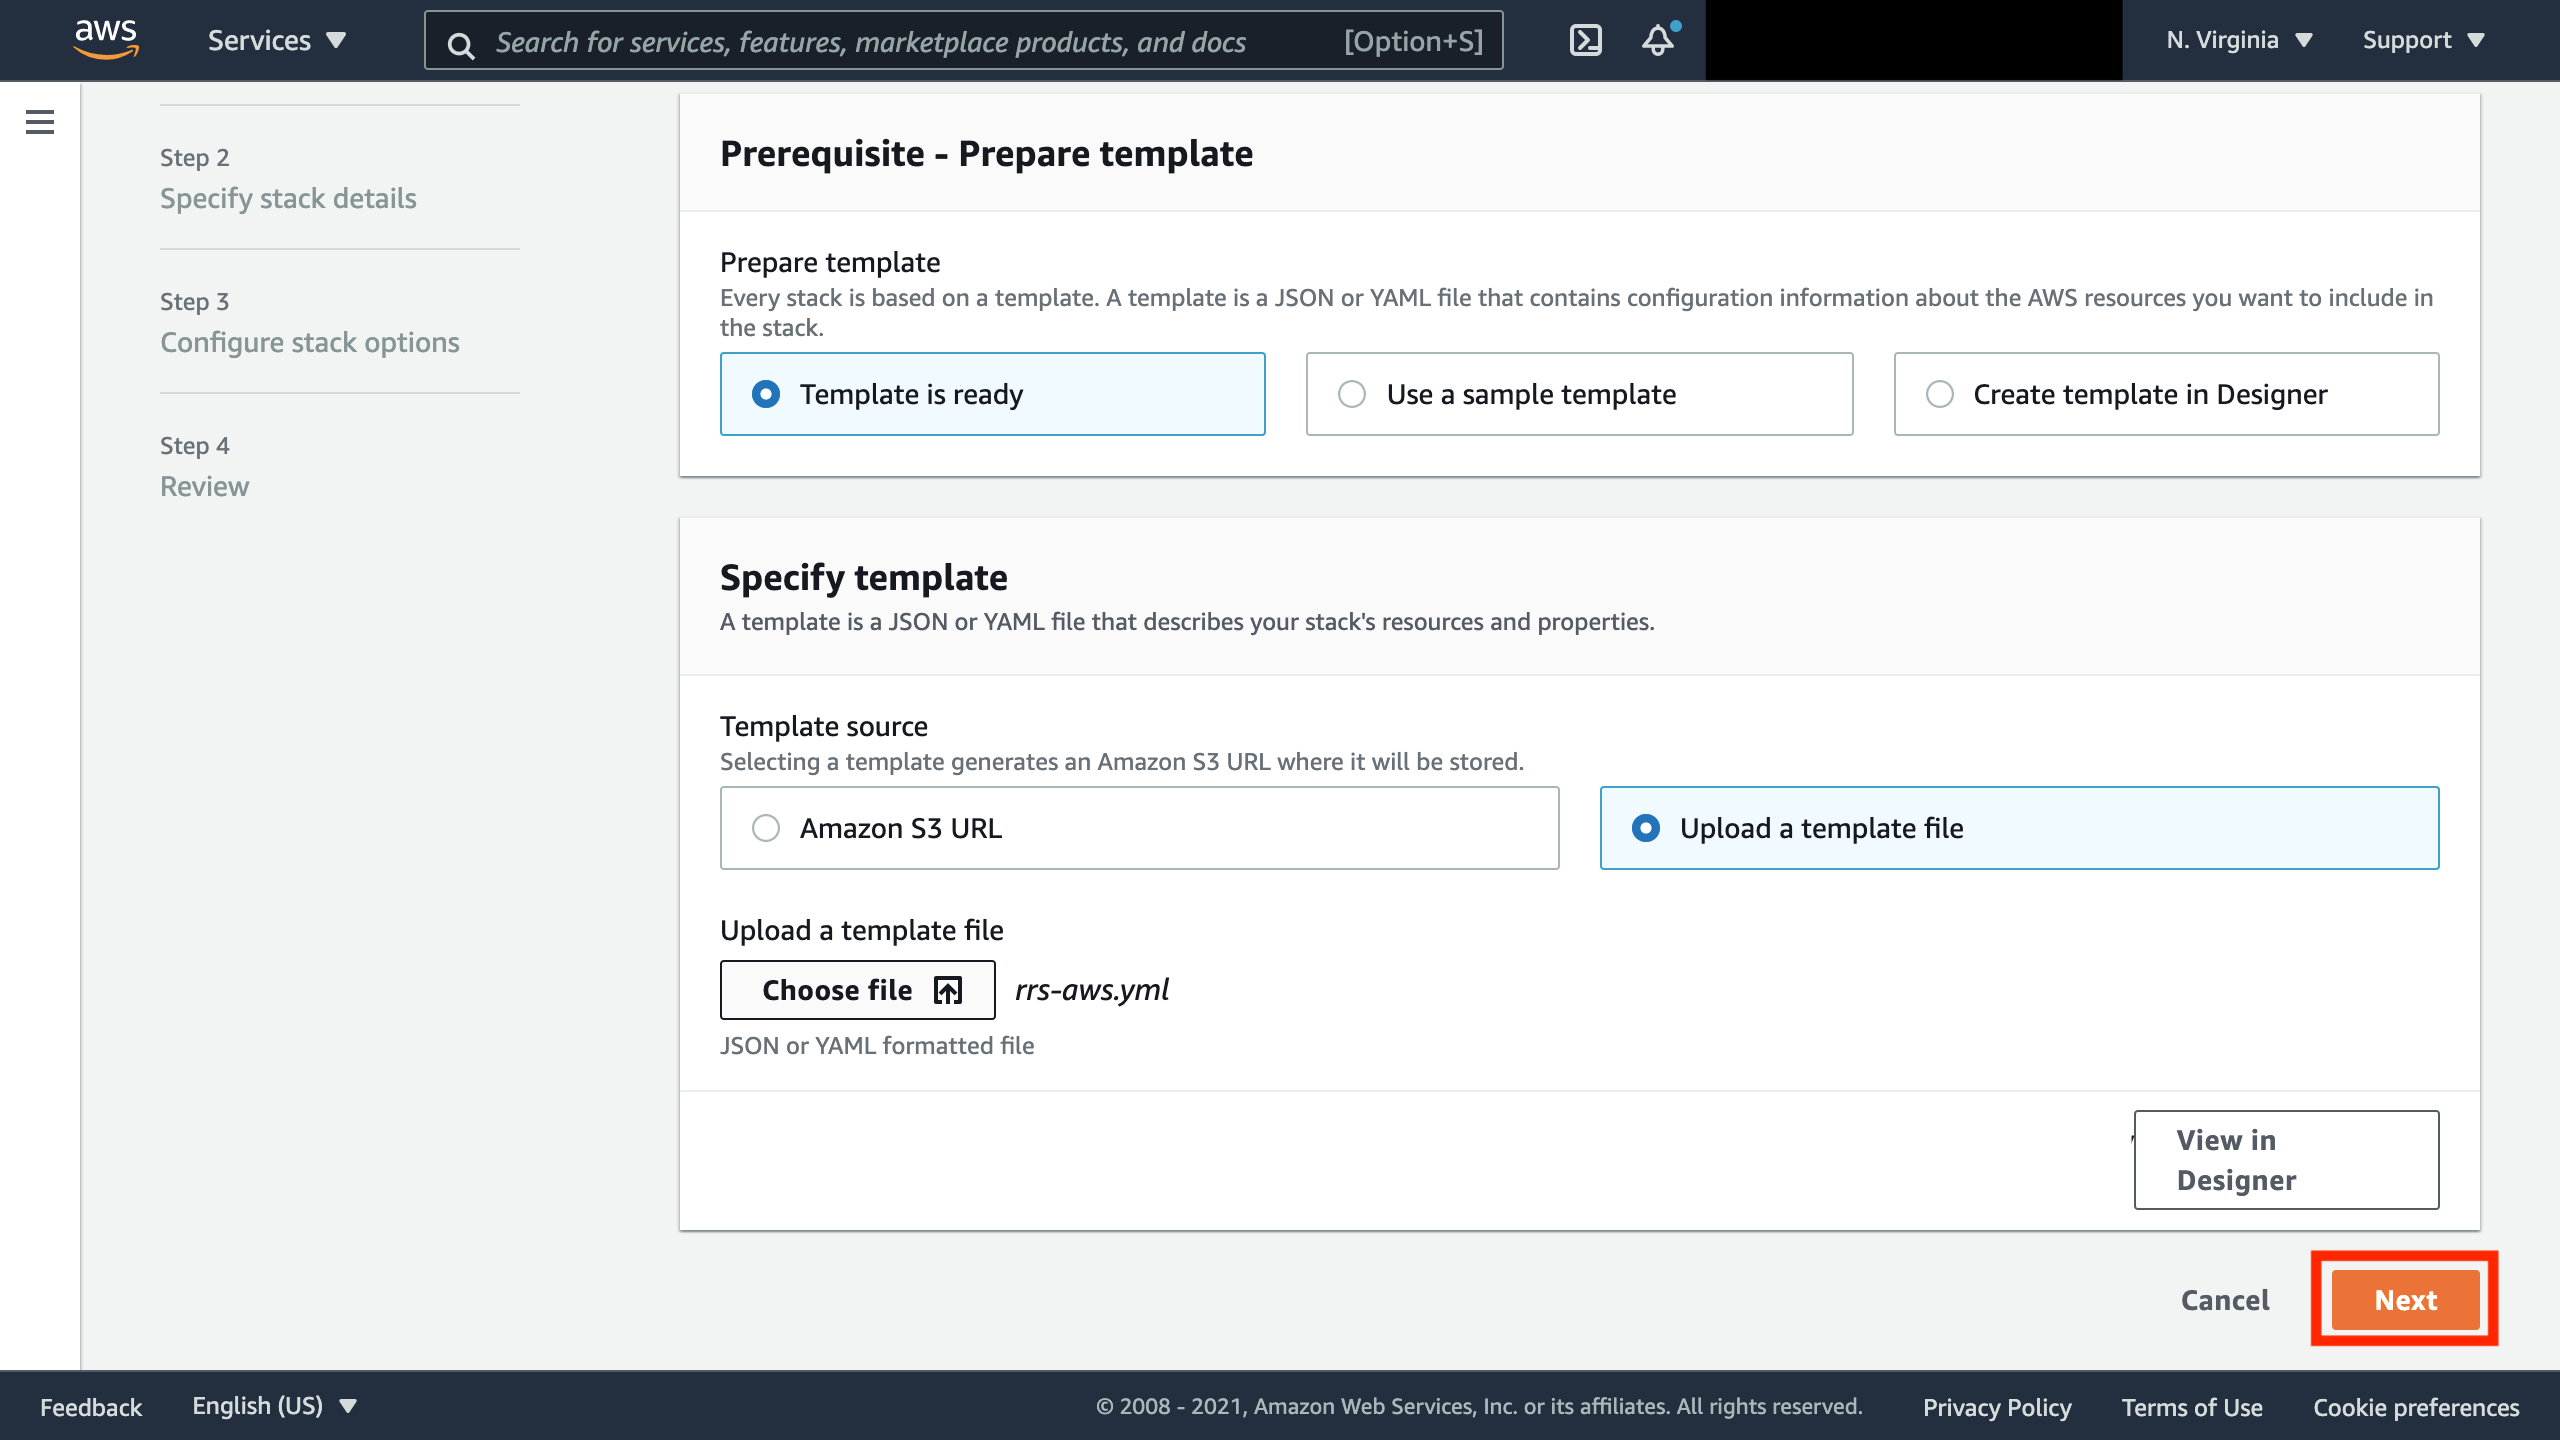
3. Click "Create stack"
4. Select "Upload a template file" under Template source in Specify template
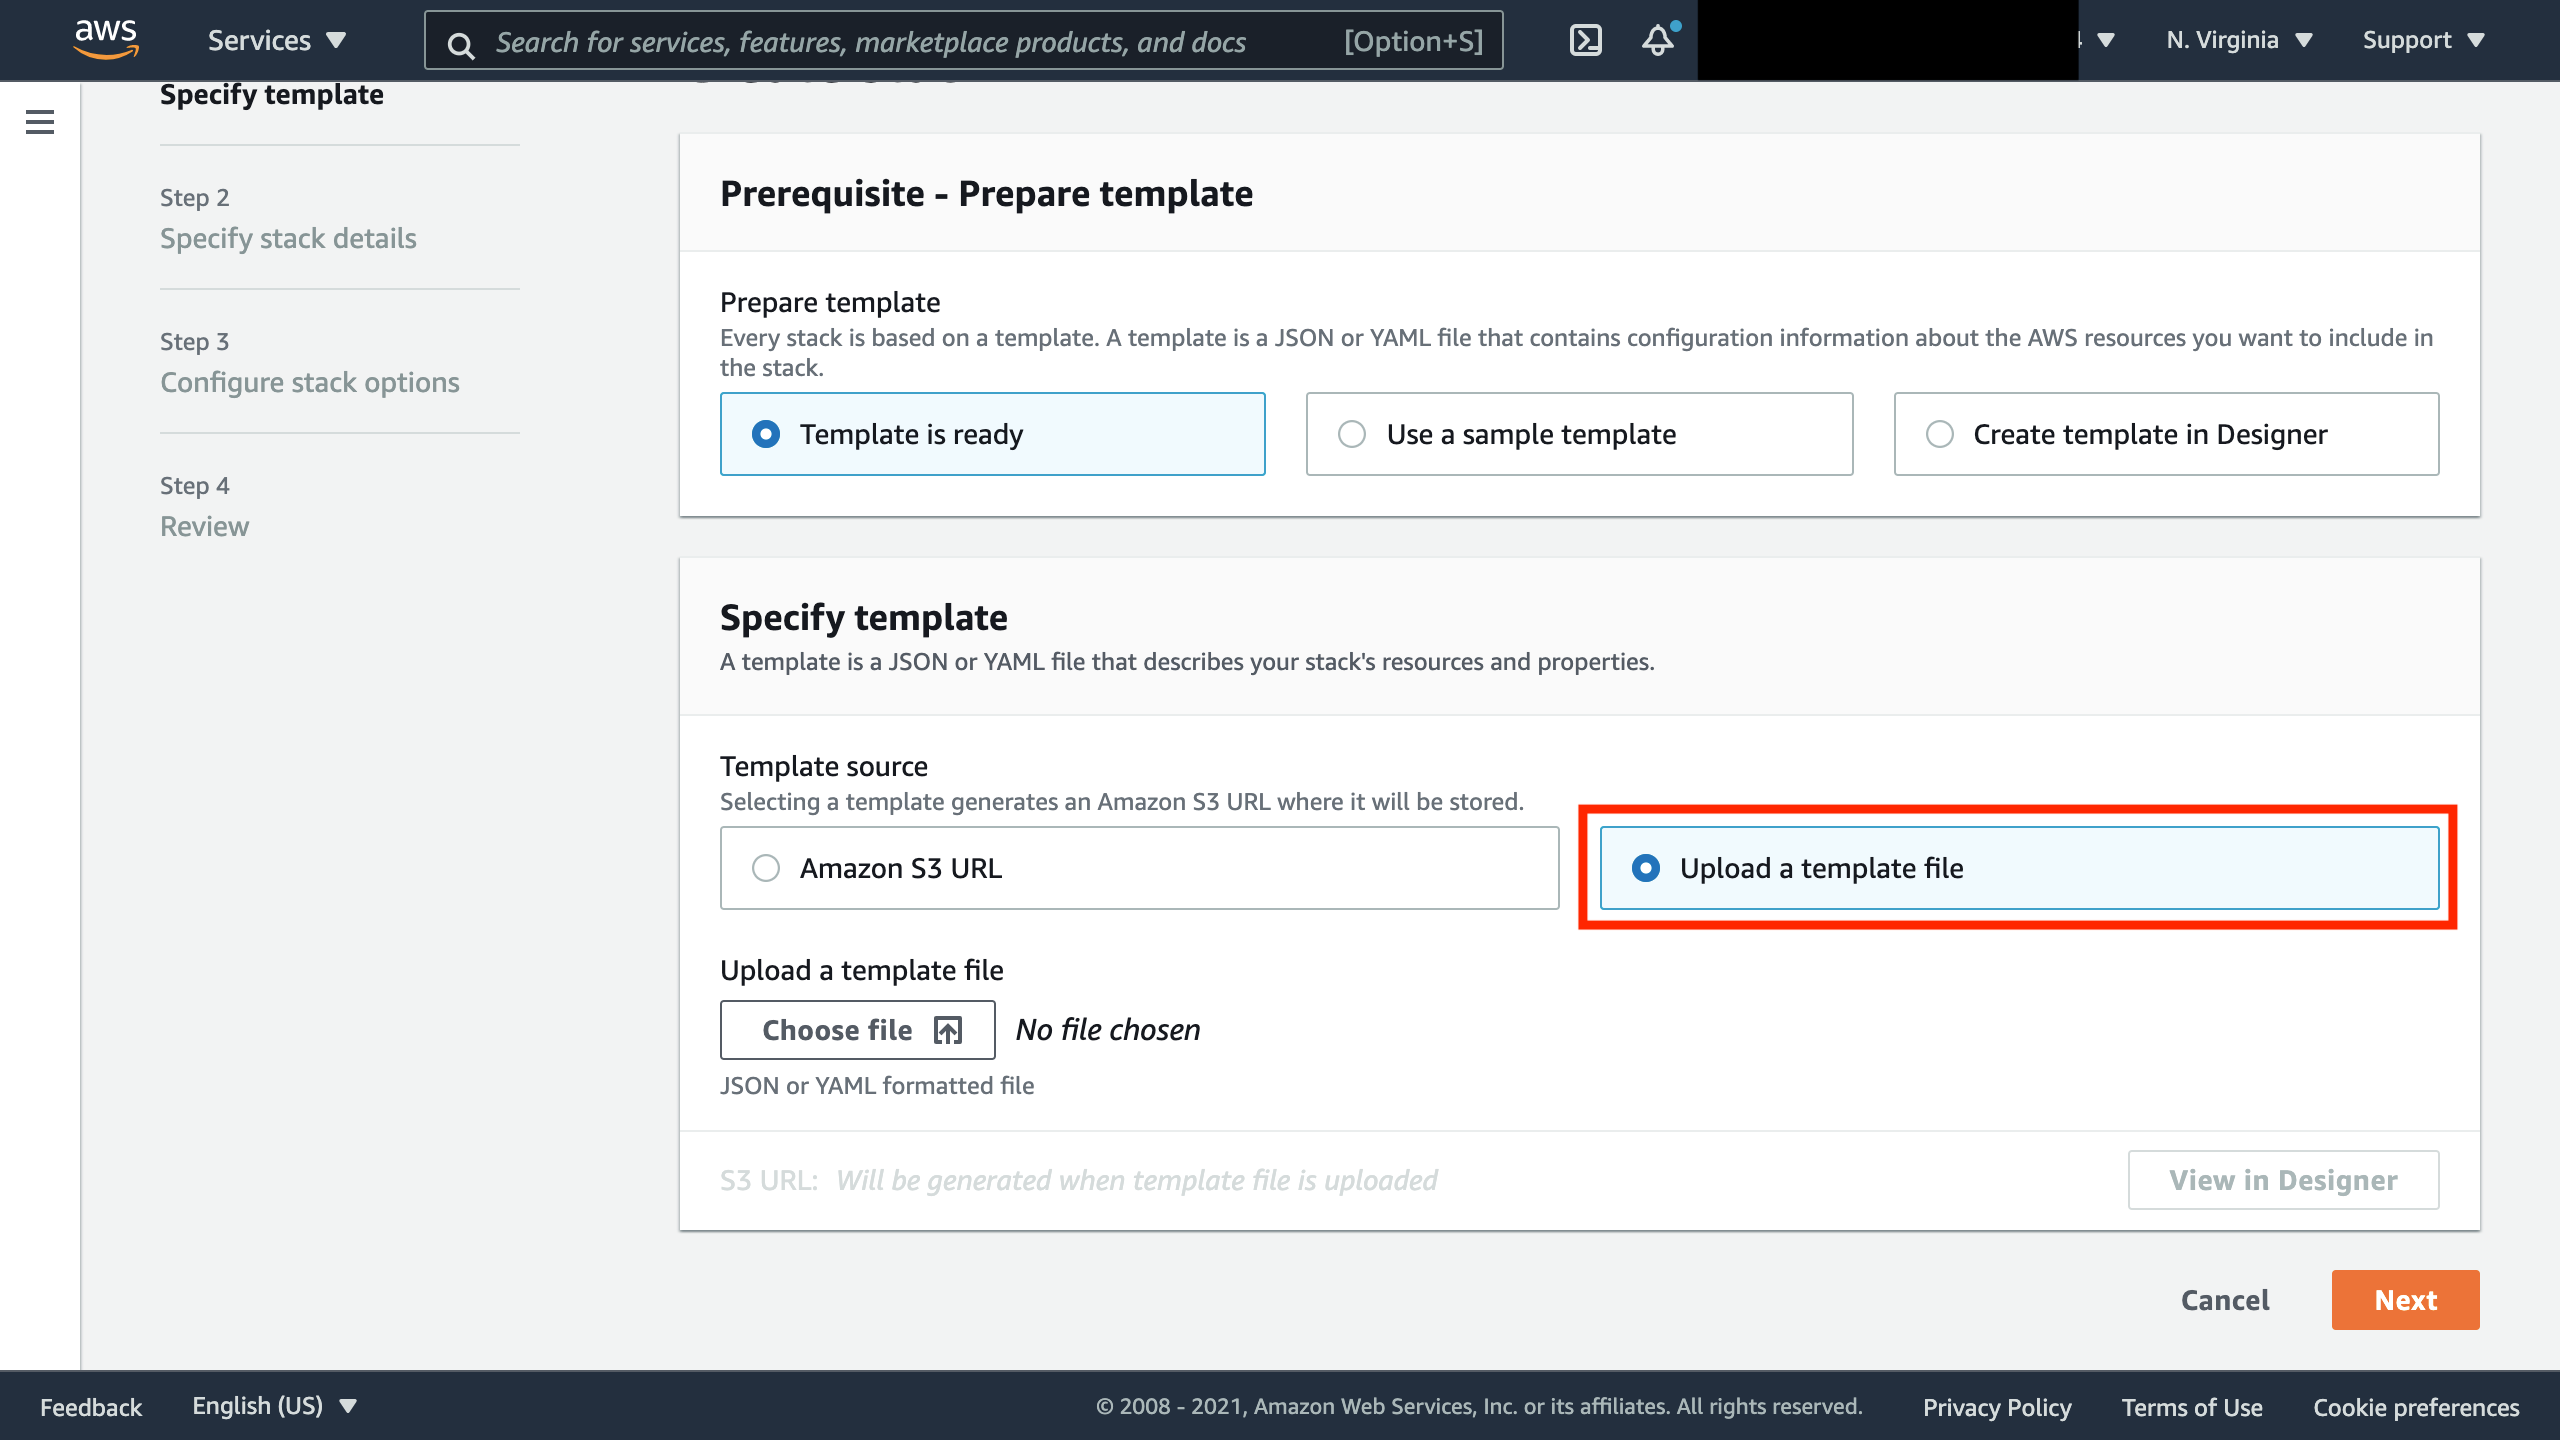
5. Select the appropriate template file from Choose file (in this case, rrs-aws.yml)
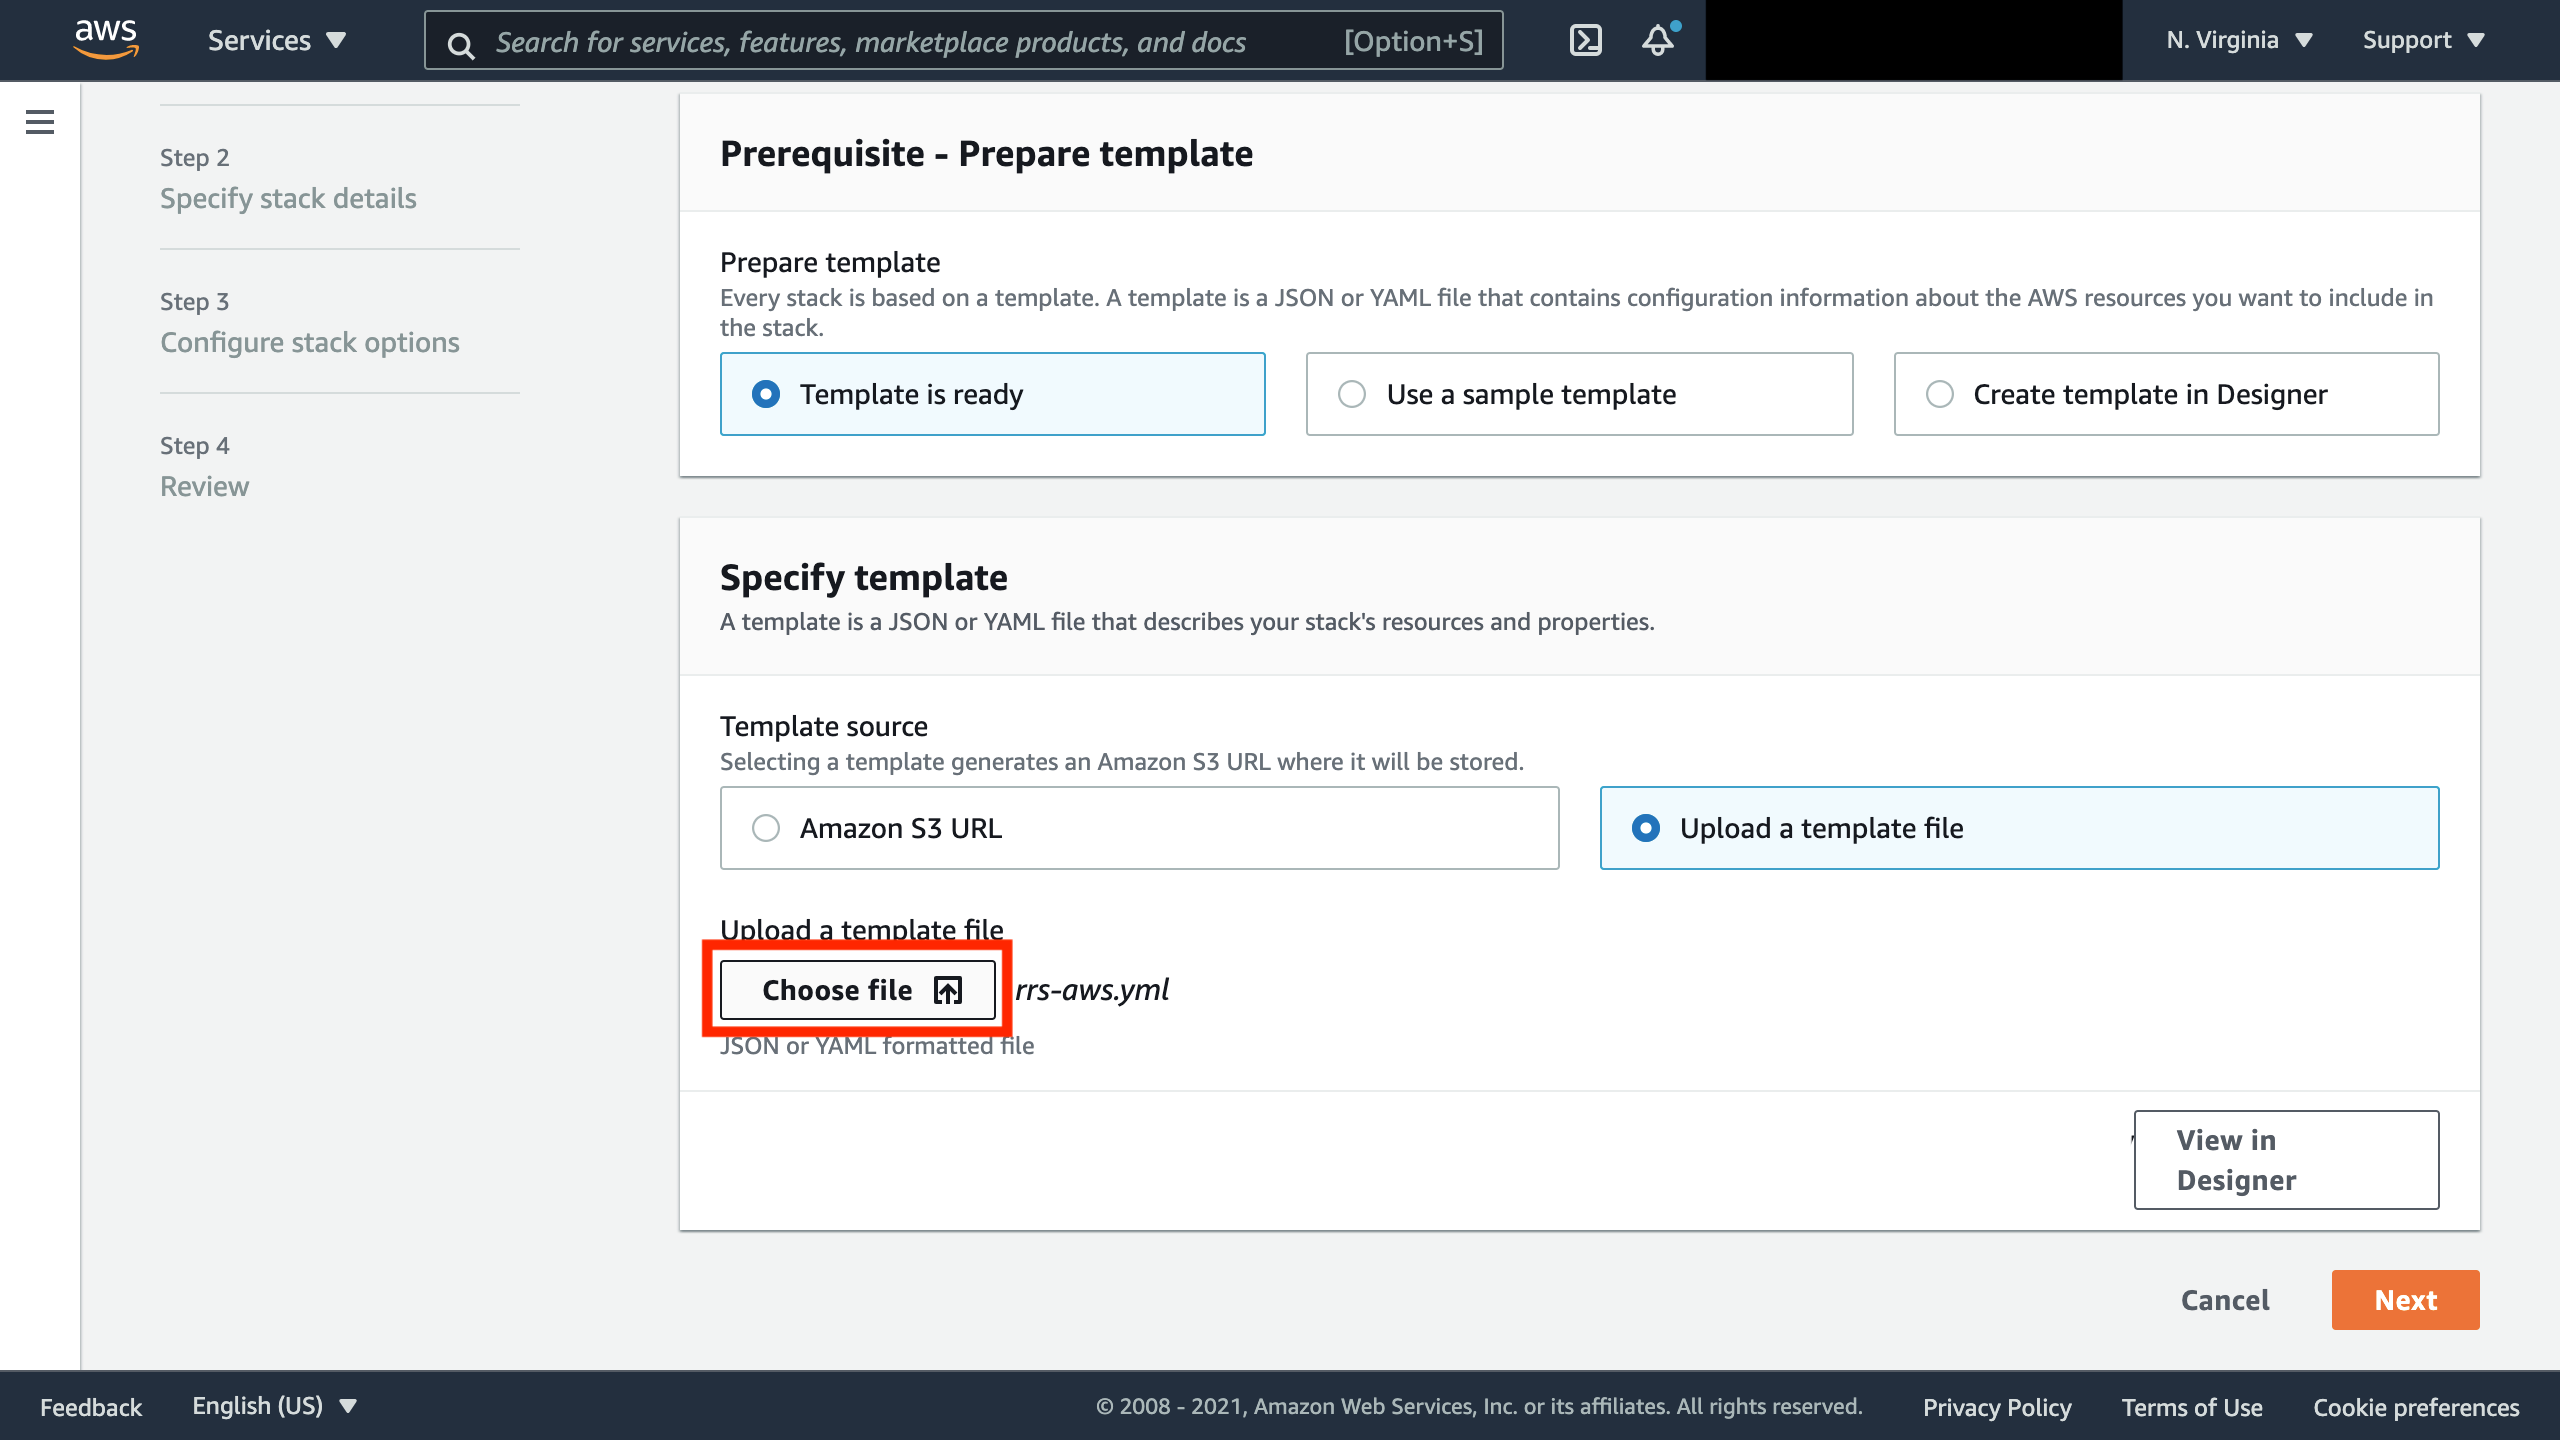
6. Click "Next"
7. Enter a free string in Stack name and click "Next".
The name can be anything you want. (In this case, enter rrs-aws)
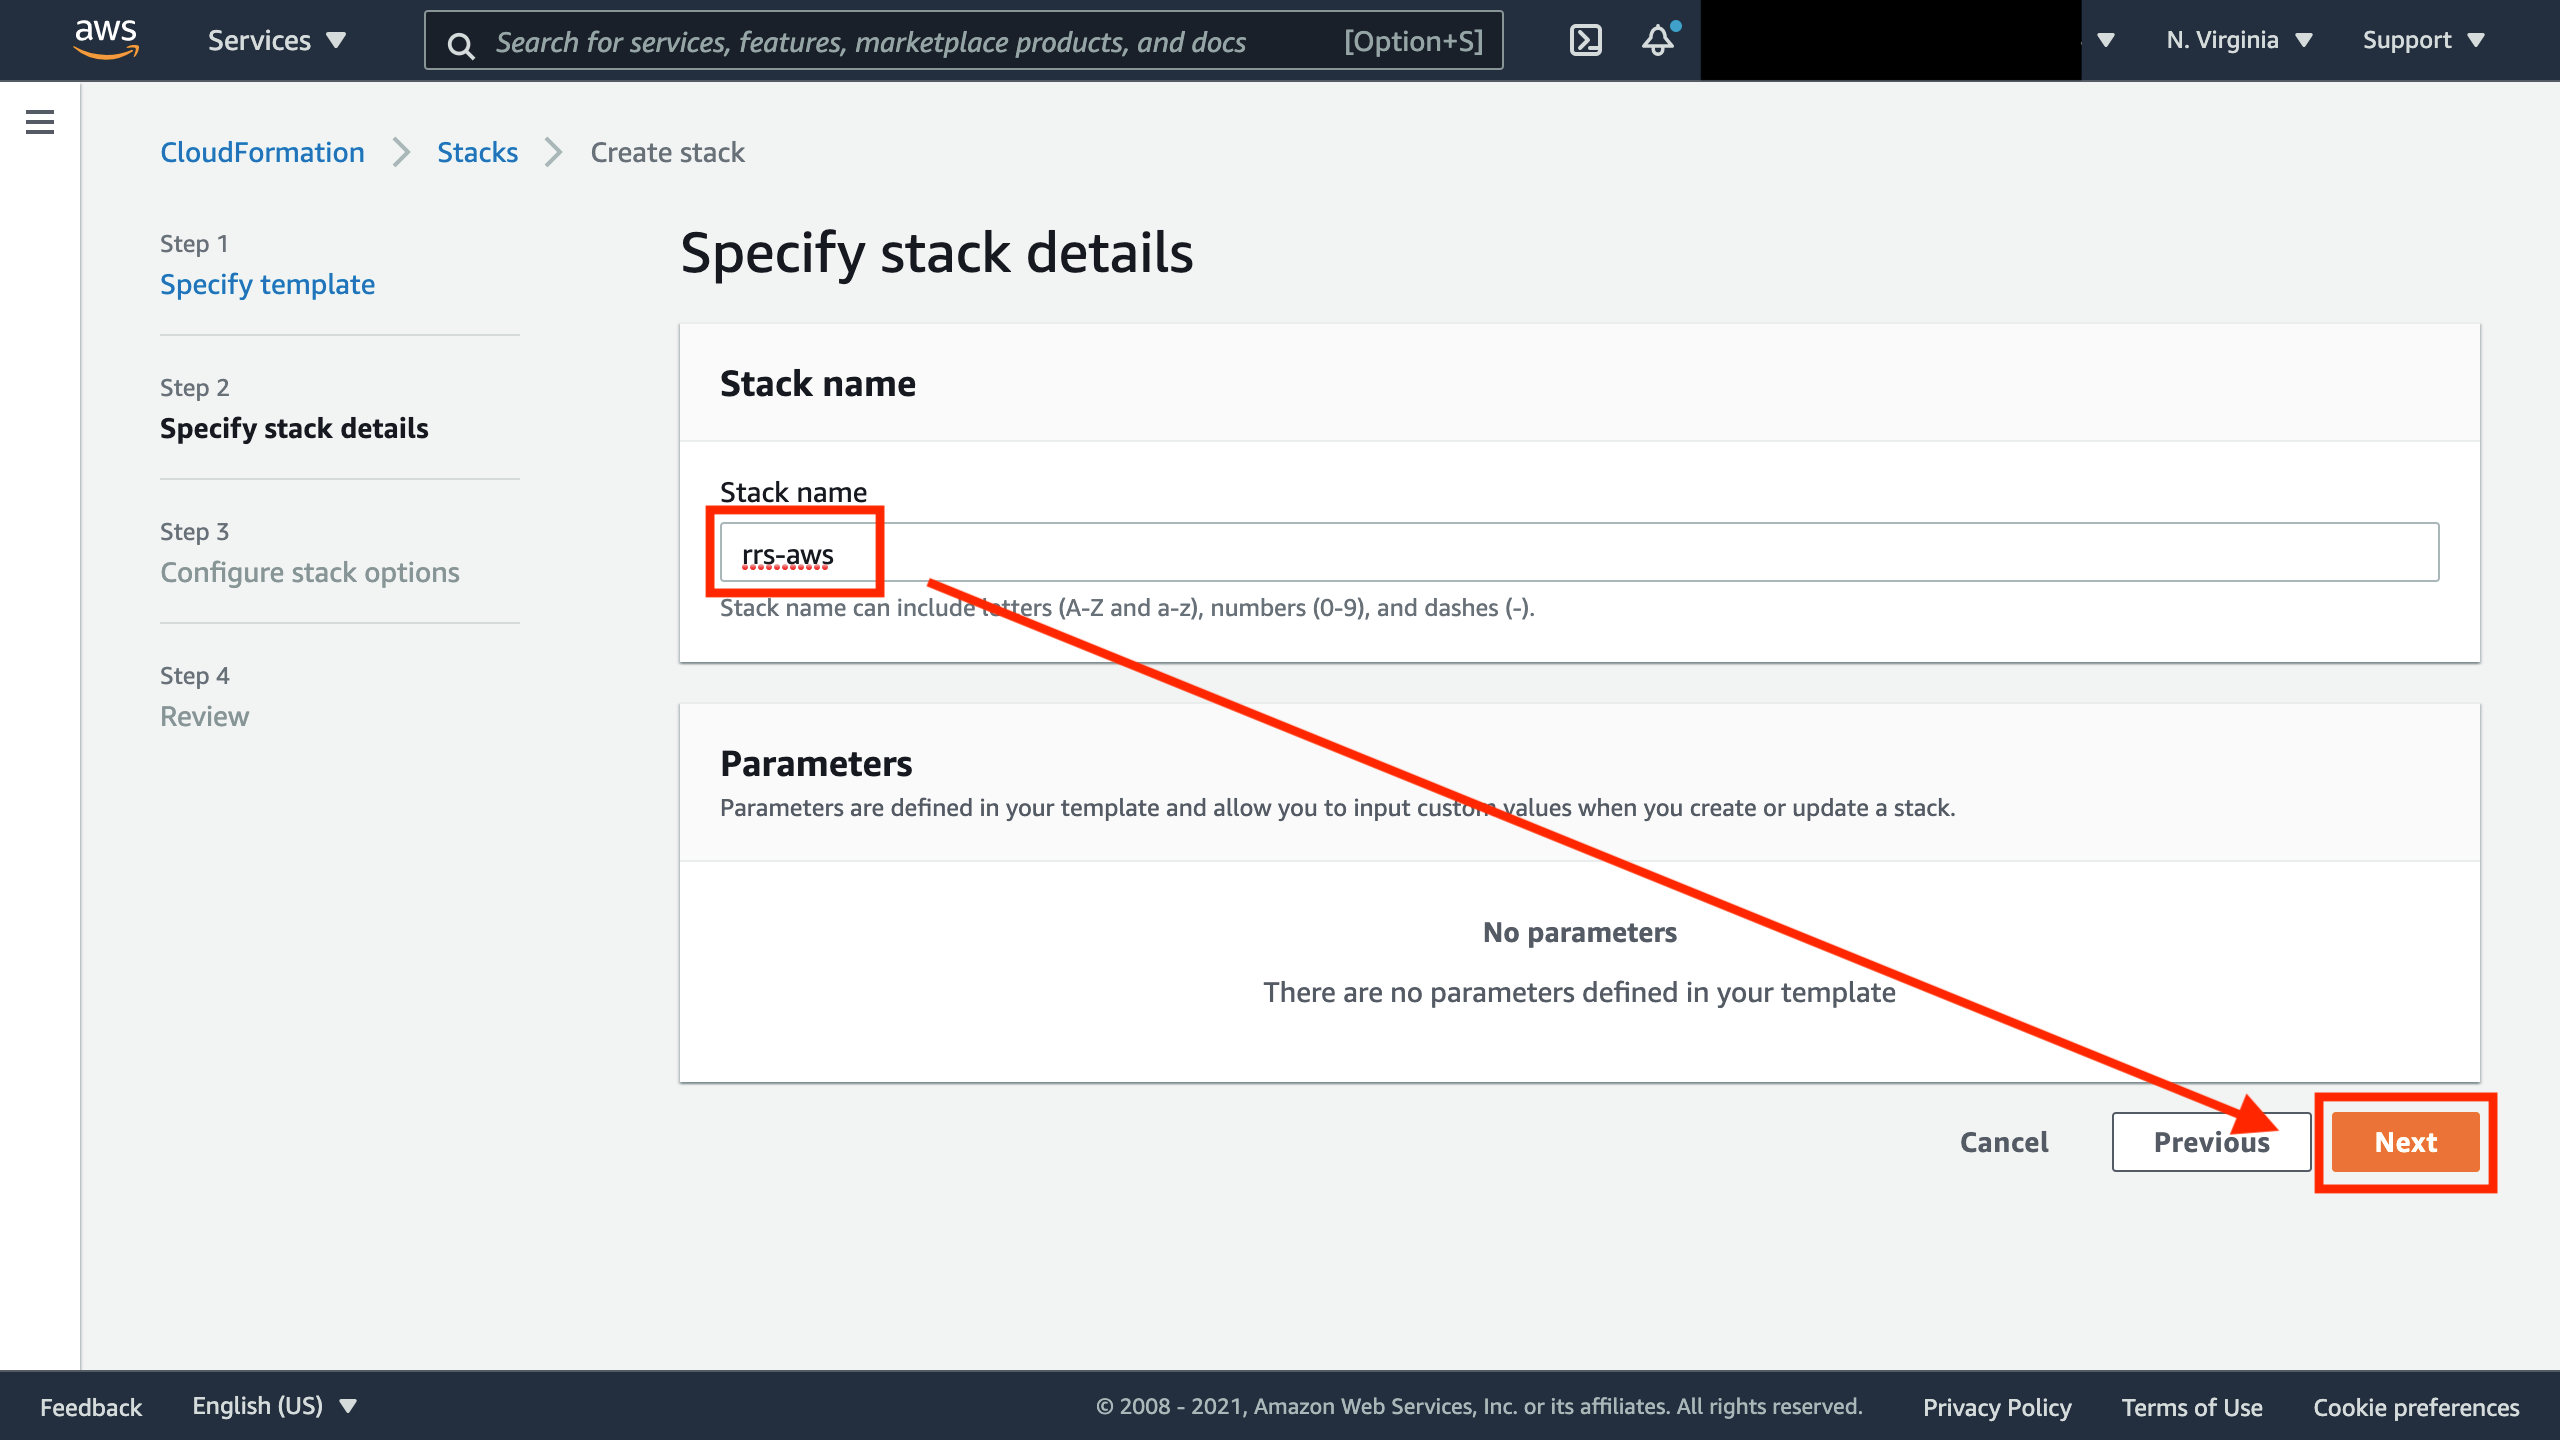
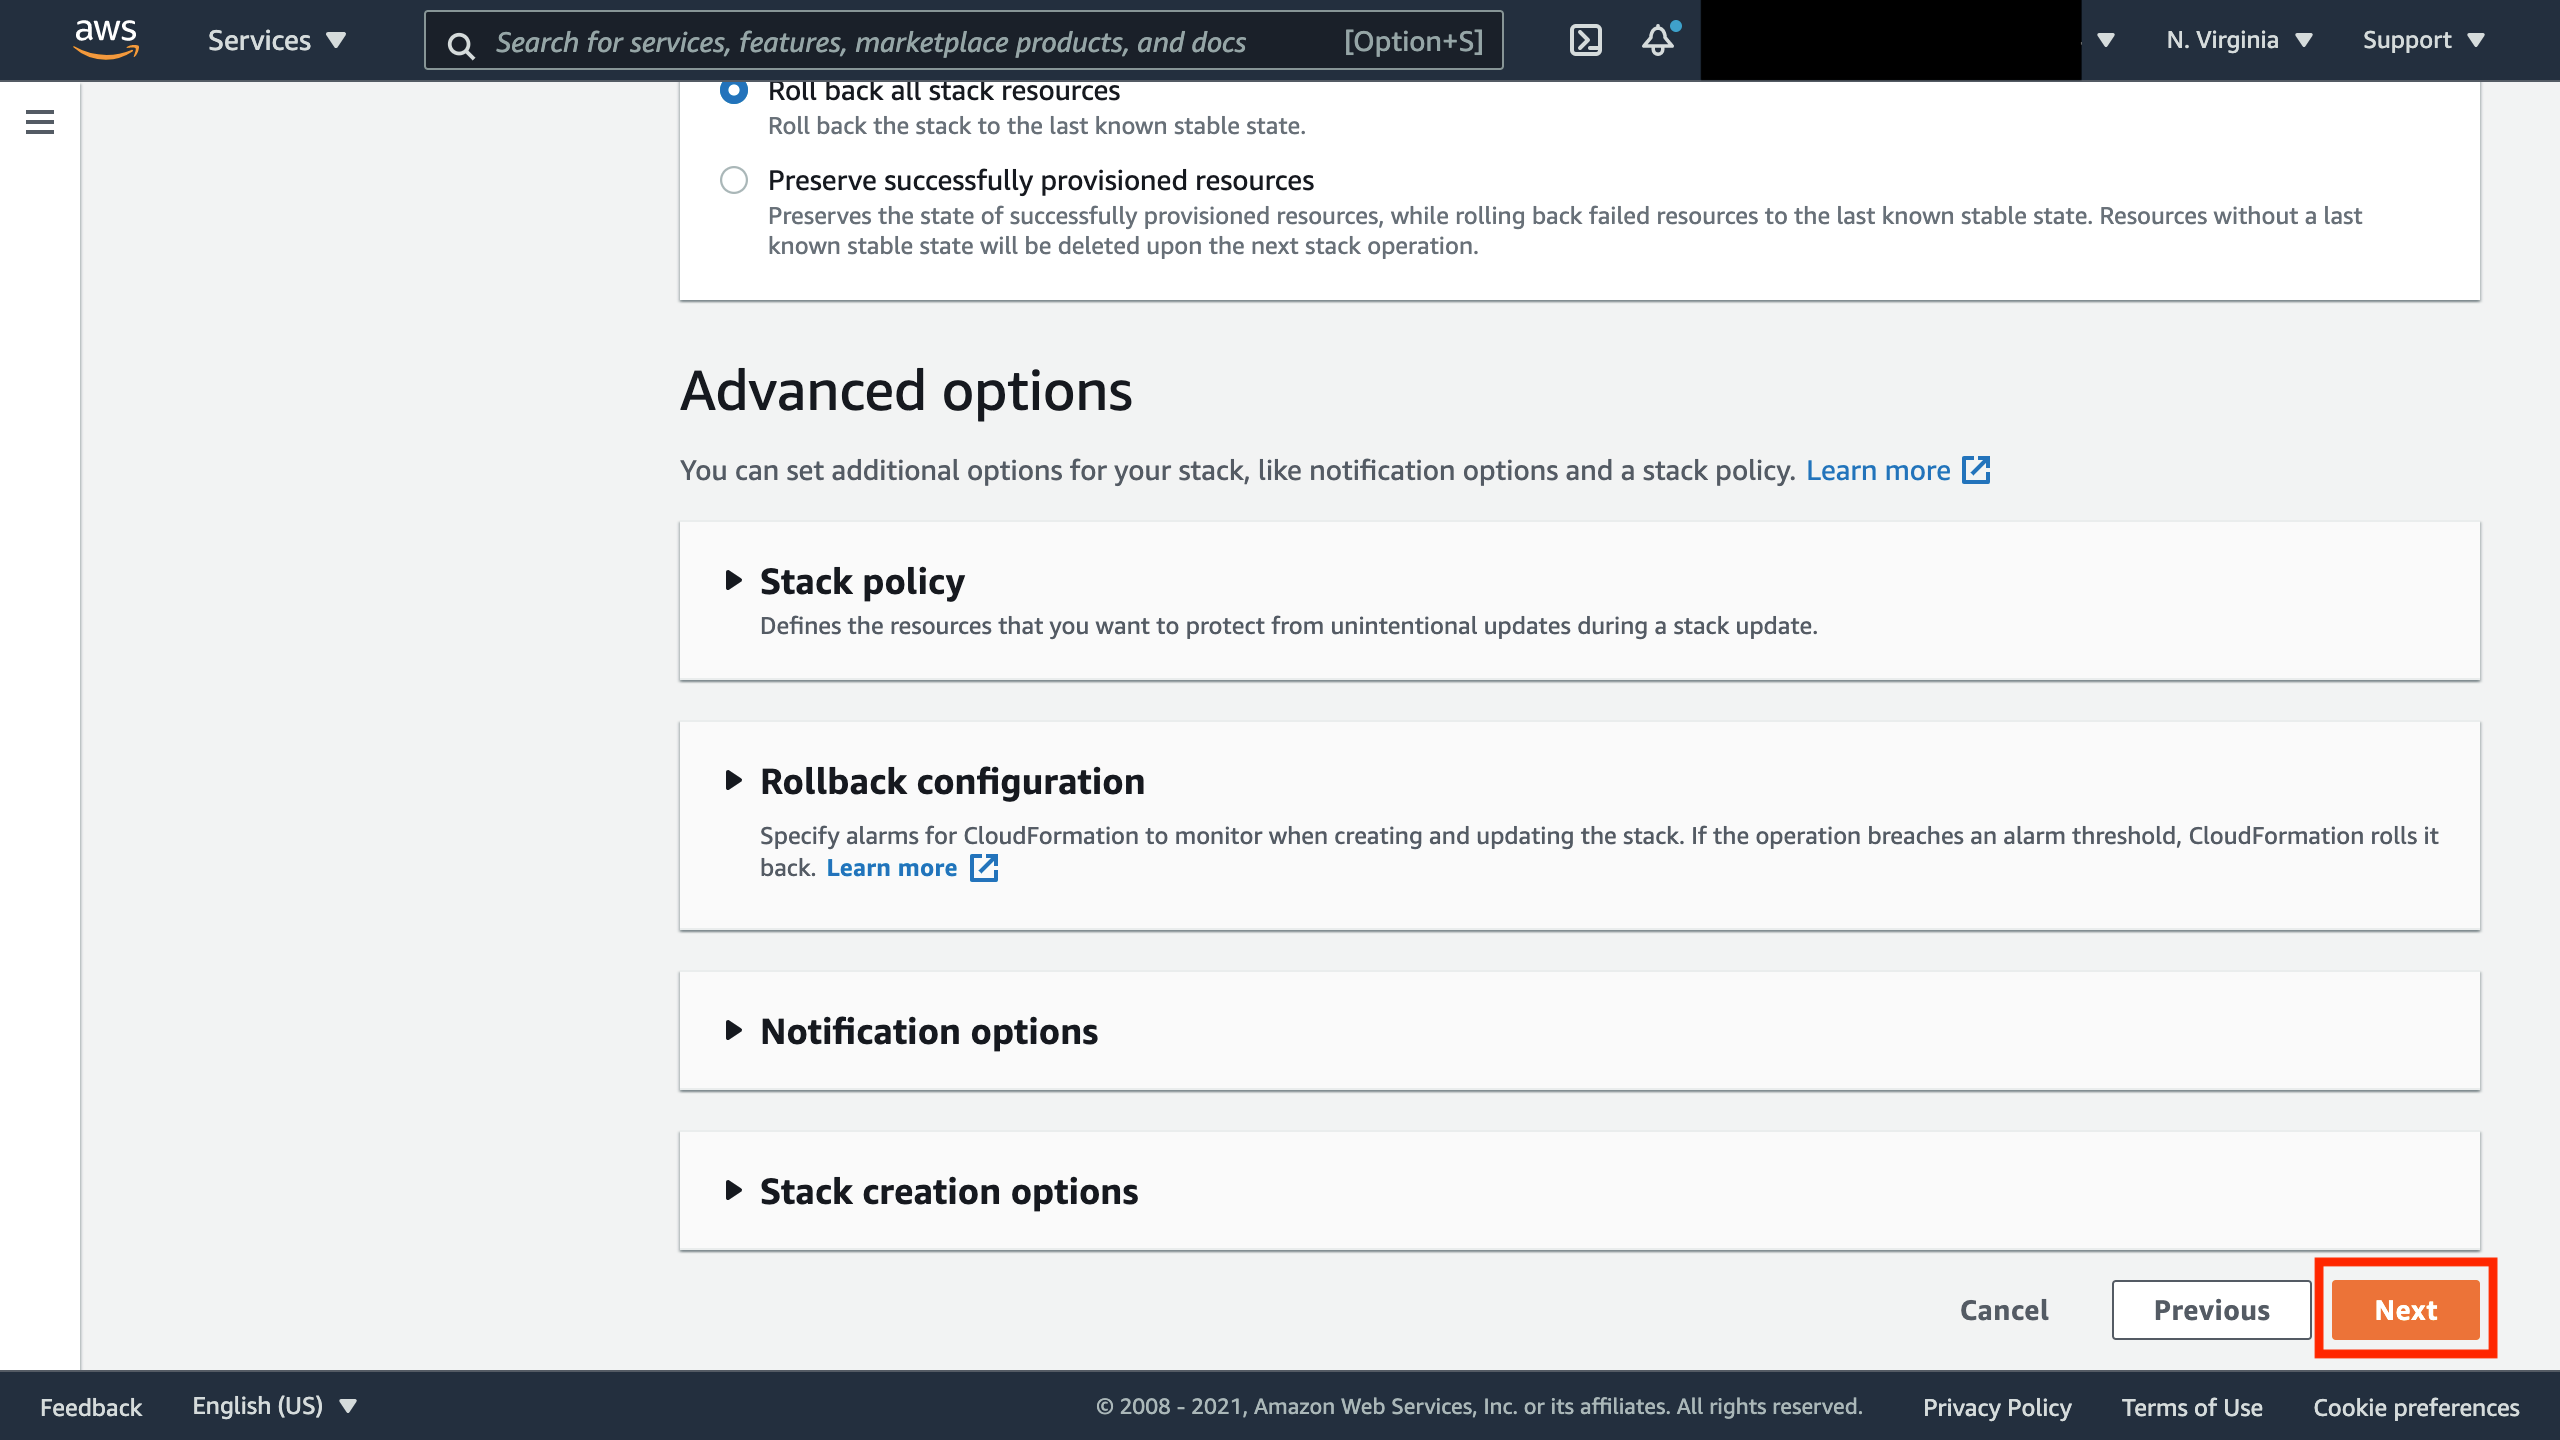
8. Click "Next" without setting anything.
9. Check "*I acknowledge that AWS CloudFormation might create IAM resources.*".
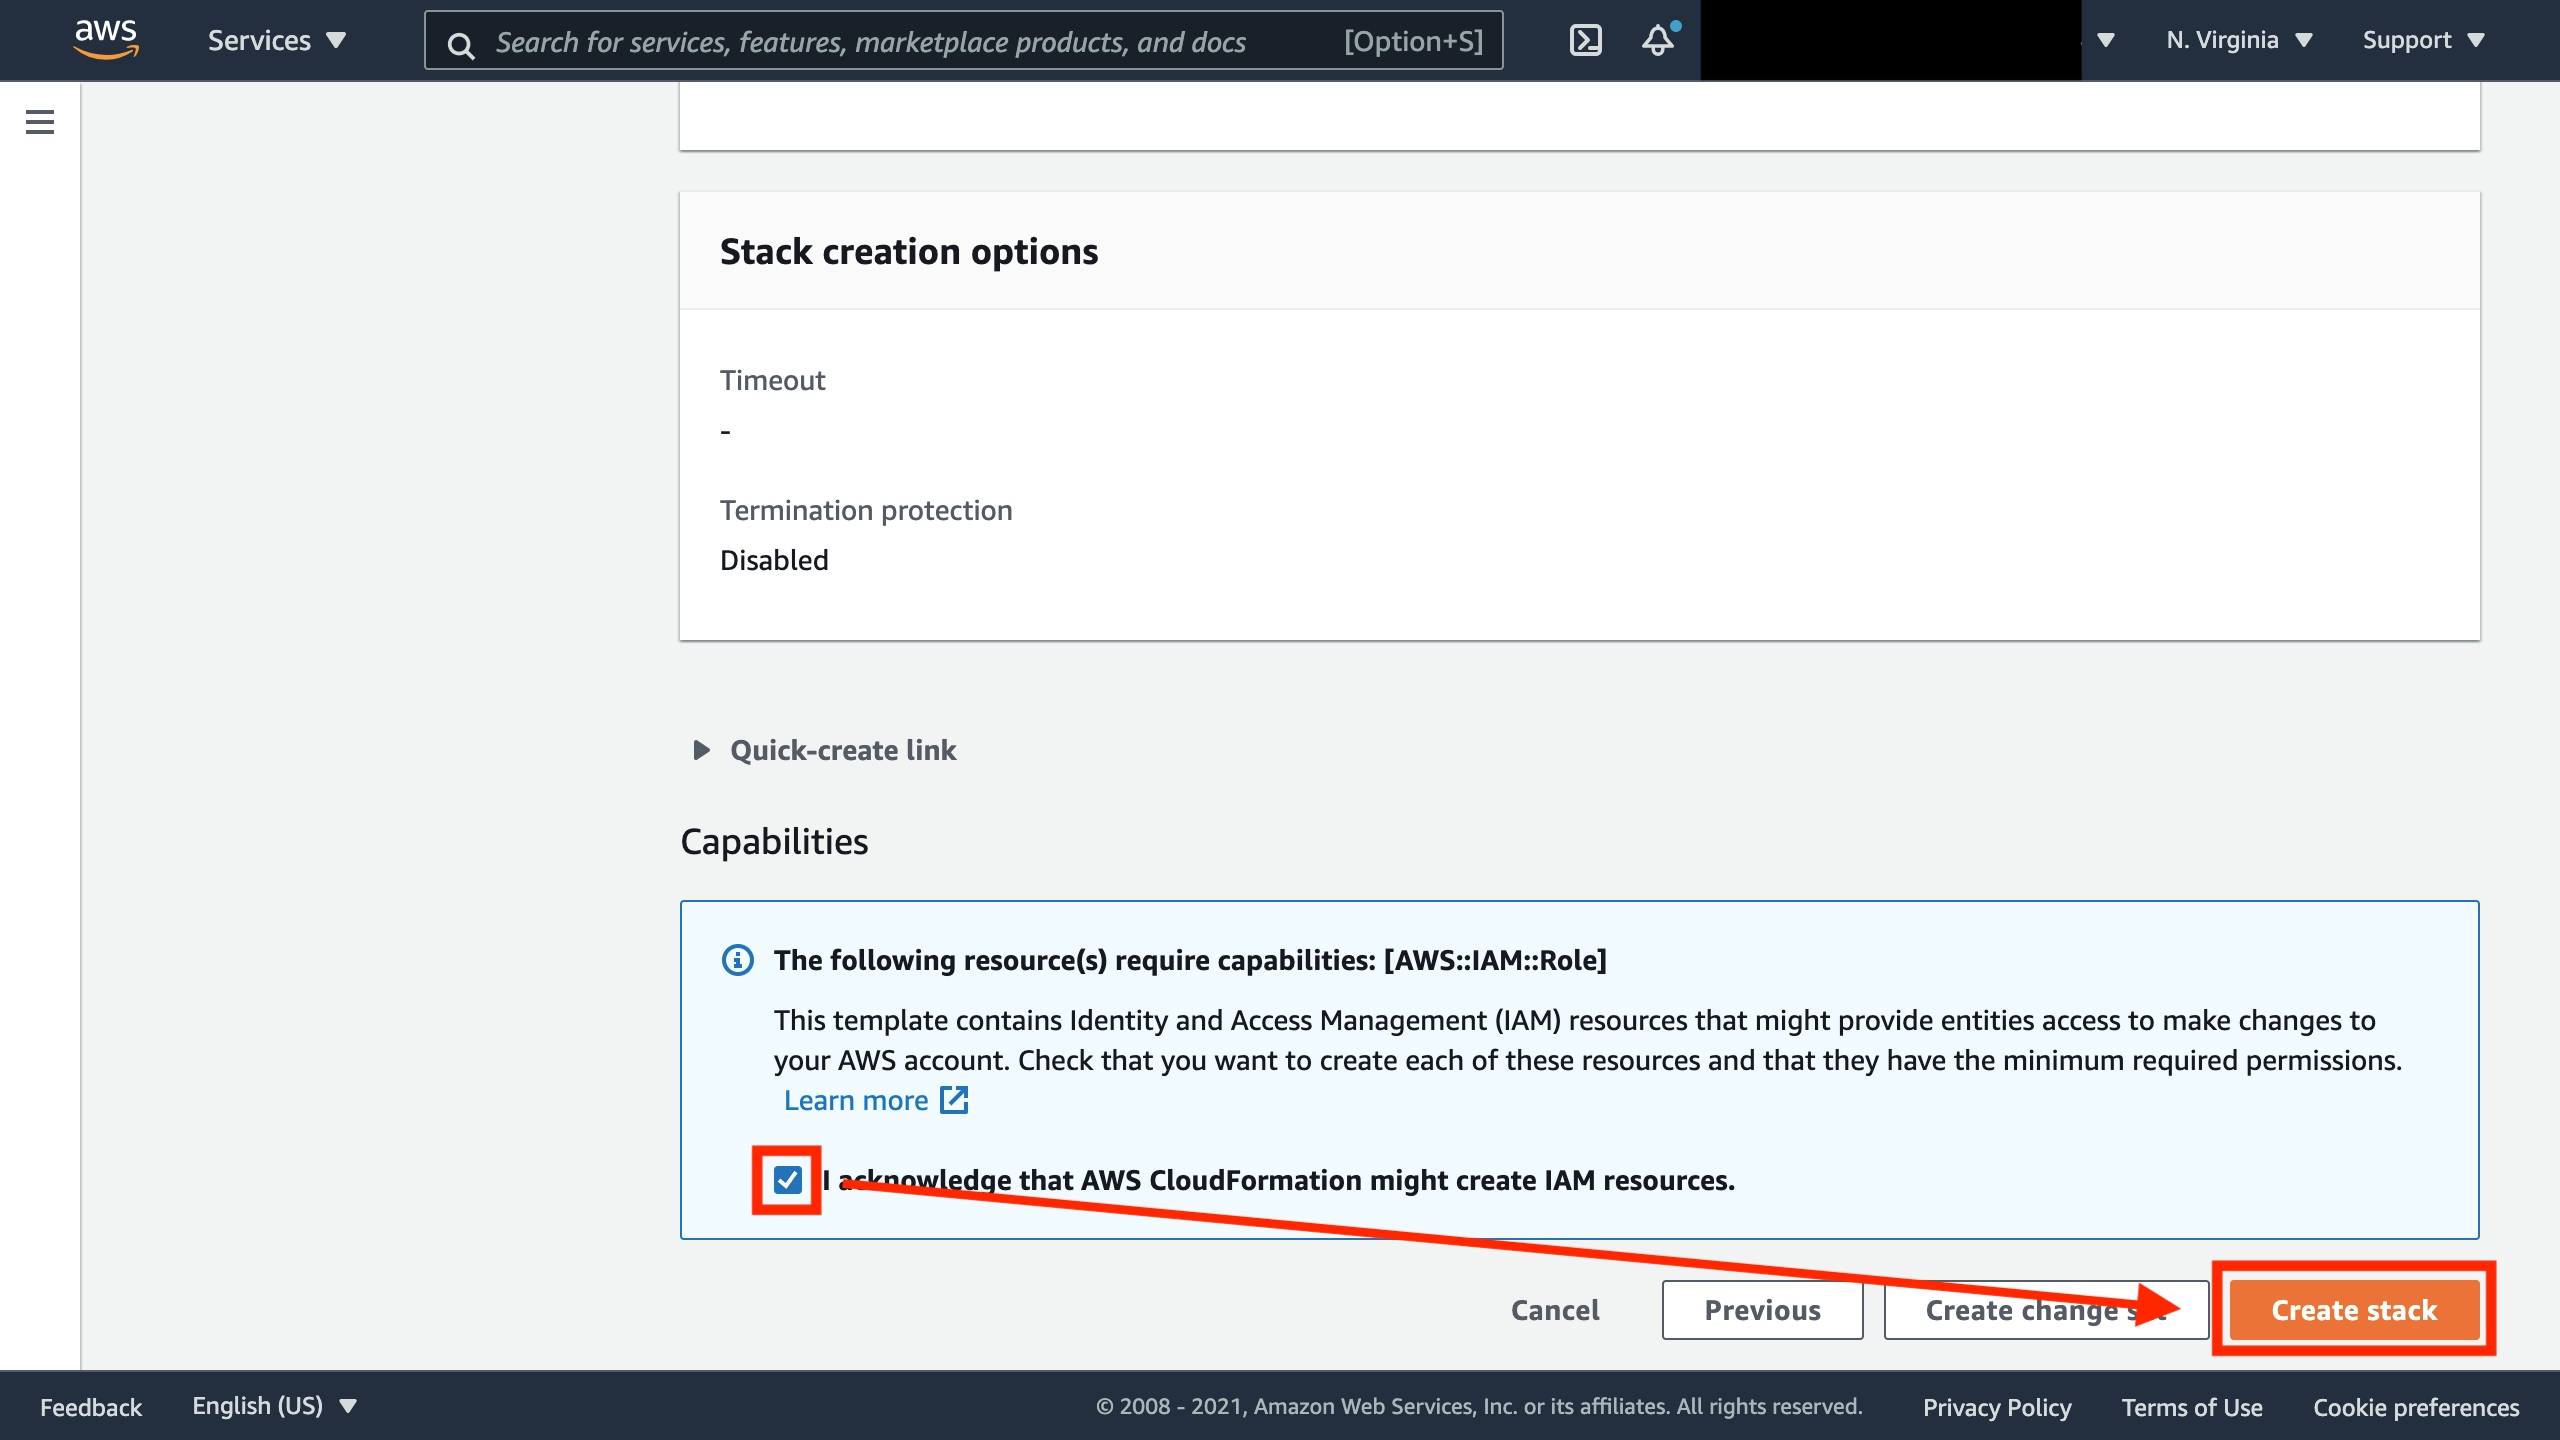
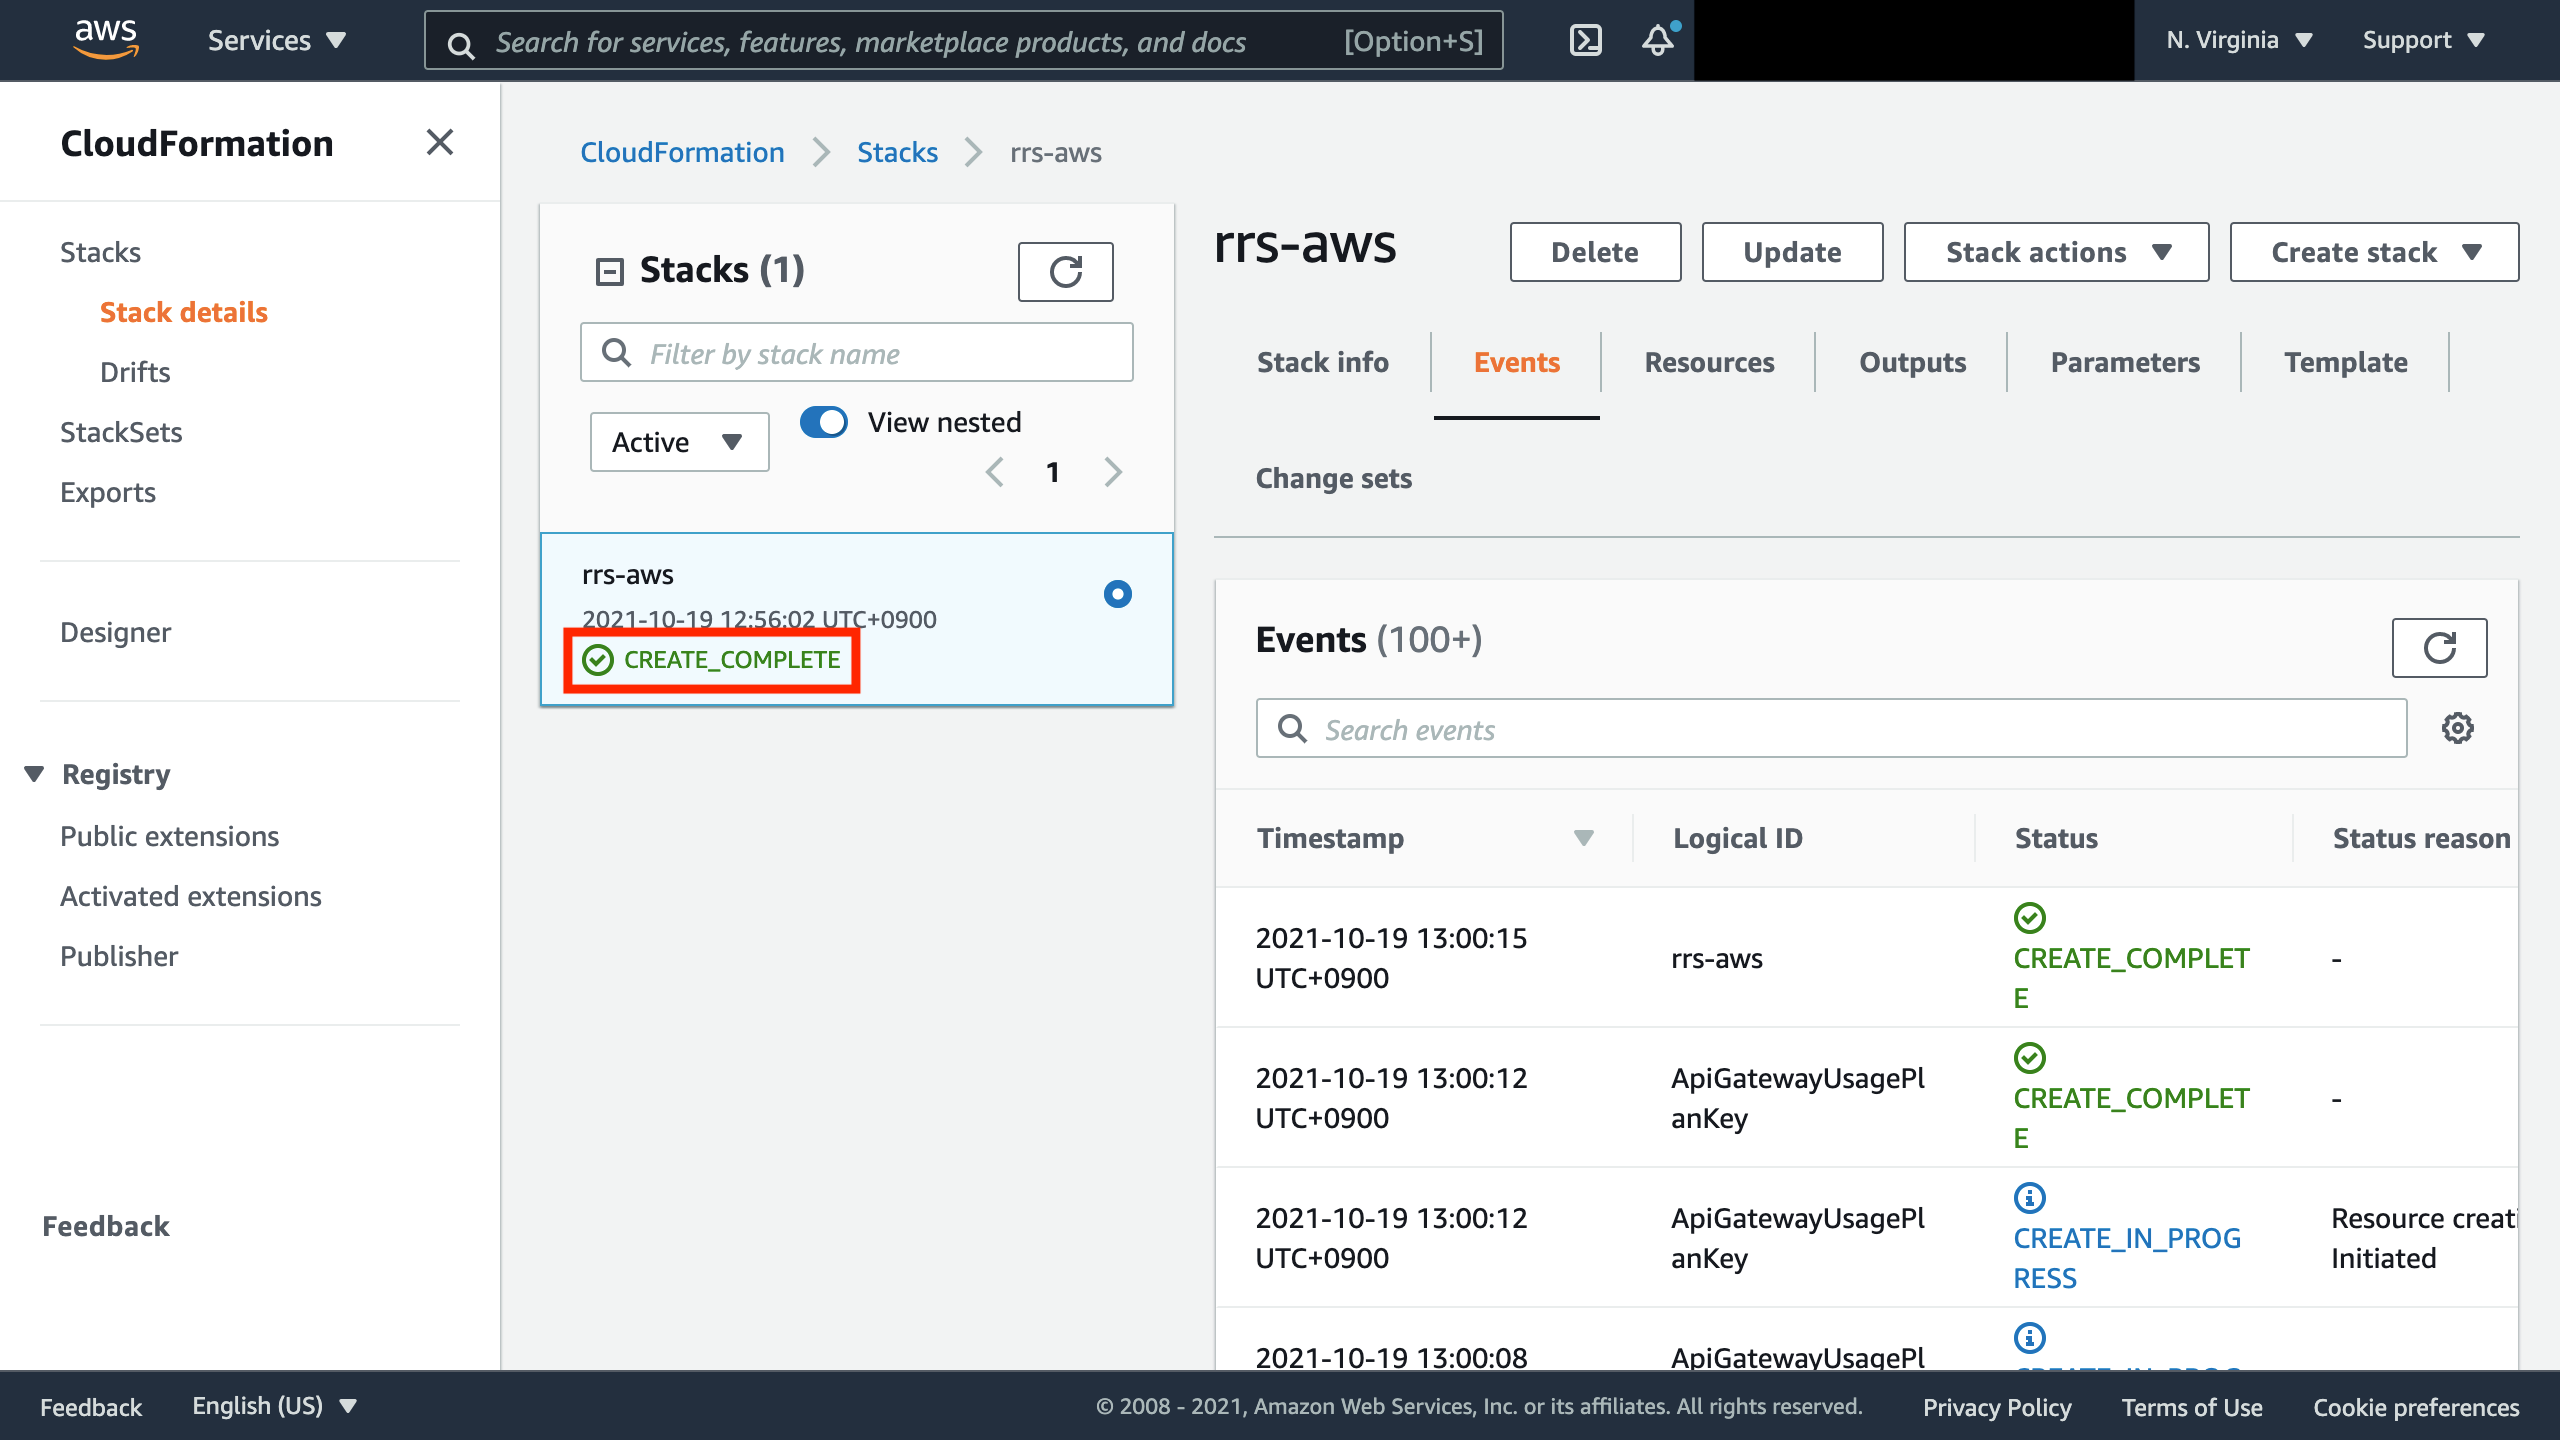
10. Verify that it is now CREATE_COMPLETE
It will take a few minutes to become CREATE_COMPLETE.
11. Download the server files with `git clone https://github.com/roborescue/rcrs-server`
12. Name the folder ``server`` and then compress it into a zip file
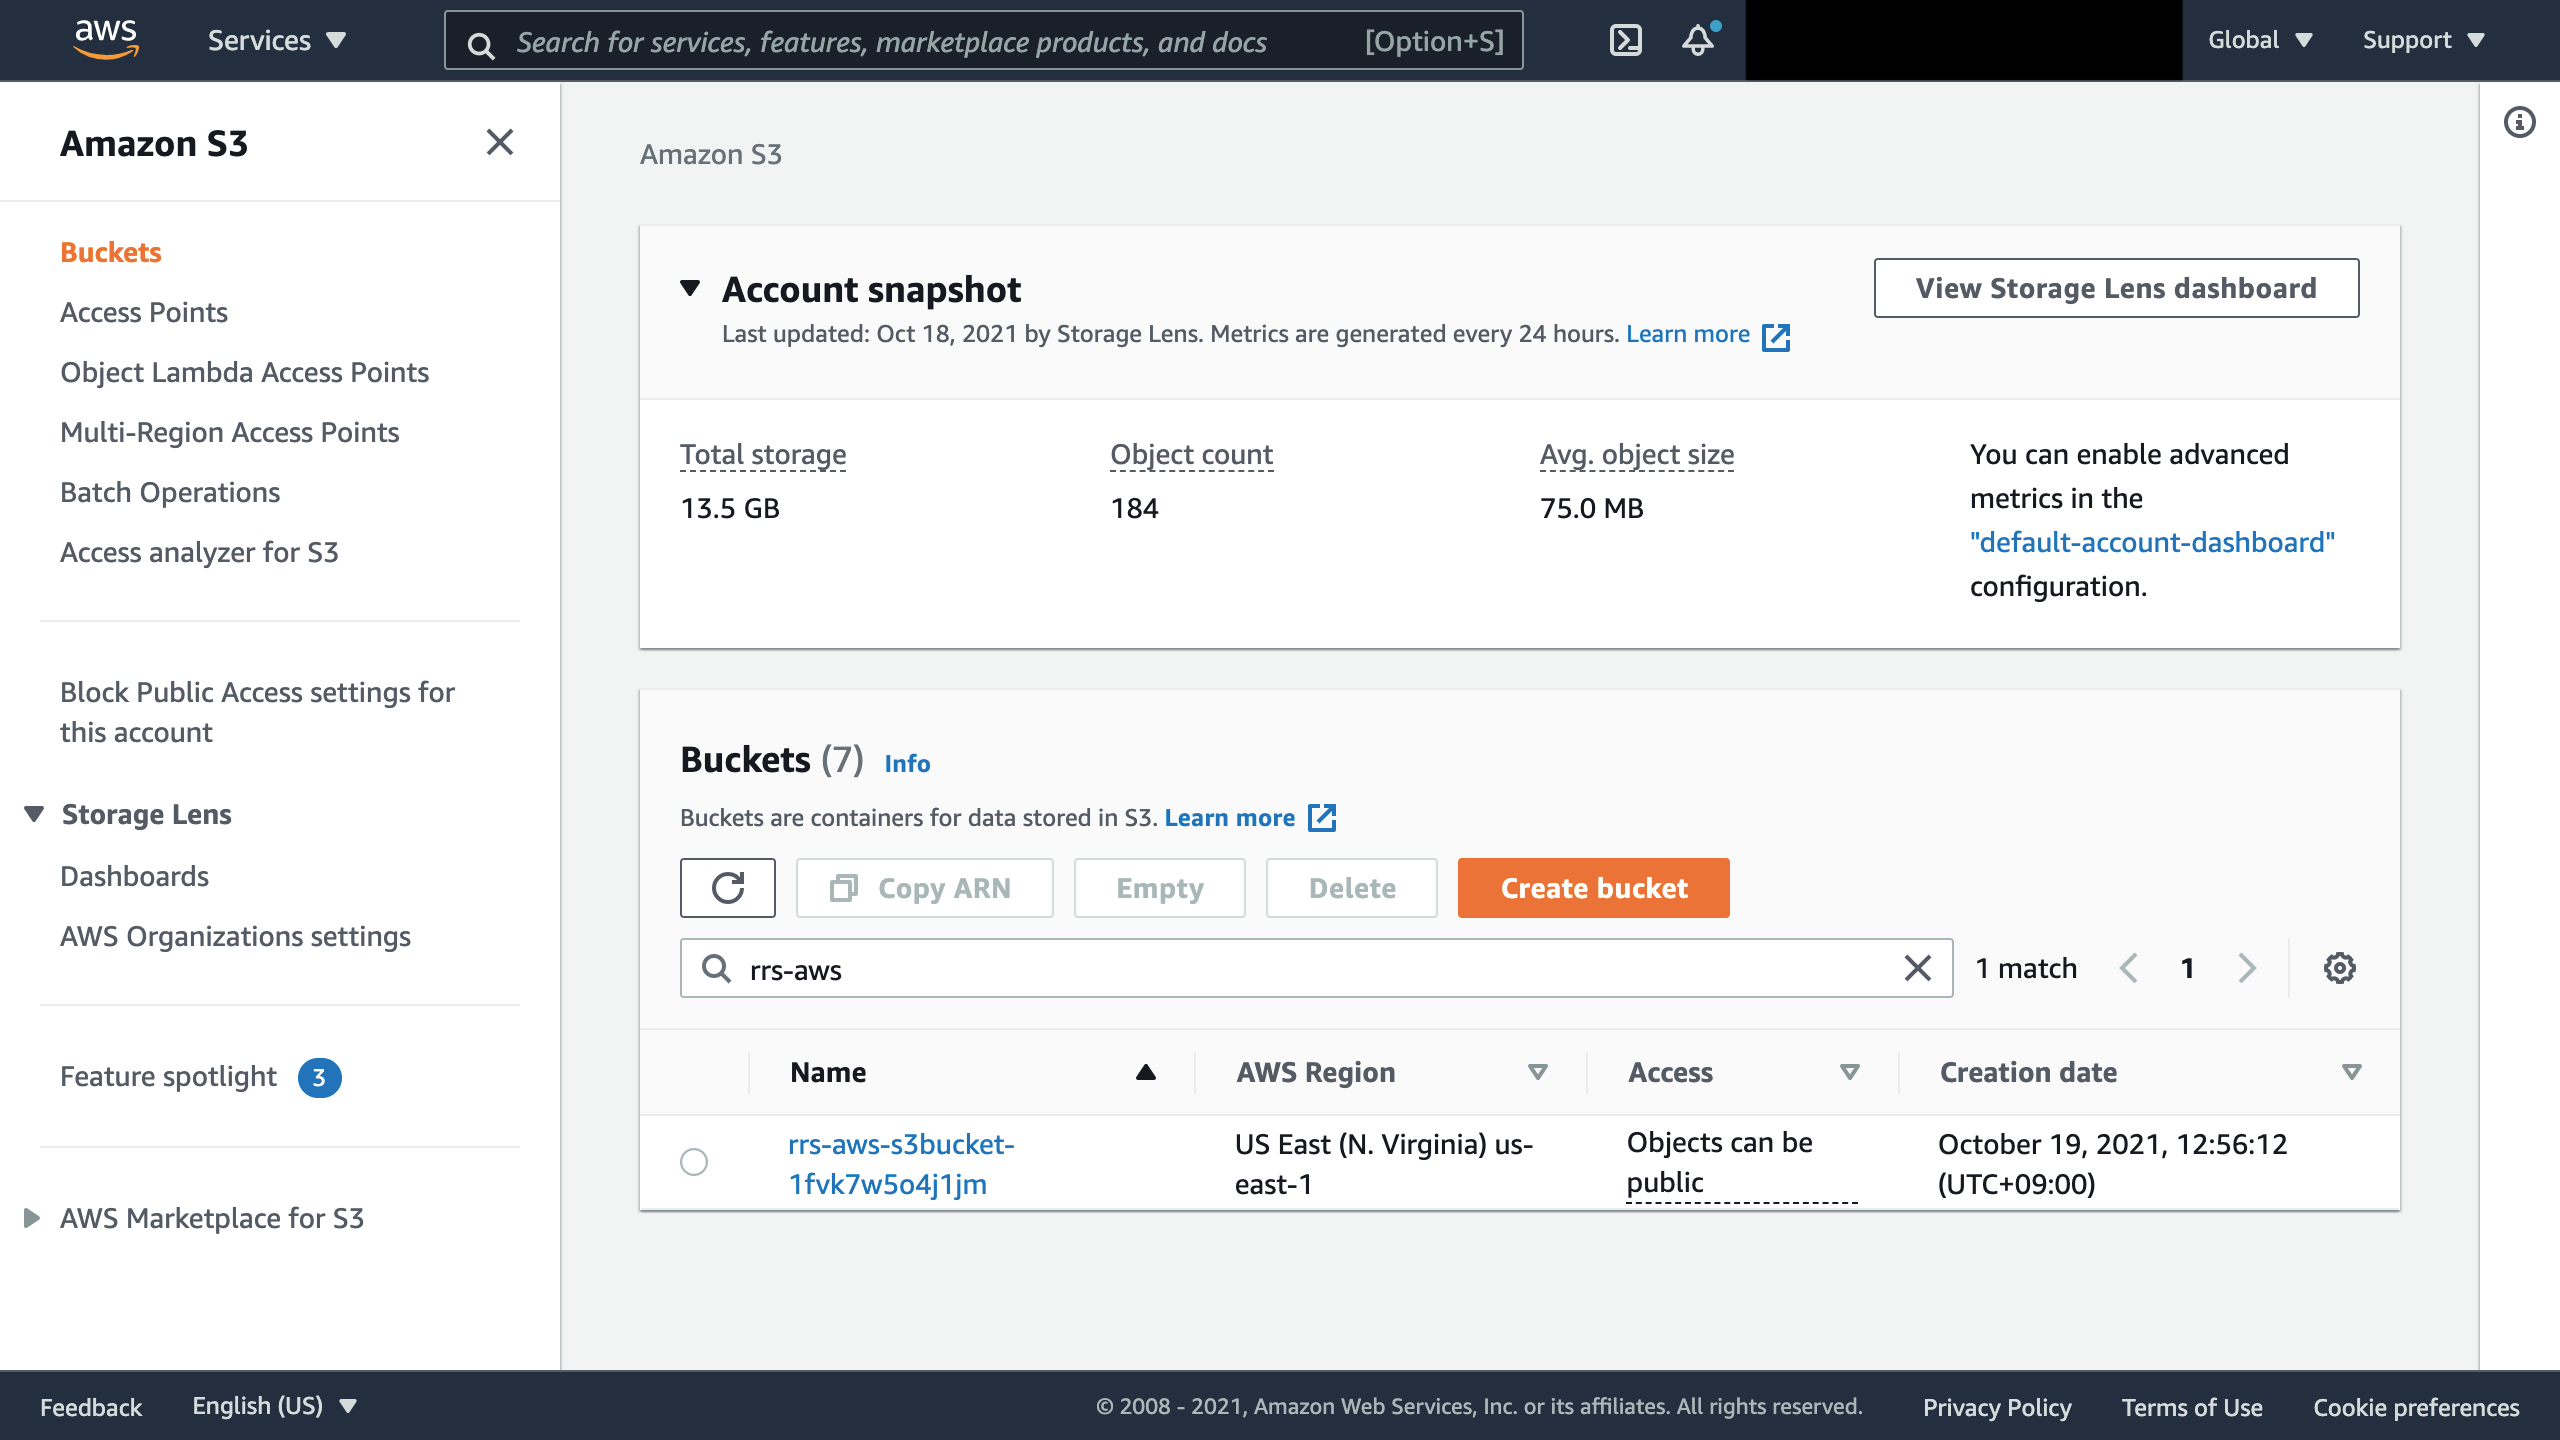
13. Go to [S3](https://console.aws.amazon.com/s3/)
14. Select the bucket whose prefix is the name you set in 6.
15. Click "Upload"
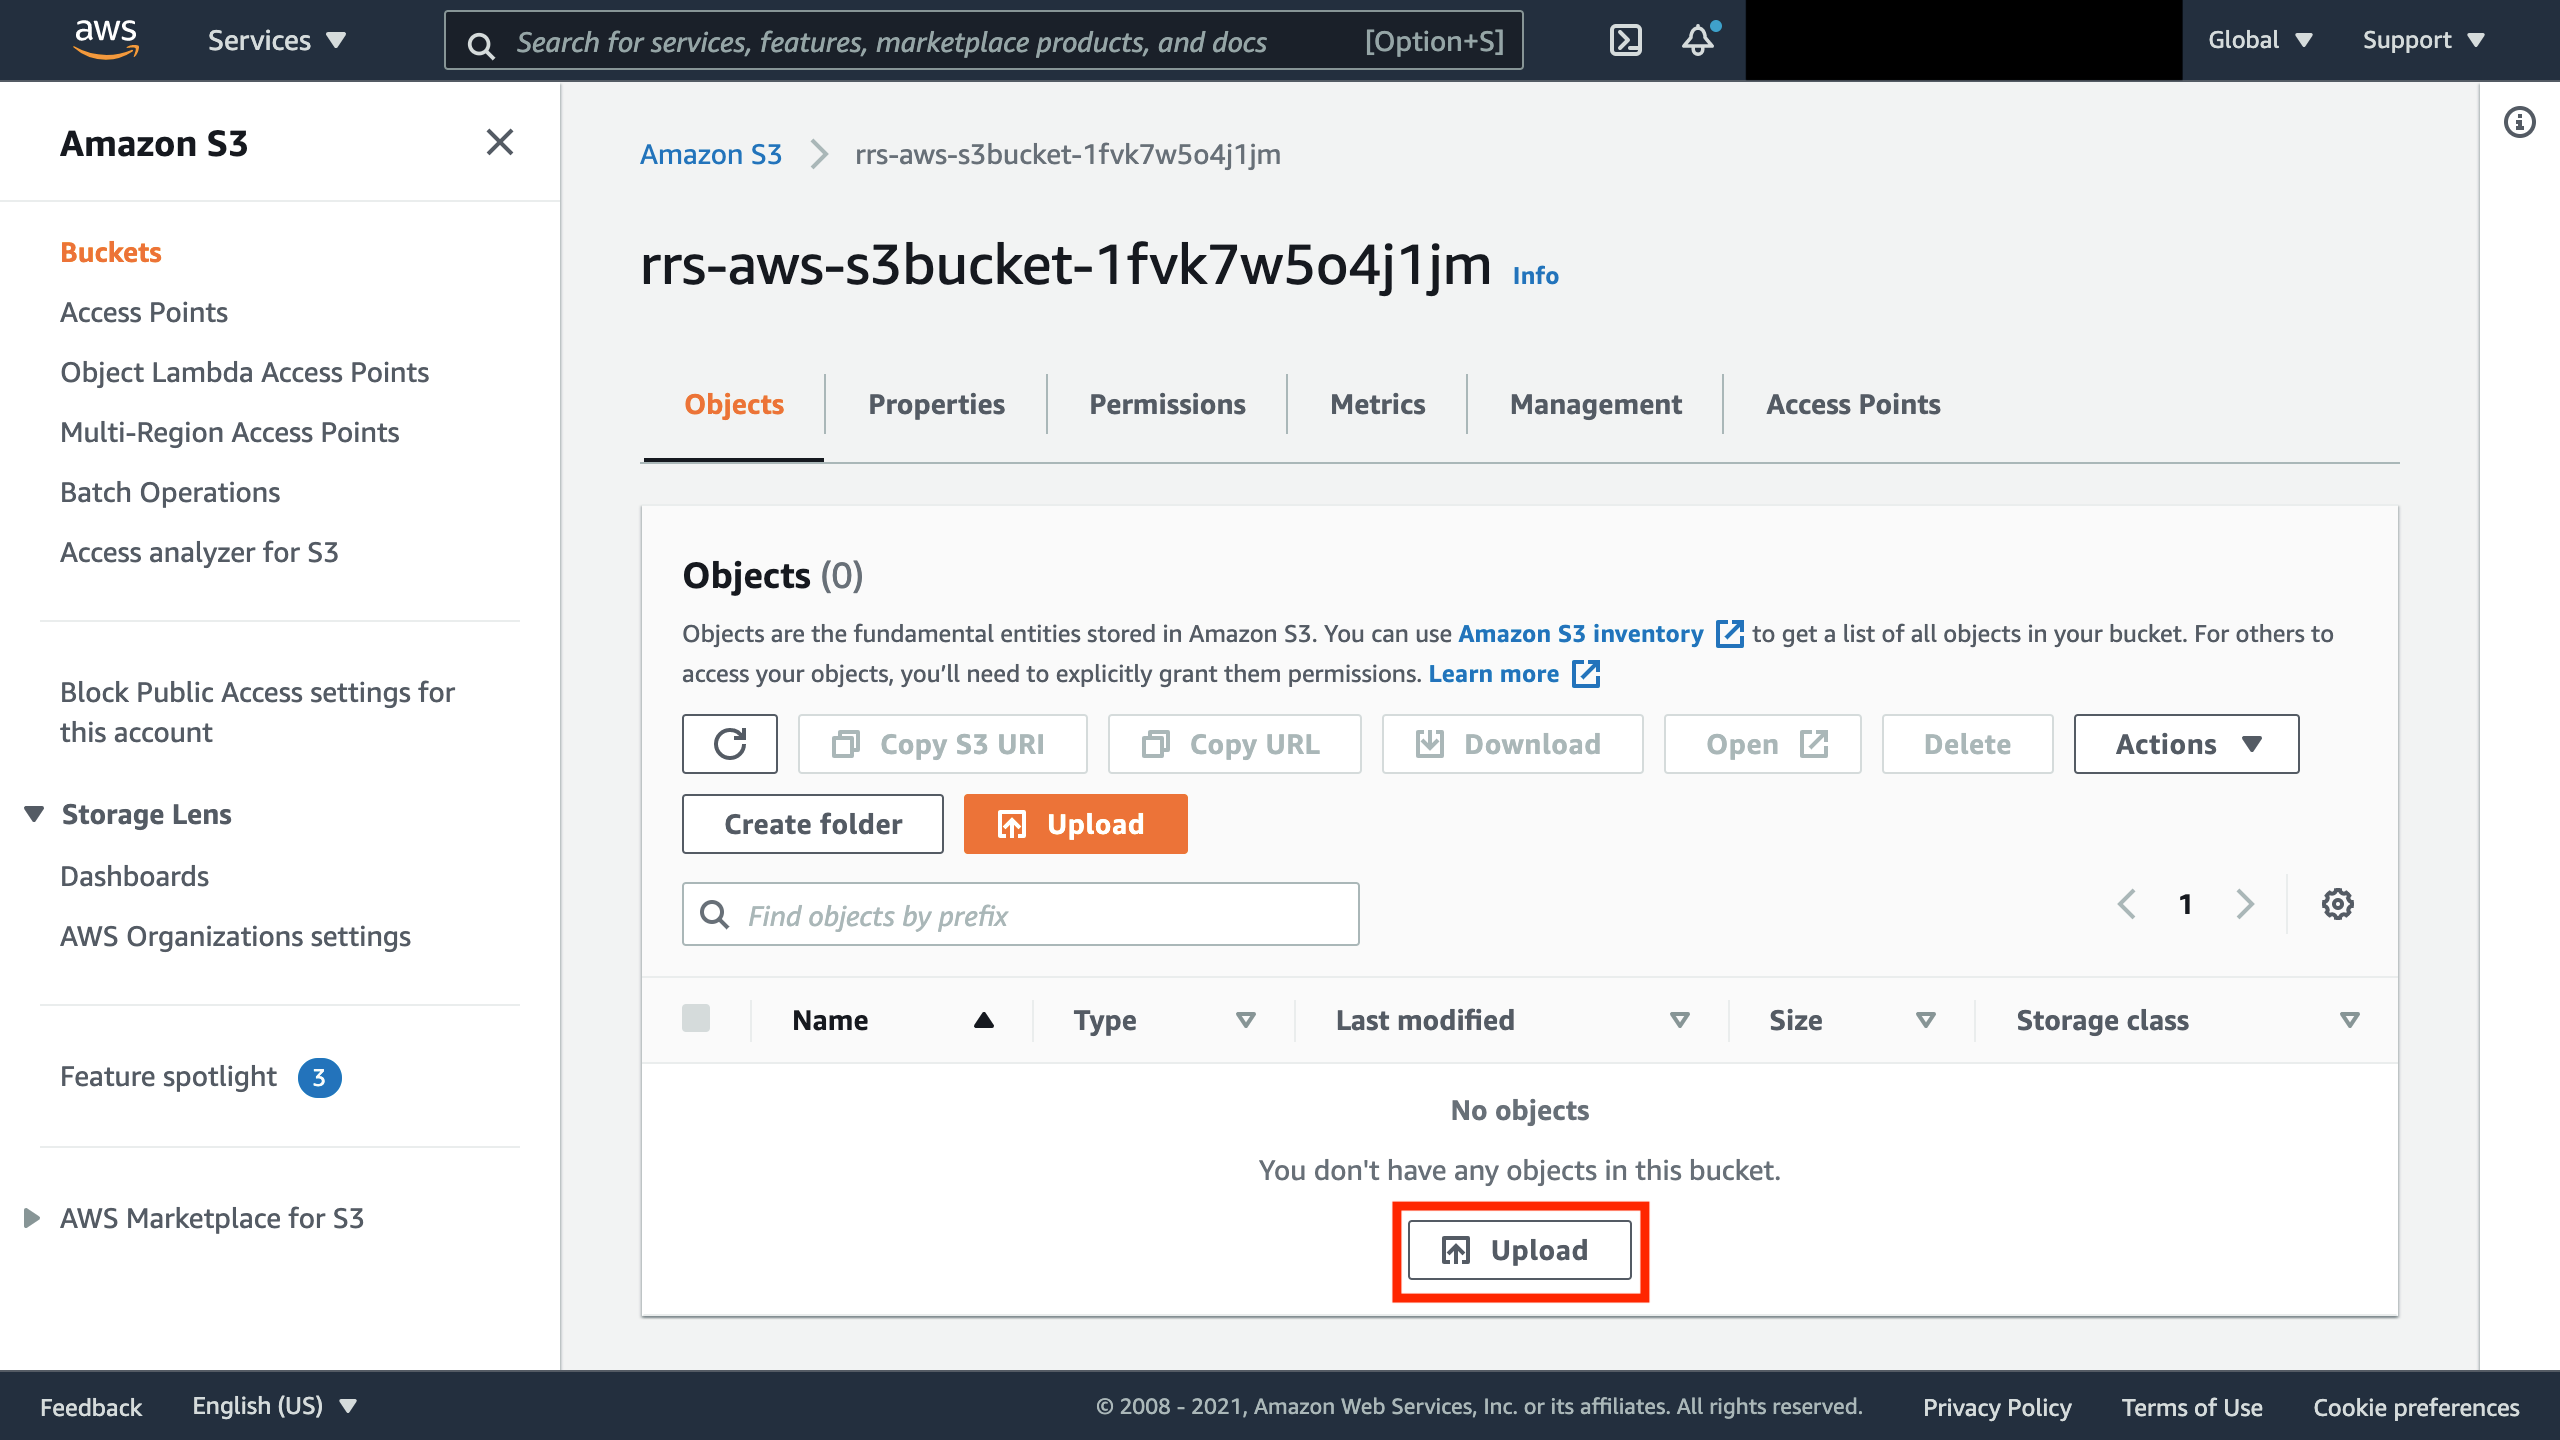
16. Drag and drop the file you just zipped, and click "Upload"

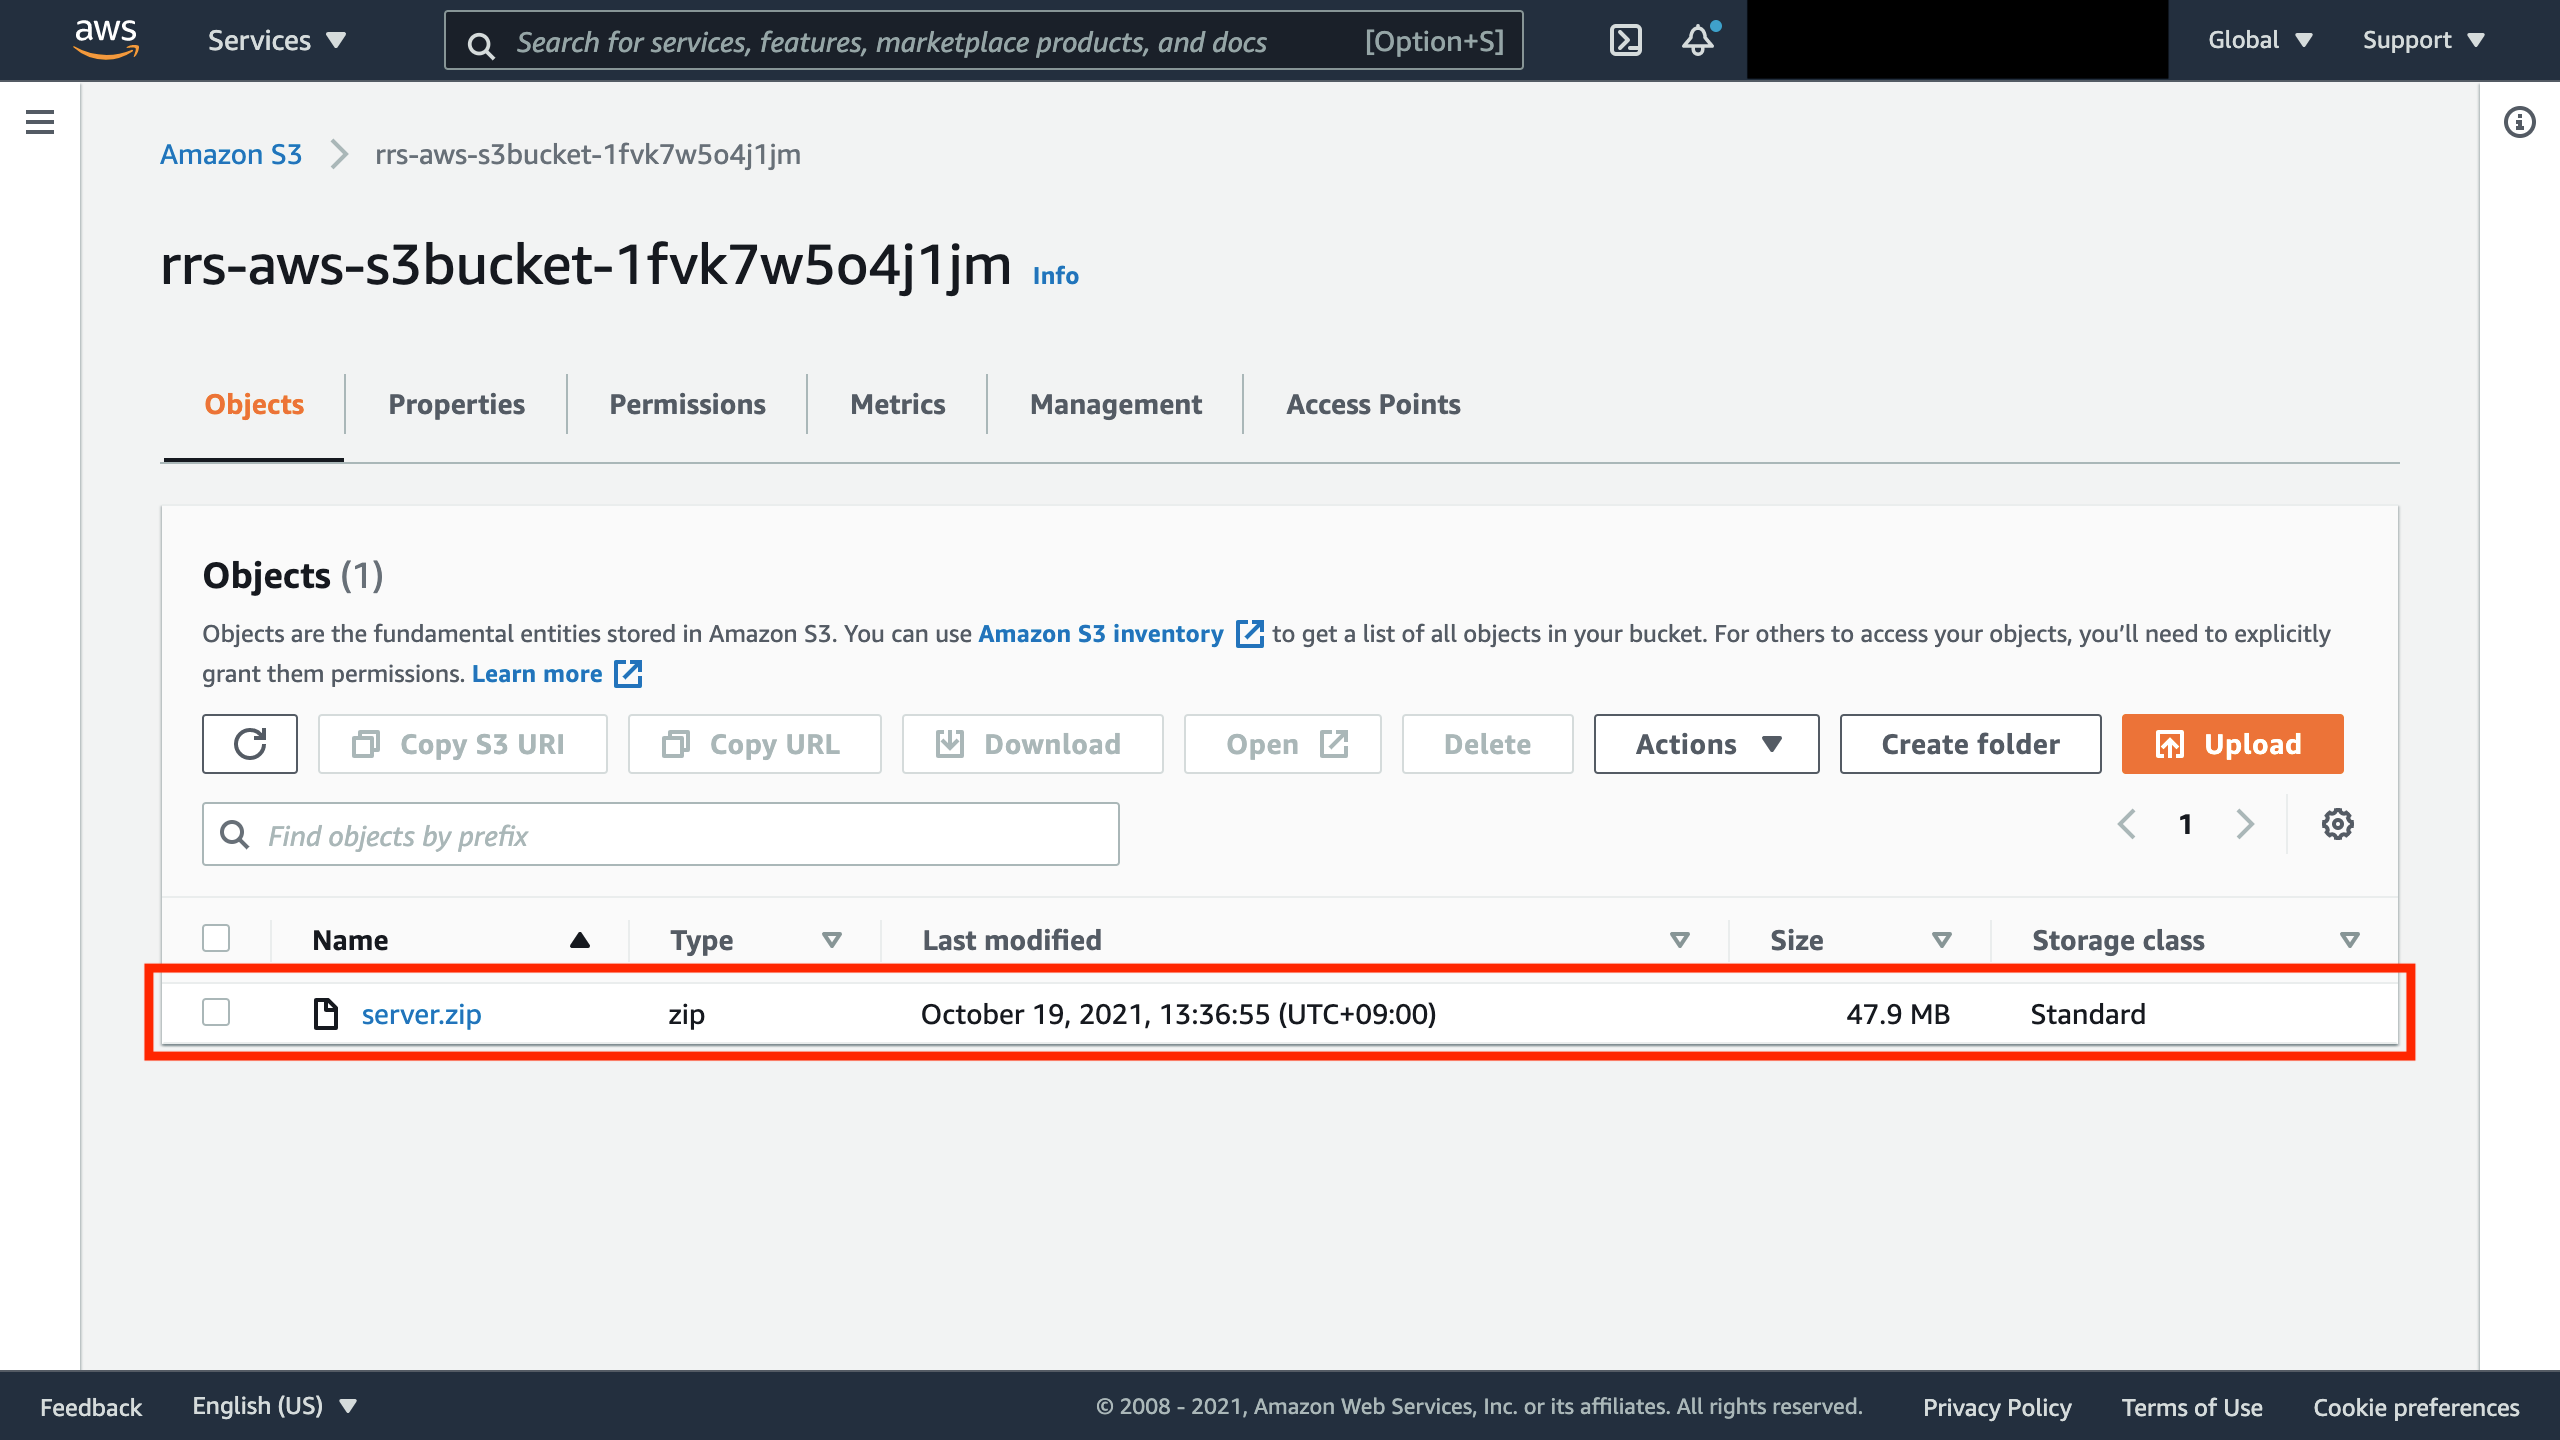
17. Confirm that `server.zip` has been uploaded
### Start RRS-AWS
::: warning
To build the environment, you will need Docker and Docker Compose.
Please refer to [Get Started with Docker](https://docs.docker.com/get-started/) for details.
If you are using Linux, you will also need to install Docker Compose separately.
Please refer to [Install Docker Compose](https://docs.docker.com/compose/install/) for details.
:::
1. Download RRS-AWS
After downloading, unzip it.
```
curl -LO https://maslab.aitech.ac.jp/~k19016kk/rrs-aws-ui-docker.zip
```
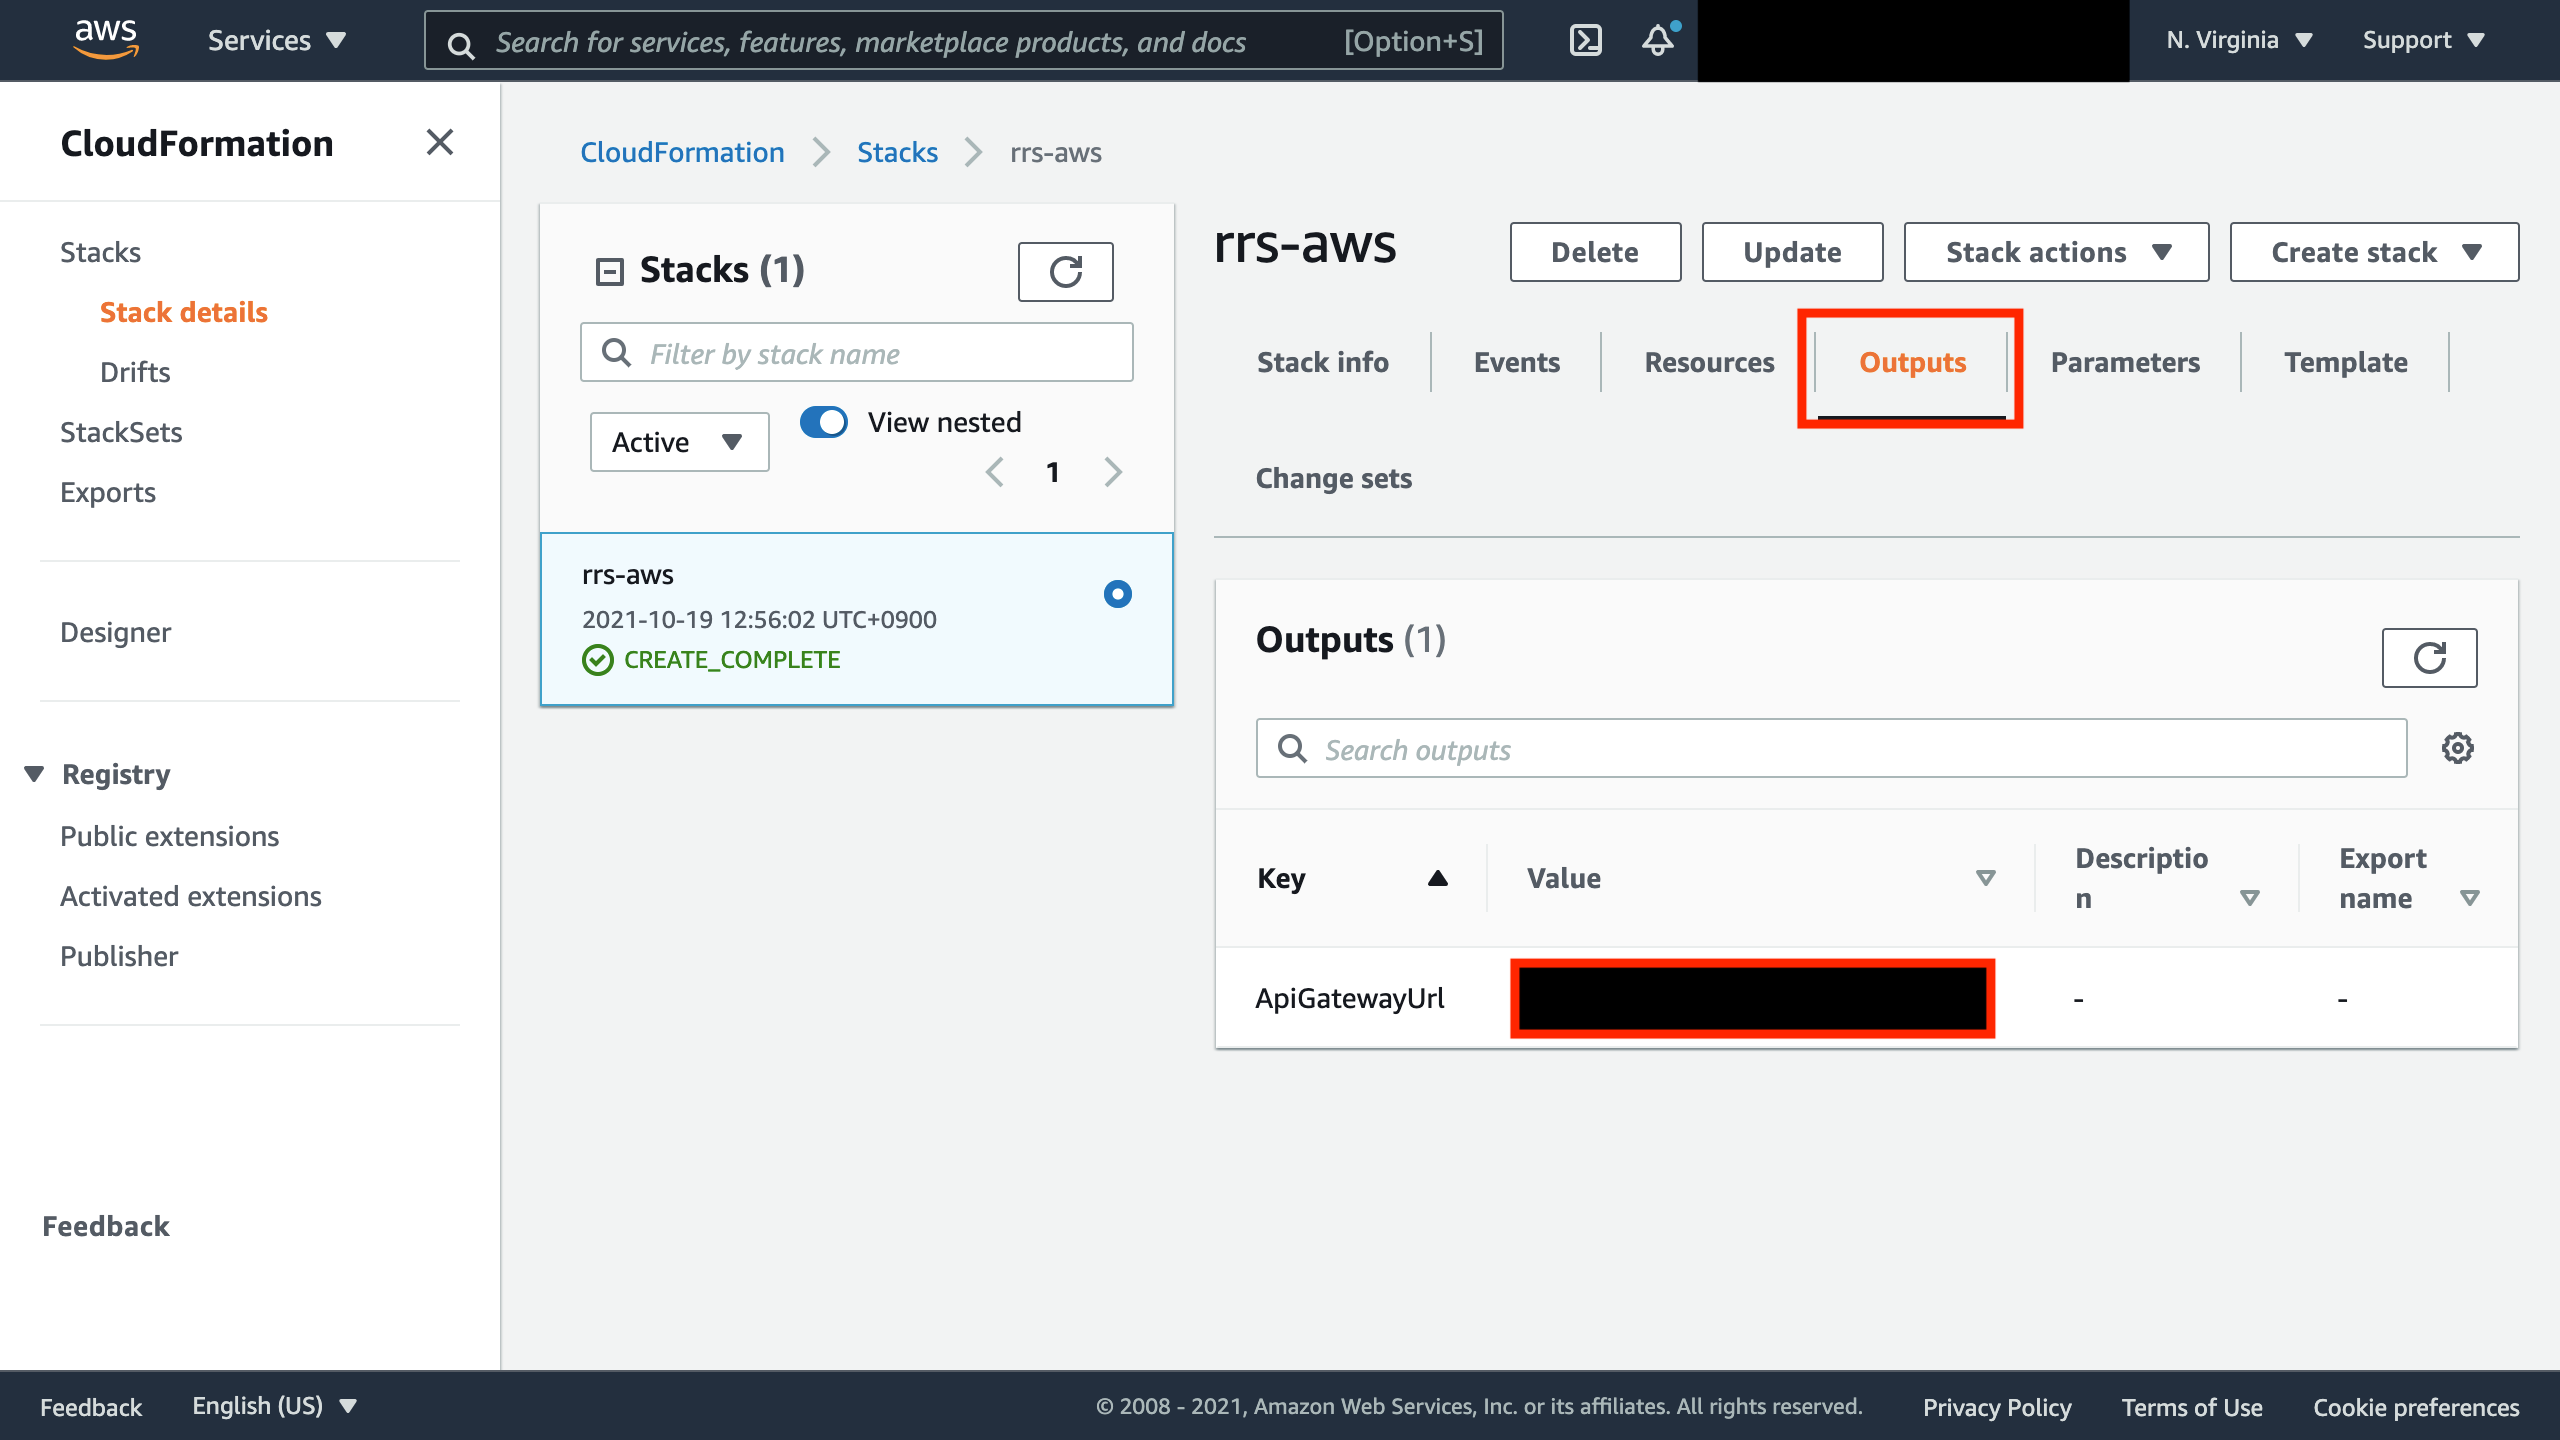
2. Get the API key and URL
1. Go to [Cloud Formation](https://console.aws.amazon.com/cloudformation/) .
2. Select the Stack that you just created.

3. Get the ApiGatewayUrl in the Output tab.
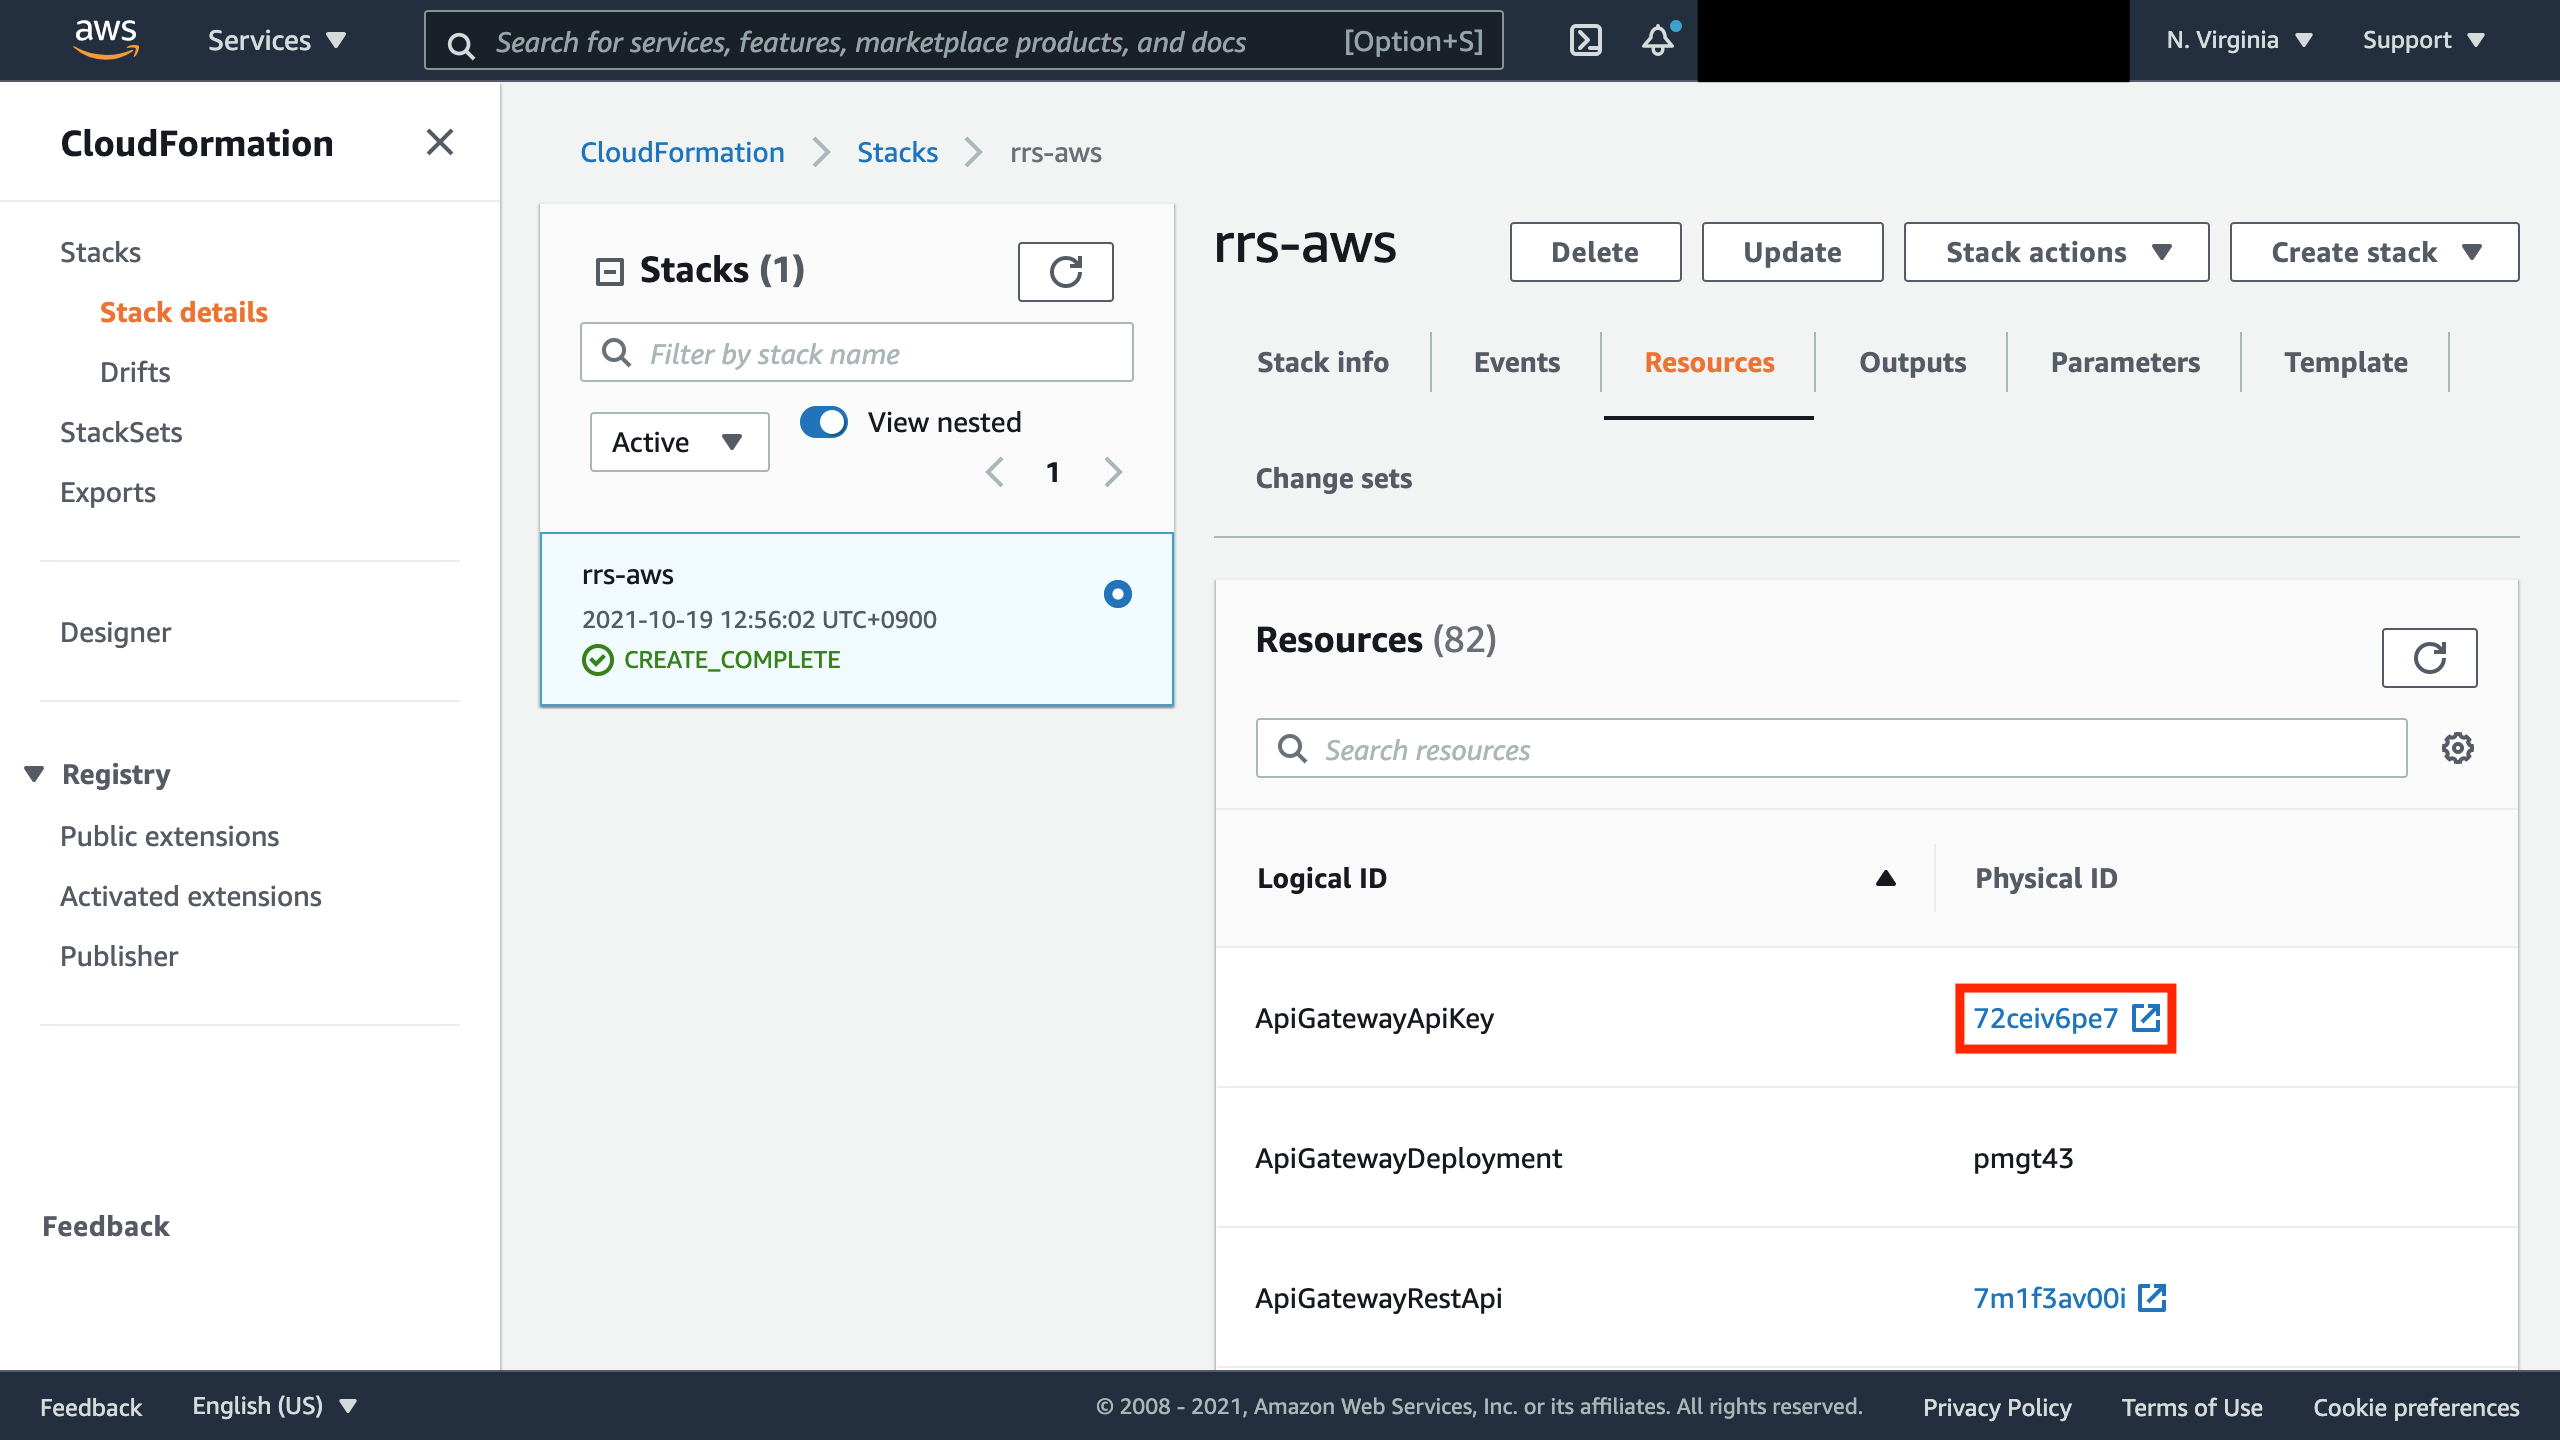
4. Step on the link for the Physical ID of ApiGatewayApiKey in the Resources tab.
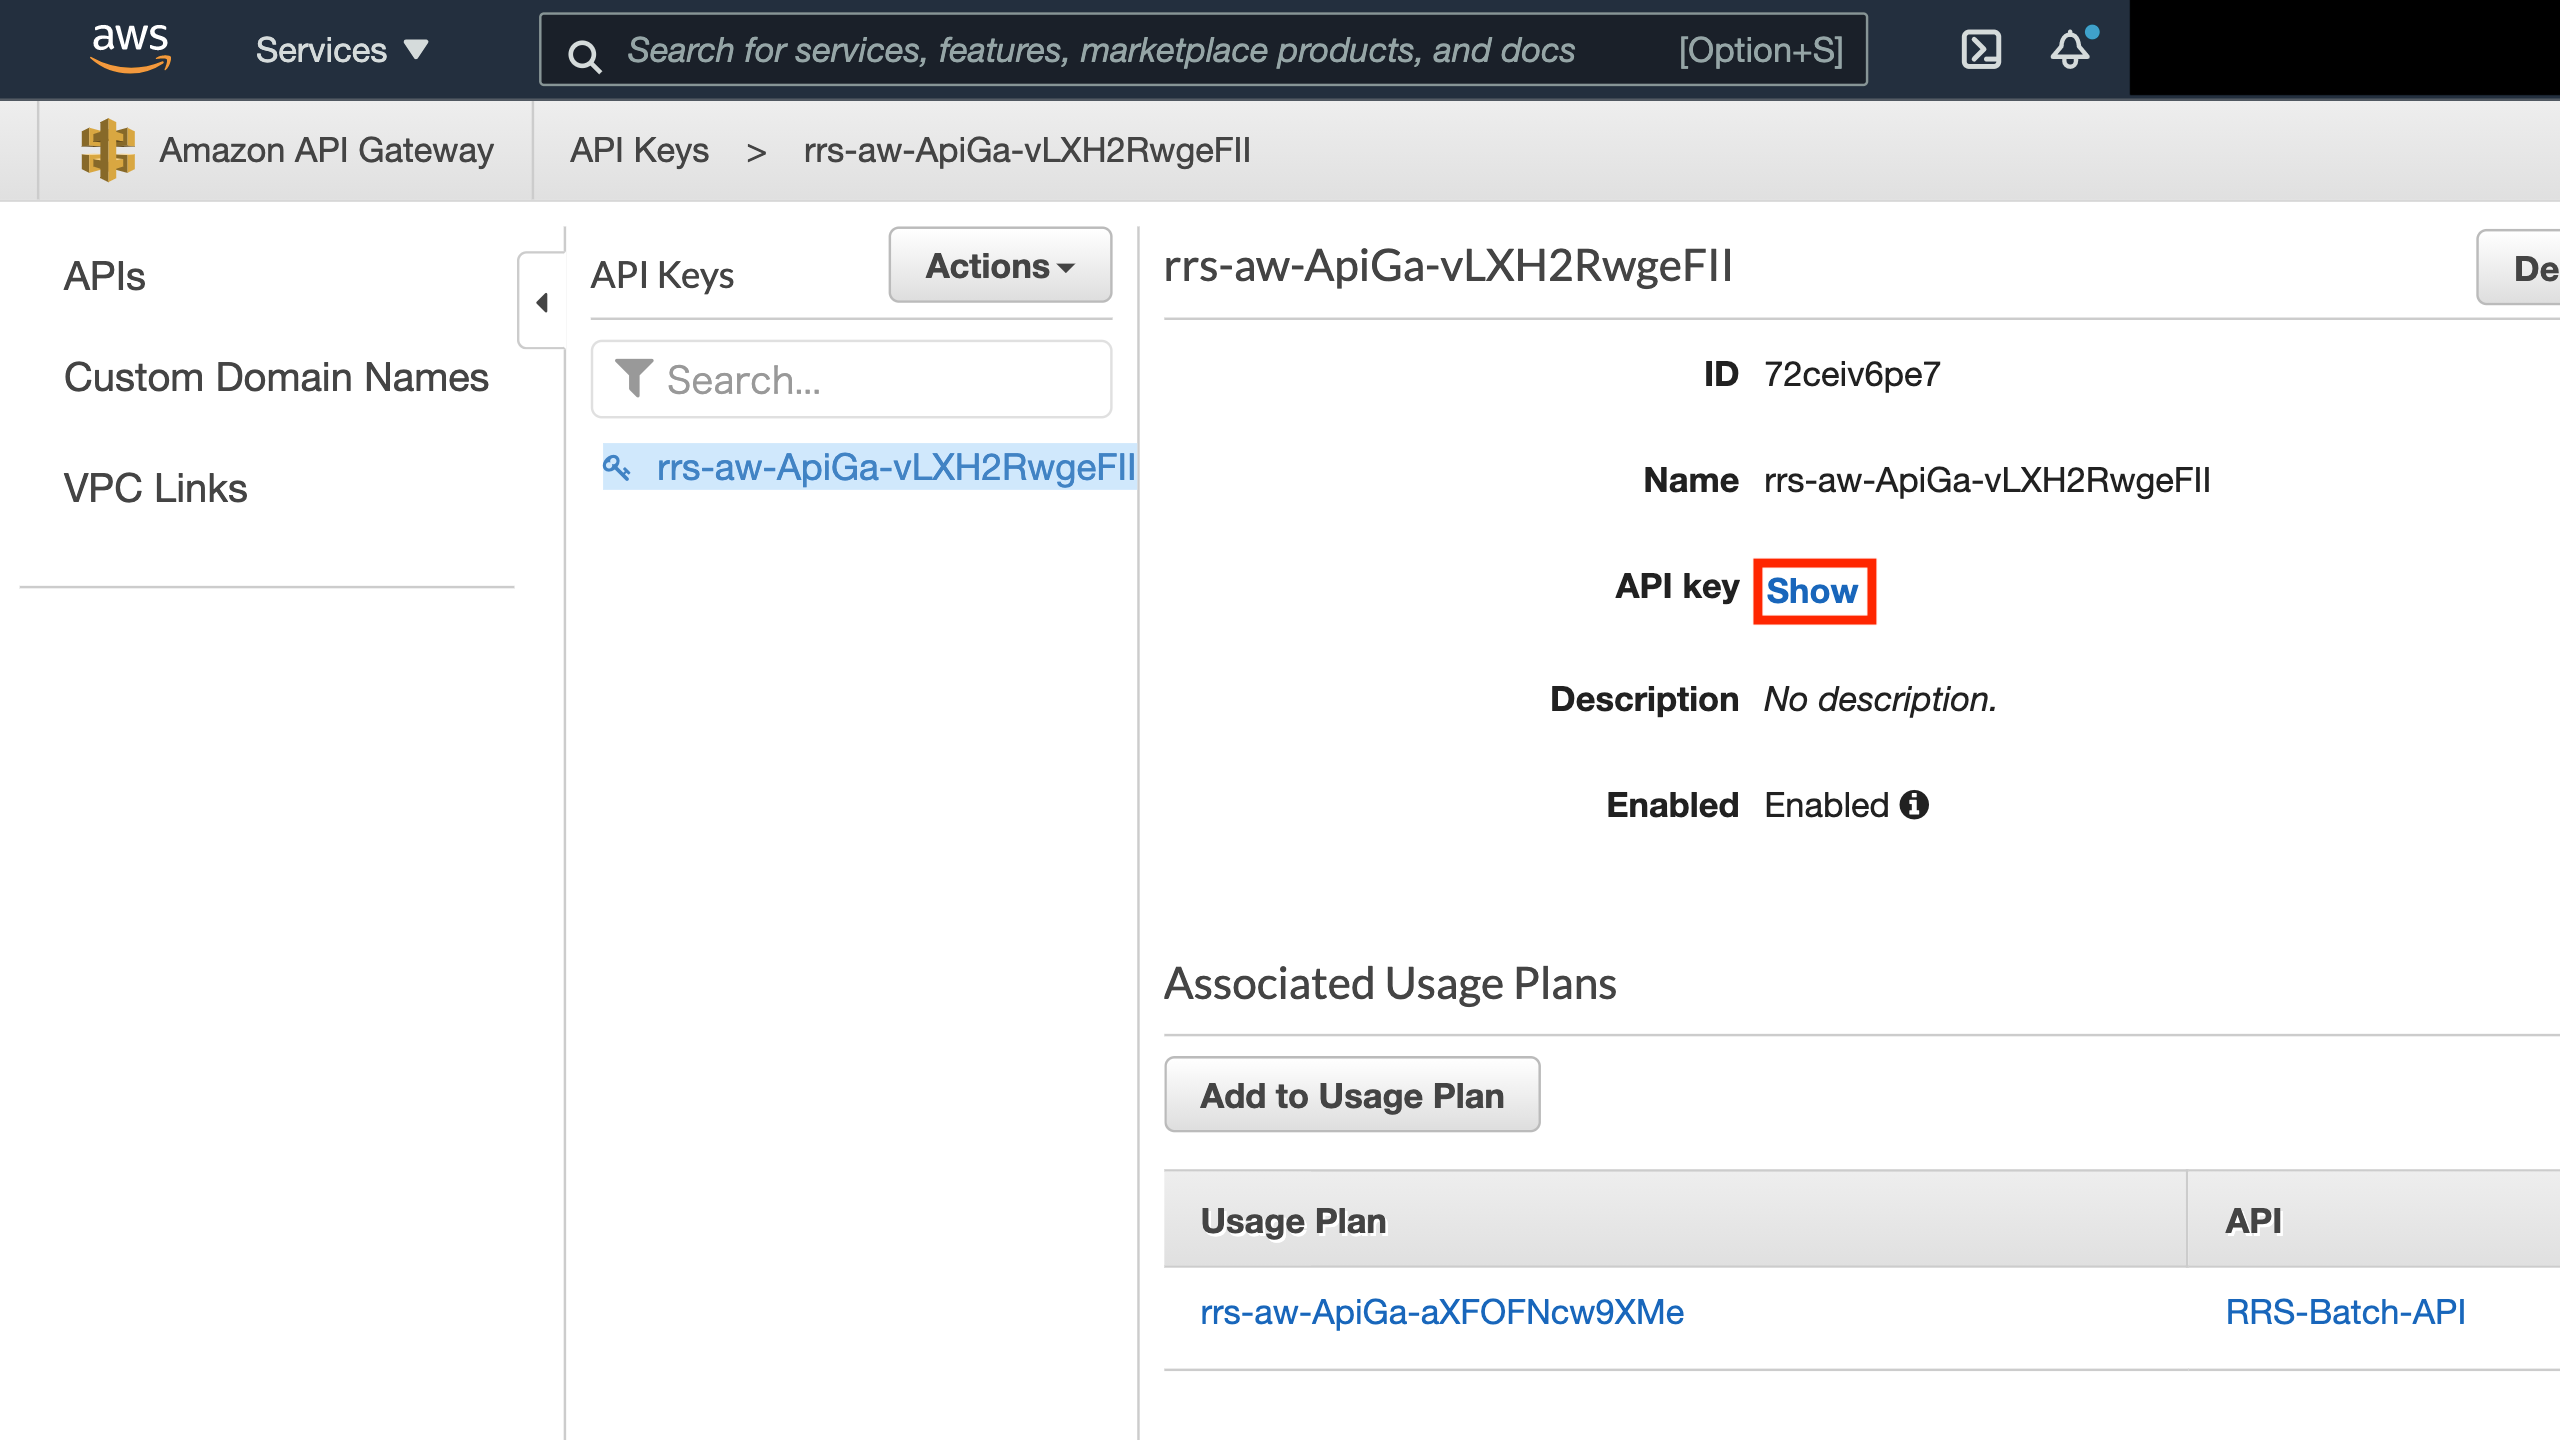
5. Click "show API Key" to obtain the API key.
3. Set the API Key and URL
Open the docker-compose.yml file in the rrs-aws-ui-docker folder.
Enter the API URL and key in the API_URL and API_KEY sections at the bottom, respectively.
4. Change the database password
Change the value of MYSQL_ROOT_PASSWORD in docker-compose.yml to your desired password.
5. Start the web server.
```
cd rrs-aws-ui-docker
sudo docker-compose up -d
```
6. (Optional) Check the logs
```
sudo docker-compose logs -t -f app
```
7. Quit the web server
```
sudo docker-compose down
```
<!-- ## Accounts
### How to register a new account
新規アカウントは手動で登録する必要があります。
1. パスワードのハッシュ化
アカウントを作成するには作成したいアカウントのパスワードをハッシュ化する必要があります。
```
cd rrs-aws-ui-docker/rrs-aws-ui/
node generate_password.js 作成するパスワード
```
2. アカウント情報の書き込み
次に、rrs-aws-ui-docker内の`/db/initdb.d/init.sql`にアカウント情報を書き込みます。
RRS-AWSではファイル名の接頭辞を用いて各チームや各選手の権限を管理しています。権限は正規表現を用いて判定をしています。
以下のサンプルを参考にアカウントを作成してください。
```
INSERT INTO `users` VALUES
(
'ait', //ユーザ名
'$2b$10$eQ/kxiTvOfC6hjmYOTPPuOjJLGLTBg9wuevR8T/Wlghrz4FrHkJ4S', //ハッシュ化されたパスワード
'AIT_', //所属チーム(ファイルの接頭辞)
'^AIT_.*', //エージェントファイルの書き込み権限
'^AIT_.*', //エージェントファイルの読み込み権限
'$.', //シナリオファイルの書き込み権限
'.*', //シナリオファイルの読み込み権限
'^AIT_.*', //シミュレーションの実行権限
'^AIT_.*', //シミュレーション結果の閲覧権限
'$.', //バッチランの実行権限
'$.' //バッチラン結果の閲覧権限
);
INSERT INTO `credits` VALUES
(
'ait', //ユーザー名
5 //最大シミュレーション回数
);
```
基本的には以下の正規表現を用いて権限を変更します。
```.*``` : 全て許可
```$.``` : 全て拒否
```^チーム名.*```:チームのファイルorチームが実行したシミュレーションのみ許可
:::spoiler とても詳しい説明
所属チーム(ファイルの接頭辞)はエージェントファイルやシナリオファイルをアップロードするとき、ファイルの接頭辞に名前が付きます。
このサンプルの場合、このアカウントの所属チームが```AIT_```となっており、例えば、```Agent.zip```をアップロードする場合、```AIT_Agent.zip```に名前変更された後、アップロードされます。
書き込み権限はファイルのアップロードもしくは削除するファイルを制限します。
このサンプルの場合、エージェントファイルの書き込み権限は```^AIT_.*```となっており、この正規表現に一致するファイルのみアップロードもしくは削除することができます。そのため、AIT_...という接頭辞に"AIT_"がついている名前のファイルのみアップロードもしくは削除ができます。
読み込み権限は各ファイルの表示を制限します。
このサンプルの場合、エージェントファイルの読み込み権限は```^AIT_.*```となっており、この正規表現に一致するファイルのみ表示されます。そのため、AIT_...という接頭辞に"AIT_"がついている名前のファイルのみアップロードもしくは削除ができます。
実行権限はシミュレーションの実行権限を制限します。
このサンプルの場合、シミュレーションの実行権限は```.*```となっており、実行できるようになっています。
ただし、バッチランの実行権限は```$.```となっており、実行できないようになっています。
結果閲覧権限はシミュレーションの結果閲覧権限を制限します。
このサンプルの場合、シミュレーション結果の閲覧権限は```^AIT_.*```となっており、自チームの結果のみ閲覧できるようになっています。
:::
すべて許可されている管理者用アカウント1つと競技者用アカウント必要分を作成してください。
Webサーバー起動中の権限変更方法は[権限変更](#権限変更)を参照してください。
3. アカウントの確認
これでアカウント作成が完了しました。[ログイン&ログアウト](#ログインampログアウト)を参考にログインができているか確認してください。
-->
## Login&Logout
### Login
:::info
In this case, use "admin" as the ID and "password" as the password.
:::
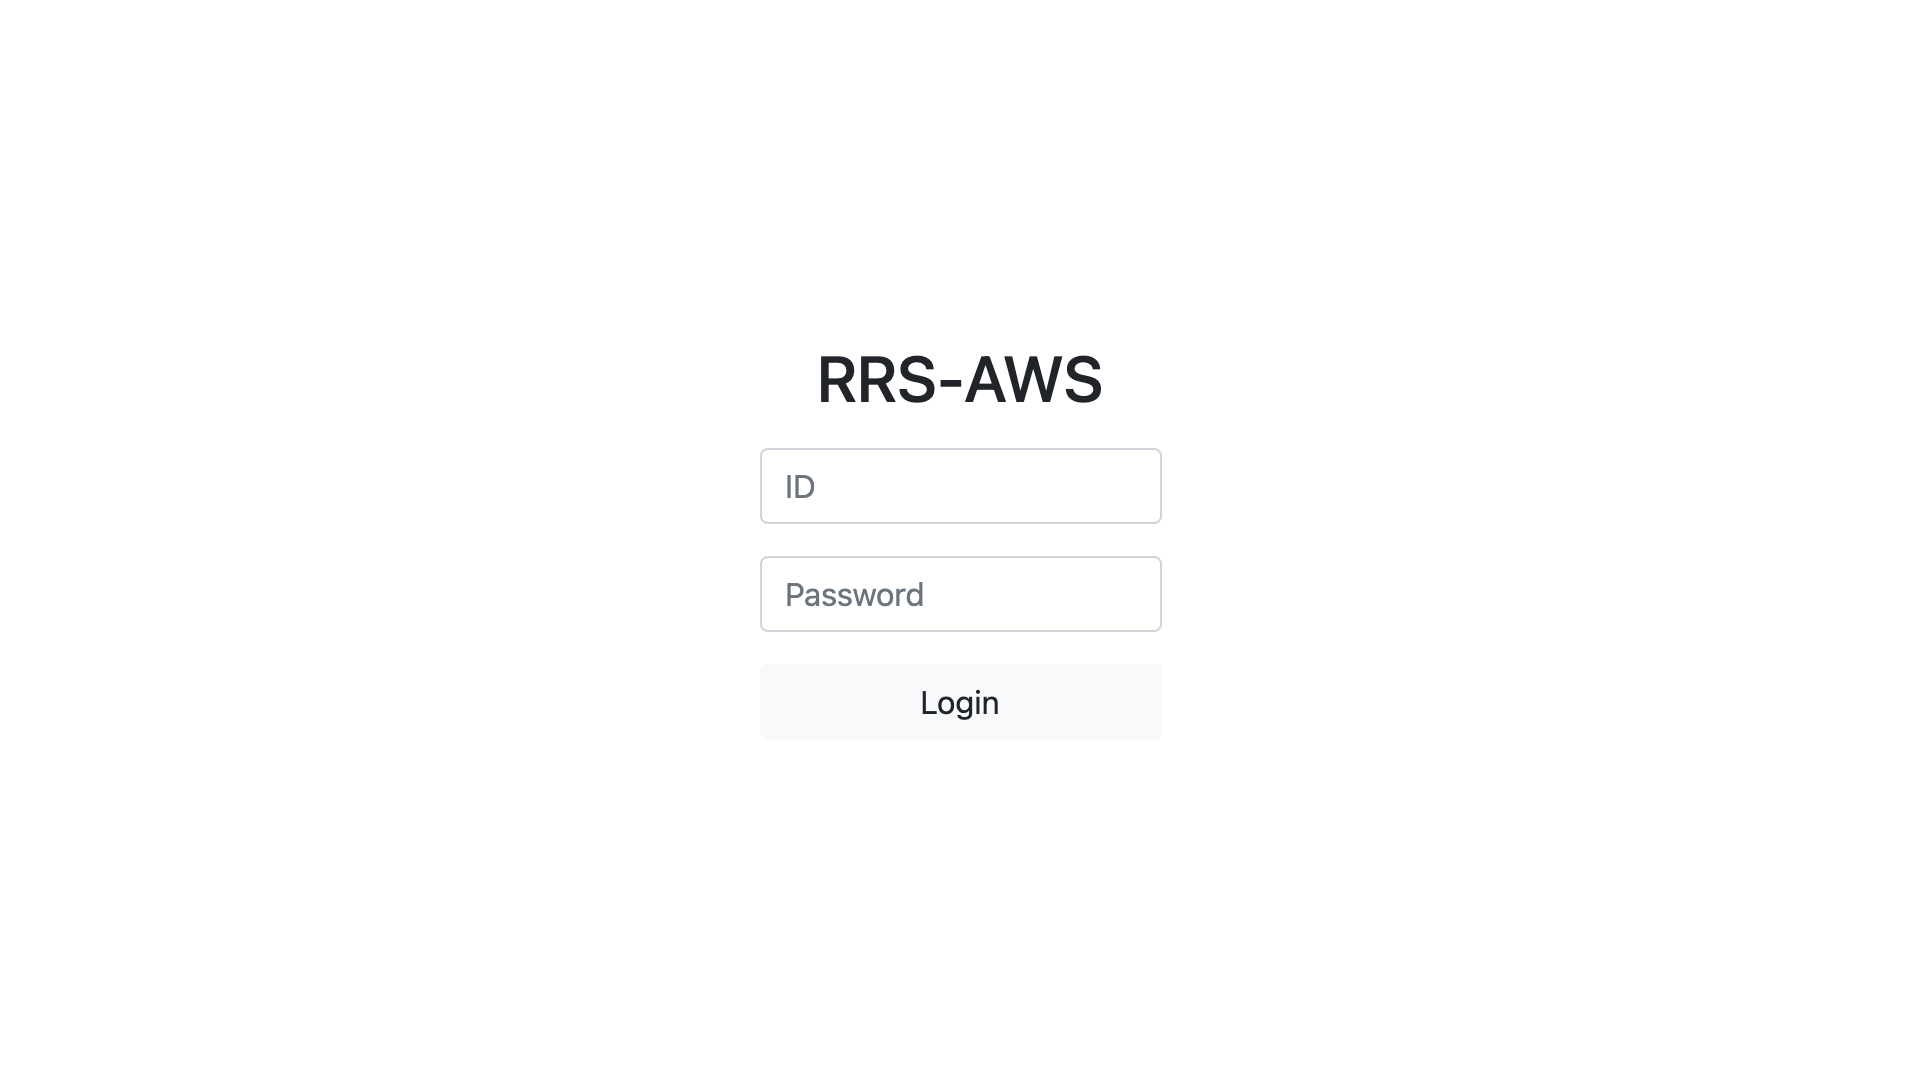
When you access RRS-AWS, the login screen will be displayed first.
Enter the ID and Password distributed to you by email, and click the Login button to log in.
After one hour, the system will time out and you will need to log in again.
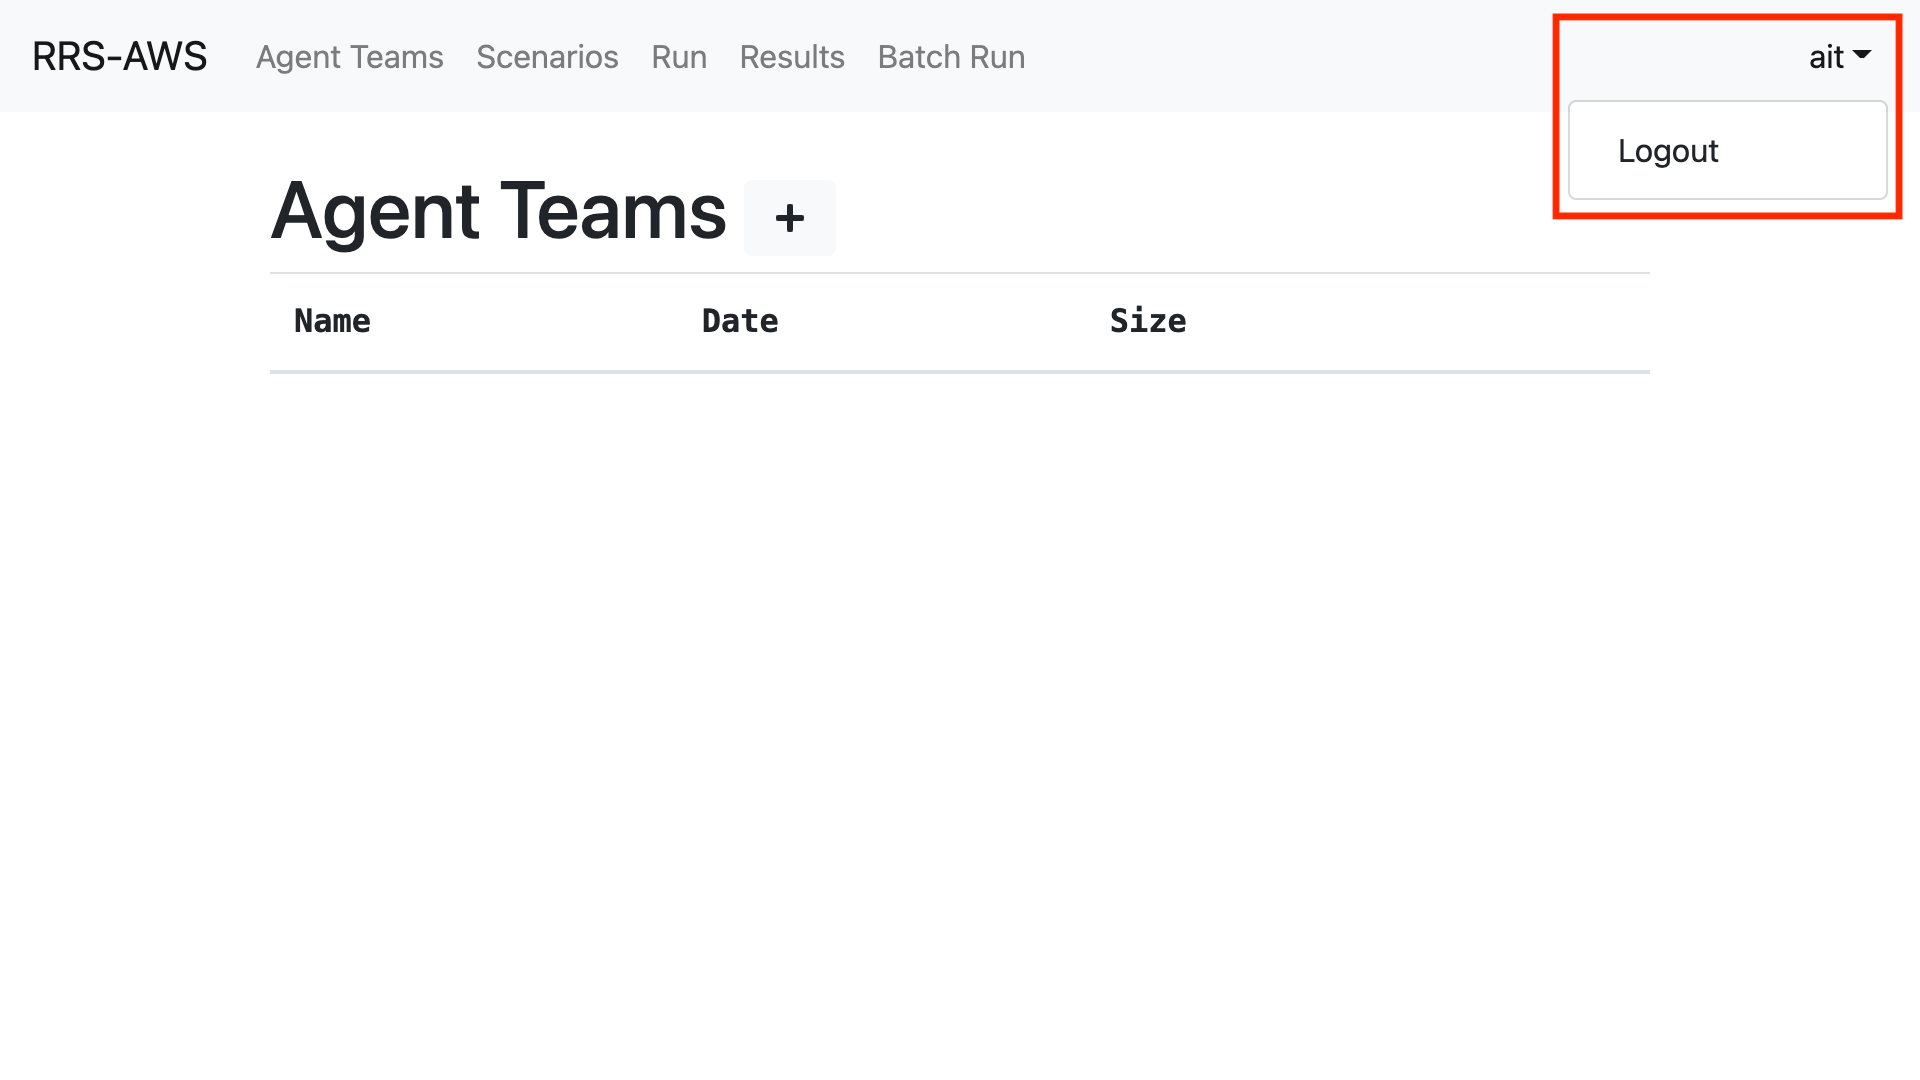
### Logout
If you want to log out, click on your account name in the upper right corner and then click Logout.
## Accounts
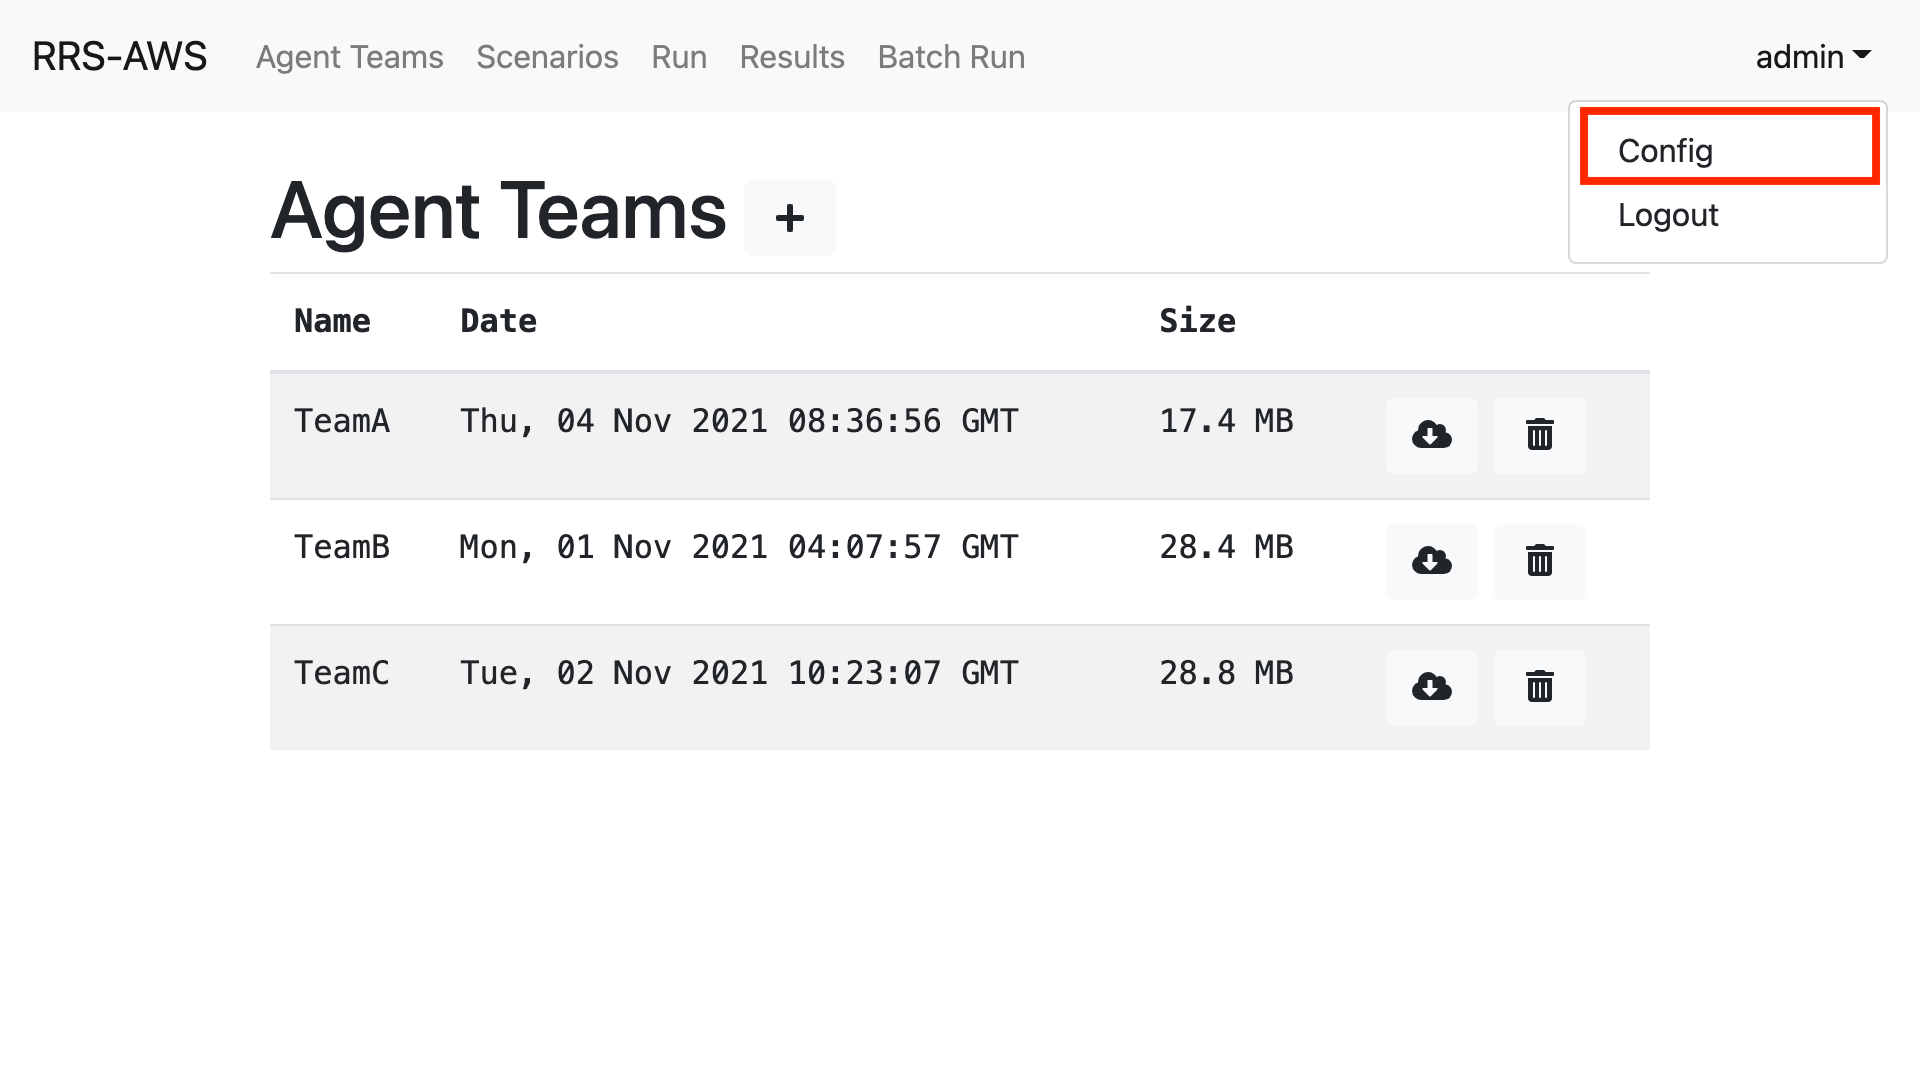
### Create Accounts
1. Click "Config" Button.
Click on your account name in the upper right corner and then click Config.
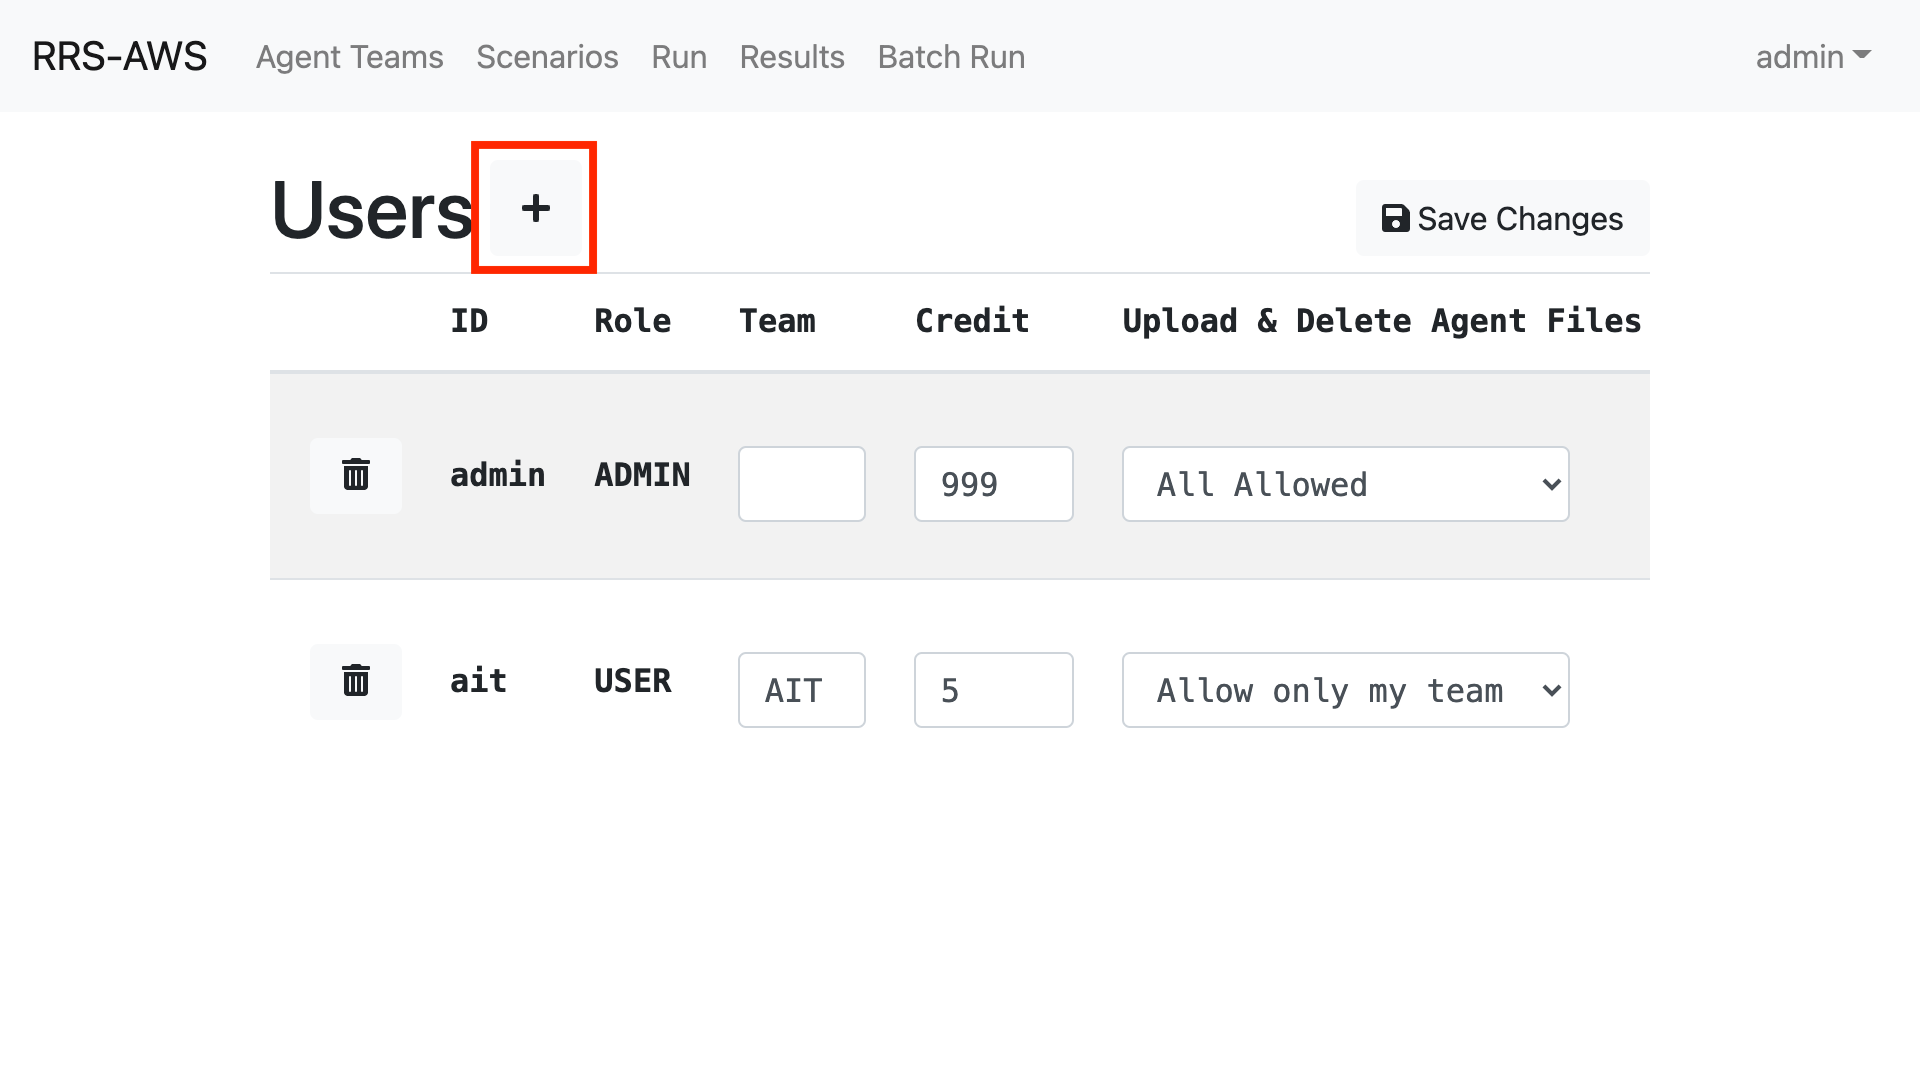
2. Click the + button
Click on the + button like in the red frame in the image.
3. Enter a new account information
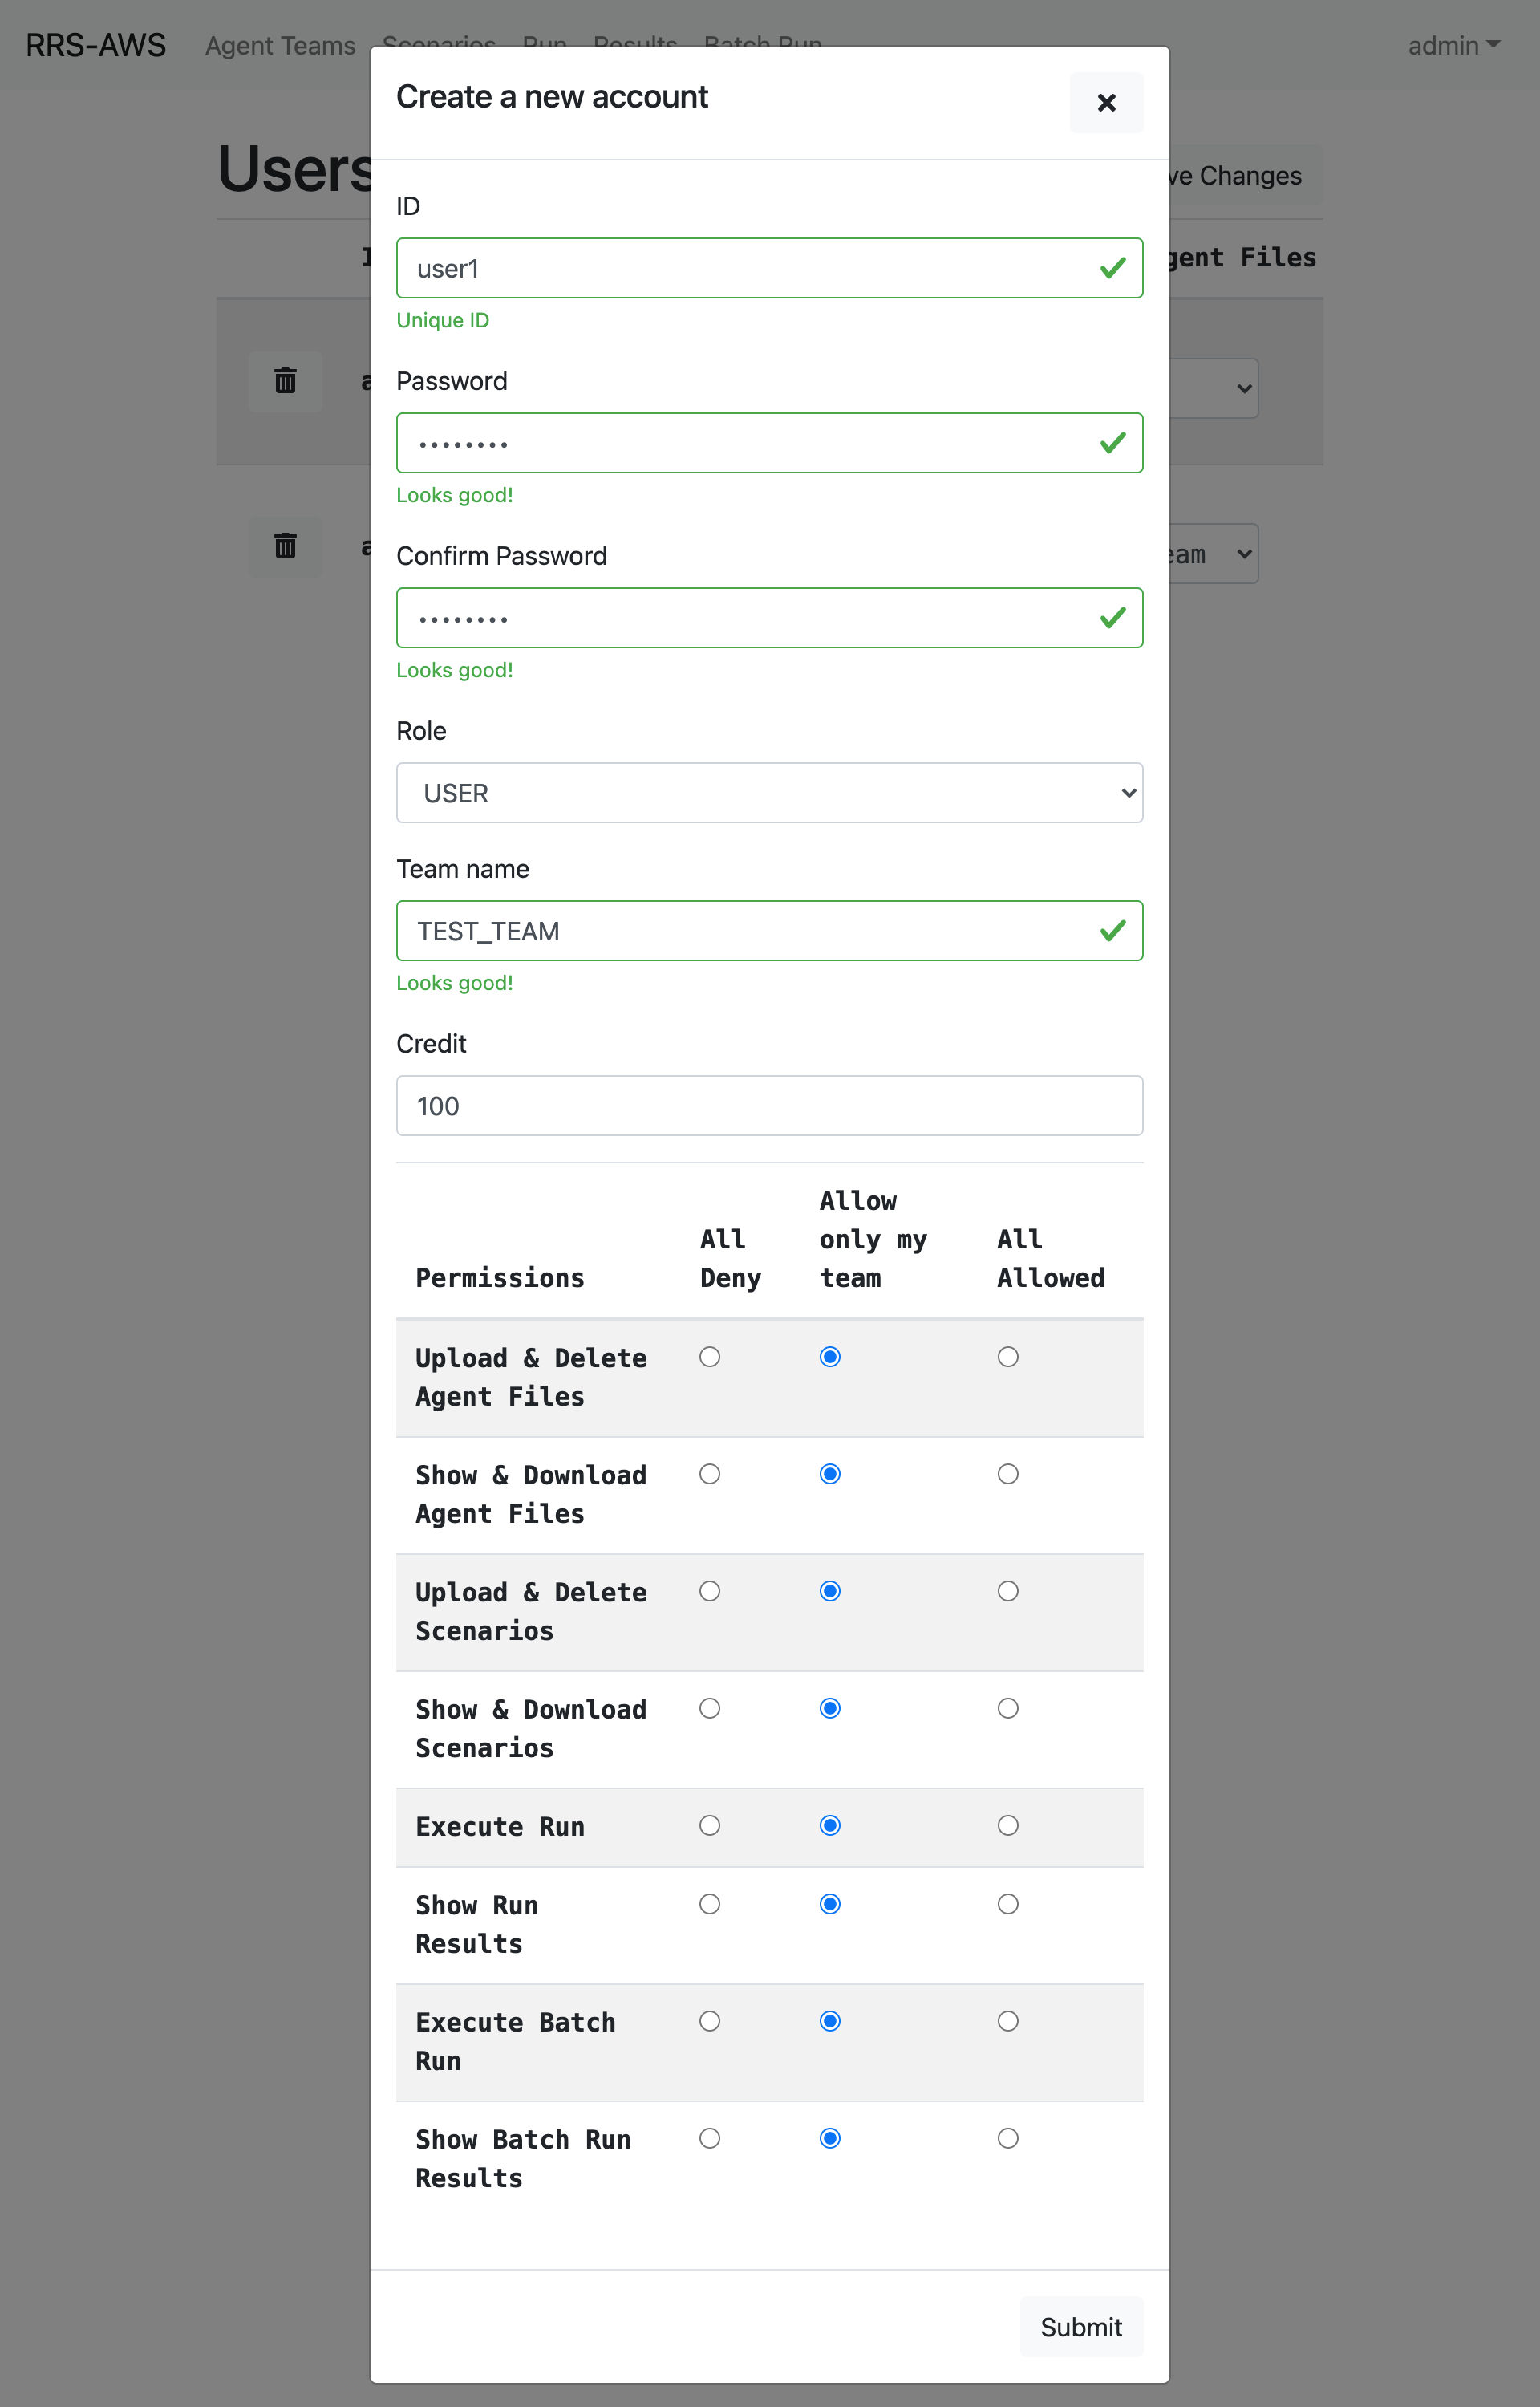
| Input field | Details |
| --------------- | ----------------------------------------------------------------------------------------------------------- |
| ID | This ID is required for login. The ID must be unique. |
| Password | Password is required for login. |
| Confim Password | Confim the password |
| Role | There are two types of Role: ADMIN and USER.<br>ADMIN can create accounts, but USER cannot create accounts. |
| Team name | Decide on a name for the team. |
| Credit | Set the number of times the simulation can be run. |
- Permissions
- All Deny
All will be denied.
- Allow only my team
- Upload
The file name will be [my team]_[file name].
- Execute
The simulation name will be [my team]_[file name].
- Delete
Only files named [my team]_[file name] can be delete
- Show
Only files named [my team]_[file name] can be see
- Download
Only files named [my team]_[file name] can be download
- All Allowed
All will be allowed.
4. Click Submit Button
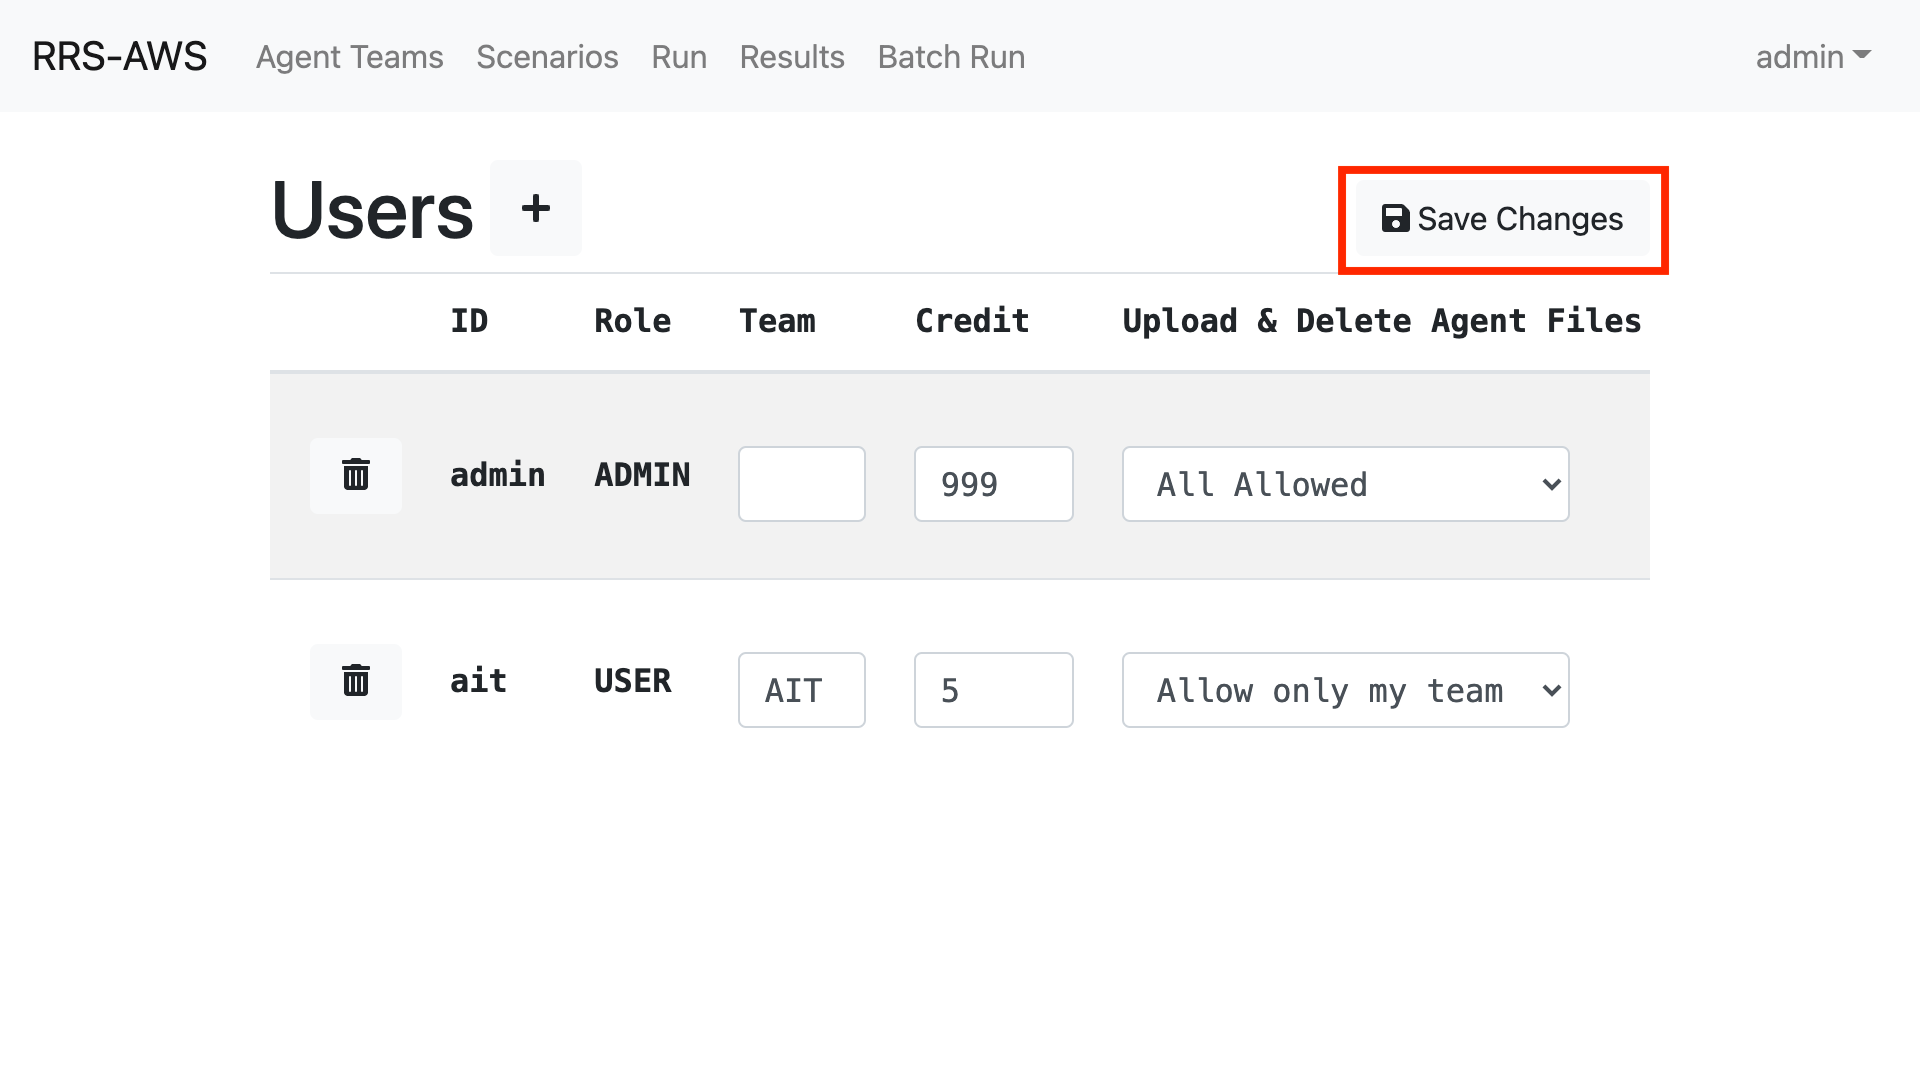
### Changes accounts
1. Change the items you want to change
2. Click "Save Changes" Button
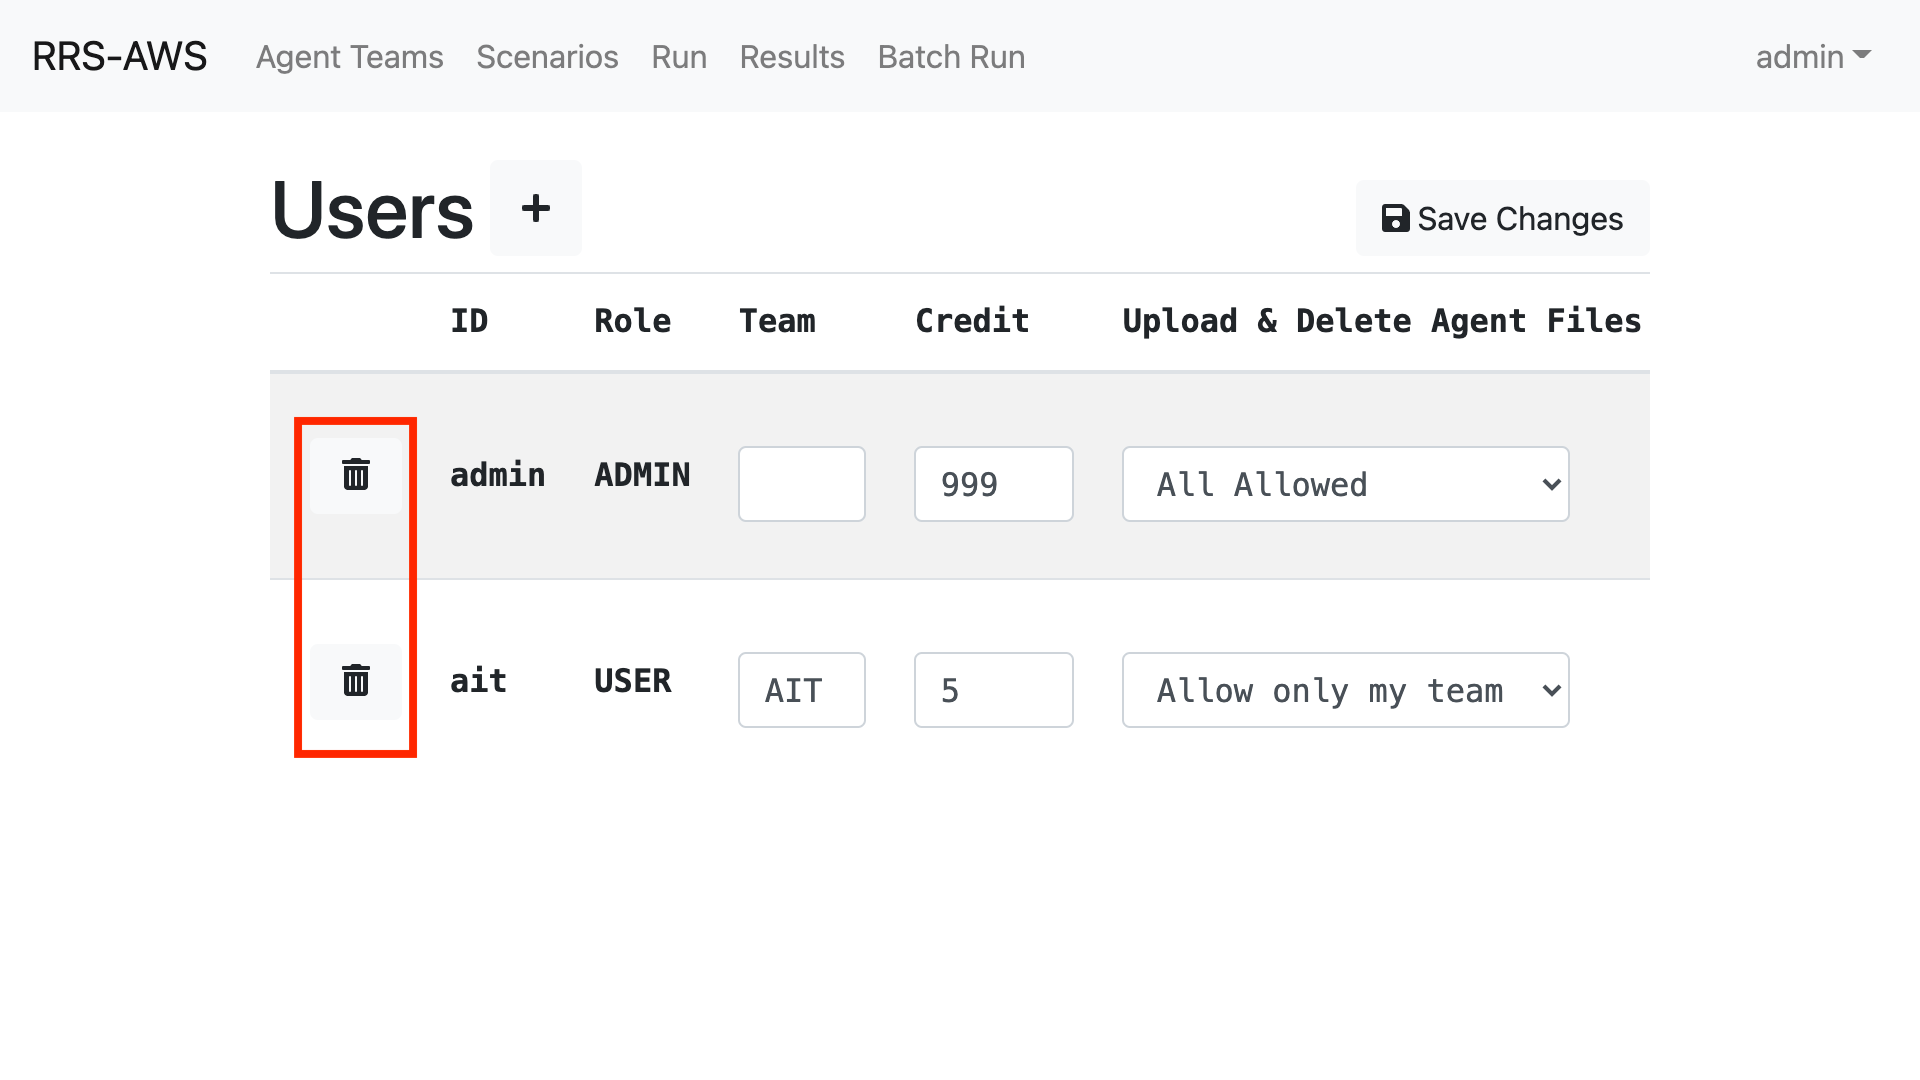
### Delete a account
Click the trash can button to the left of the account you want to delete
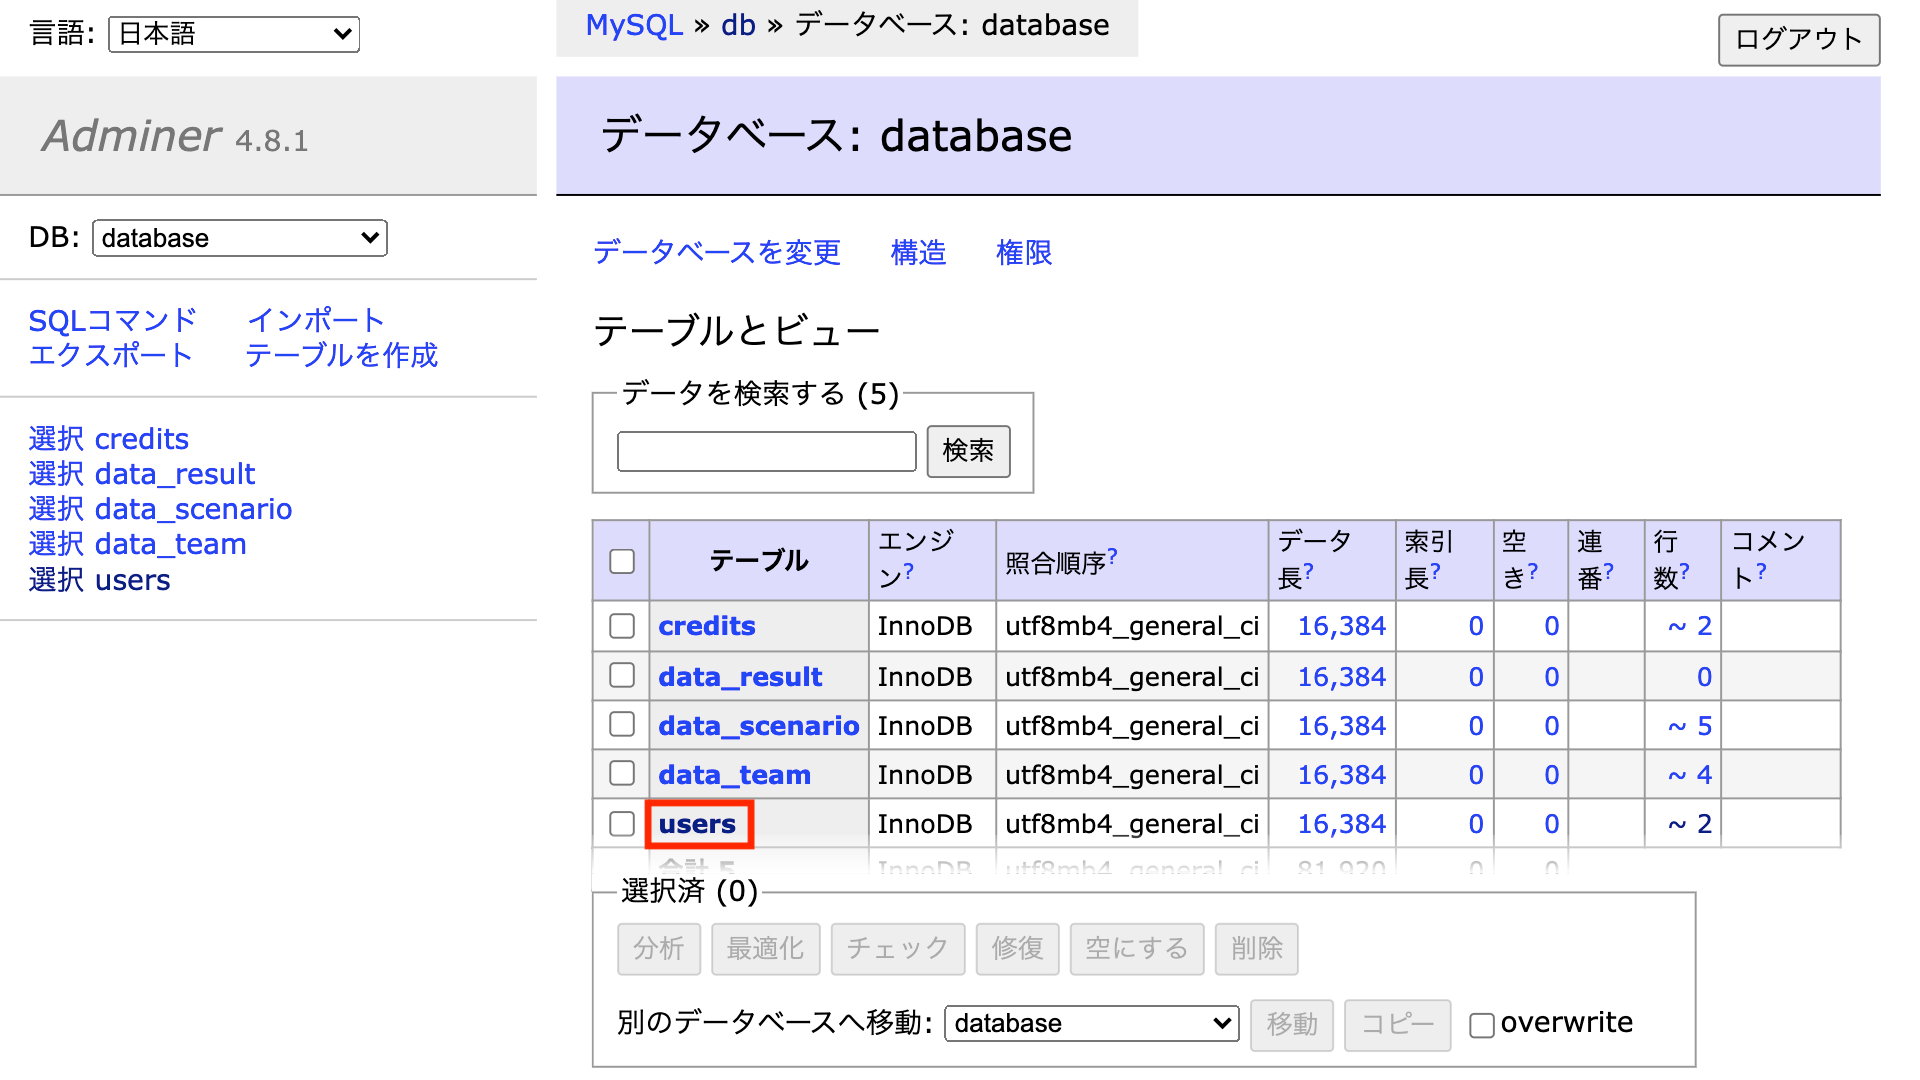
<!-- ## 権限変更
rrs-aws-ui-dockerが起動しているならば、各アカウントの権限をいつでも自由に変更することができます。
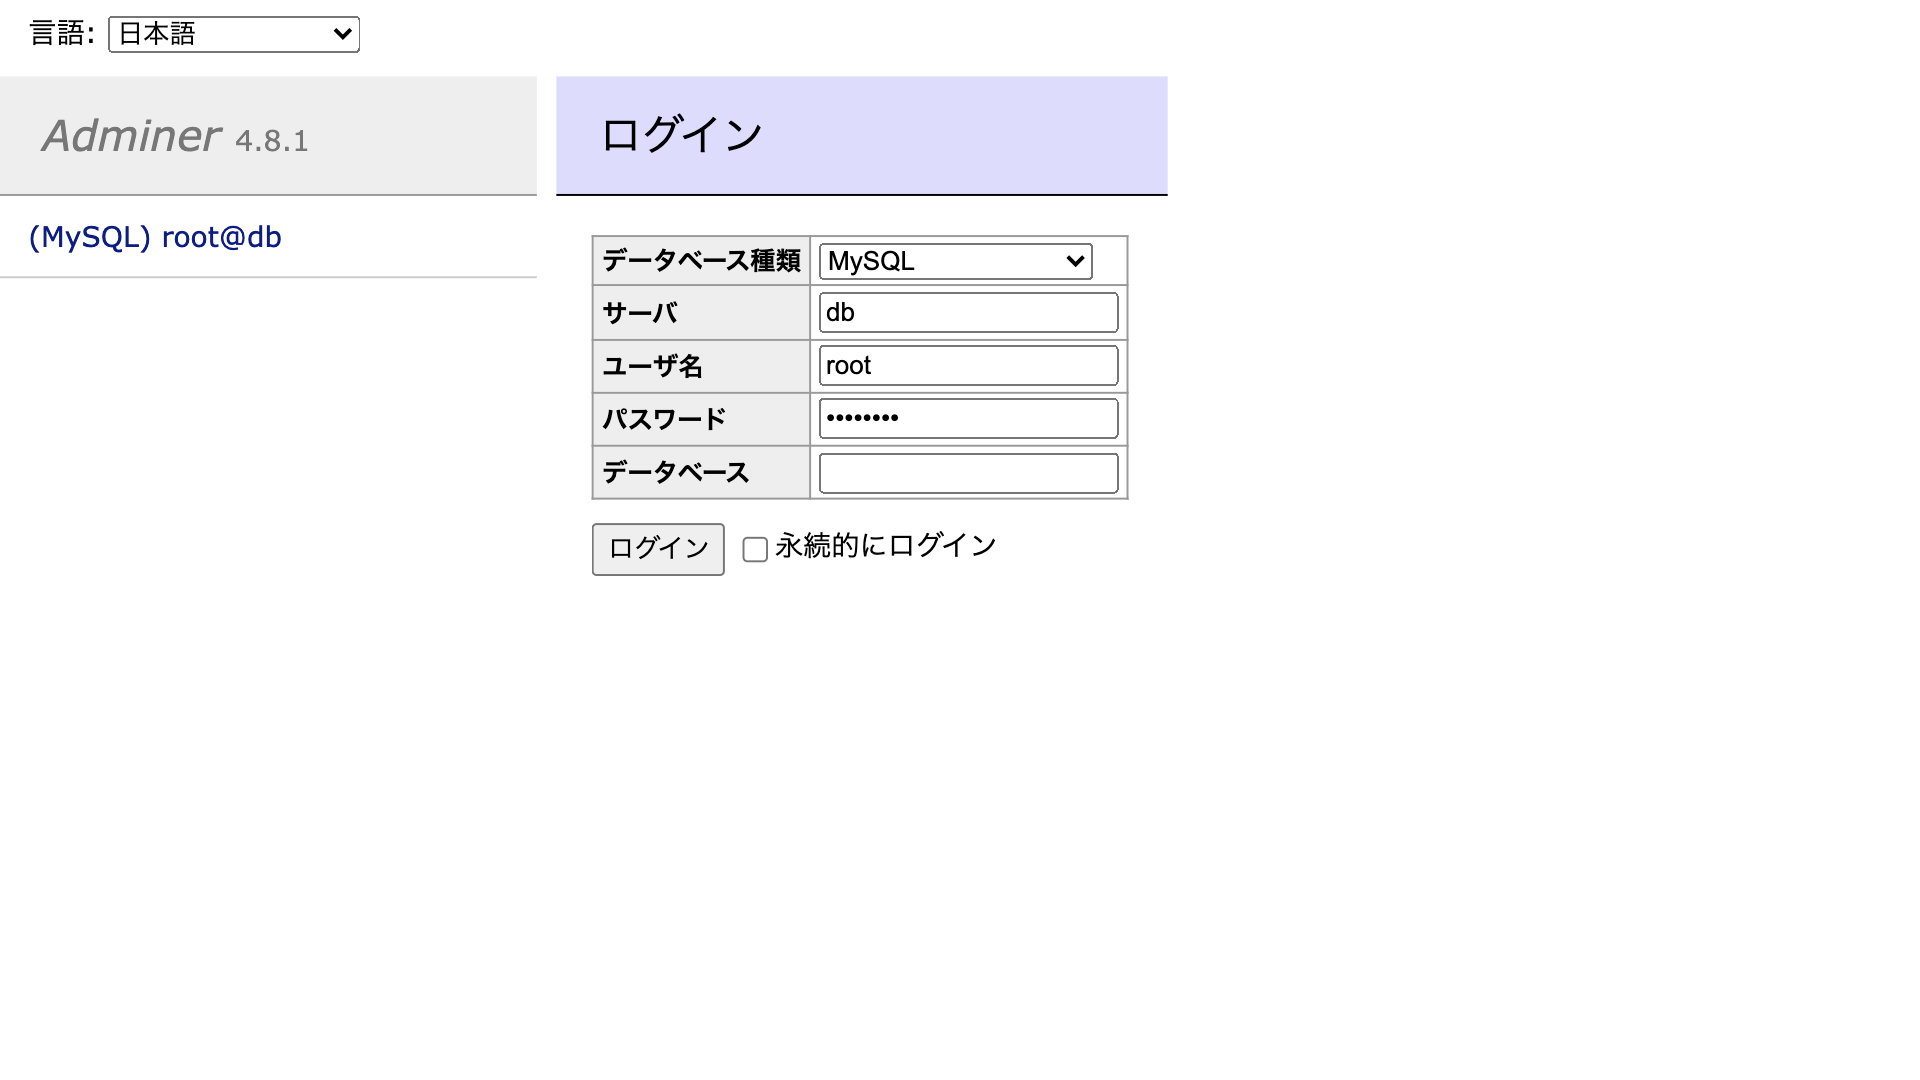
1. 任意のブラウザで <rrs-aws-ui-dockerのURL>:8080 にアクセス
2. ログイン
ID:root
PS:[環境構築](#環境構築)で変更したパスワード
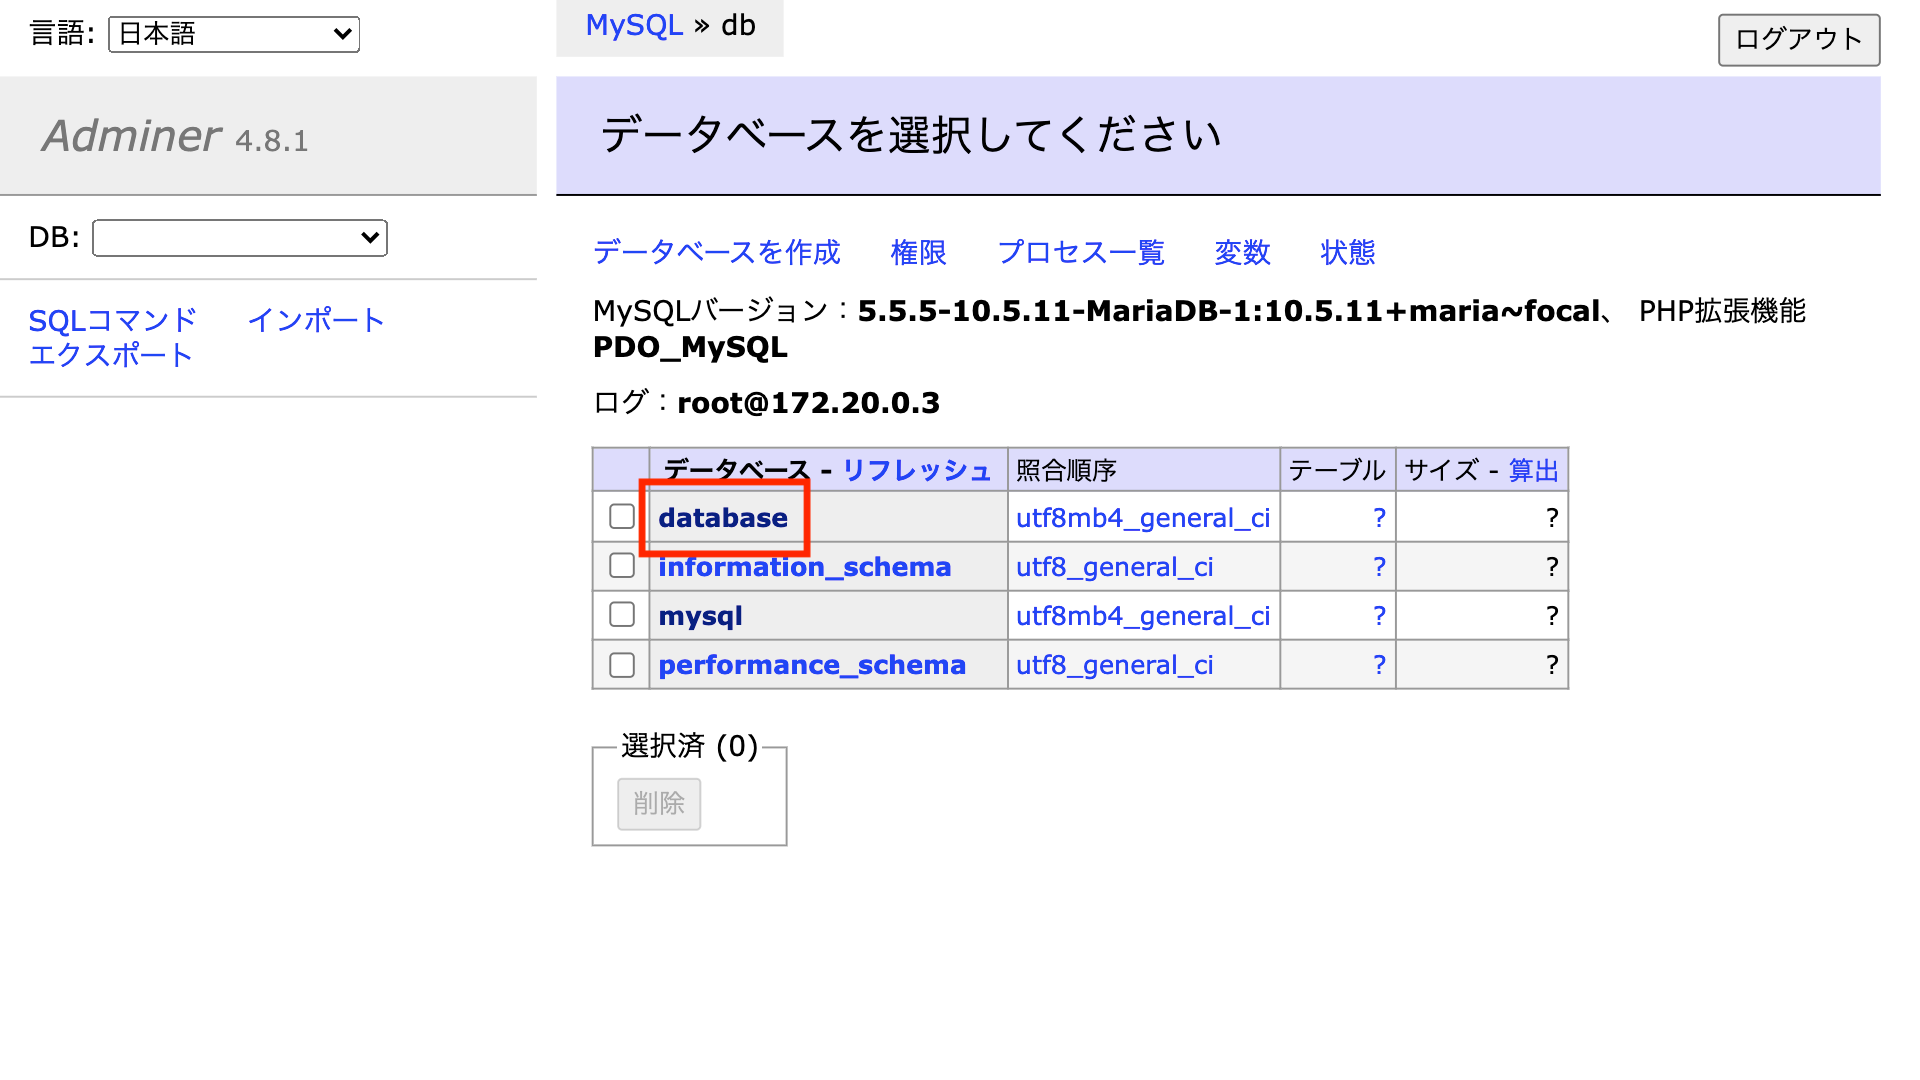
3. データベースを選択
databaseを選択してください
4. テーブルを選択
usersを選択してください
5. データを選択
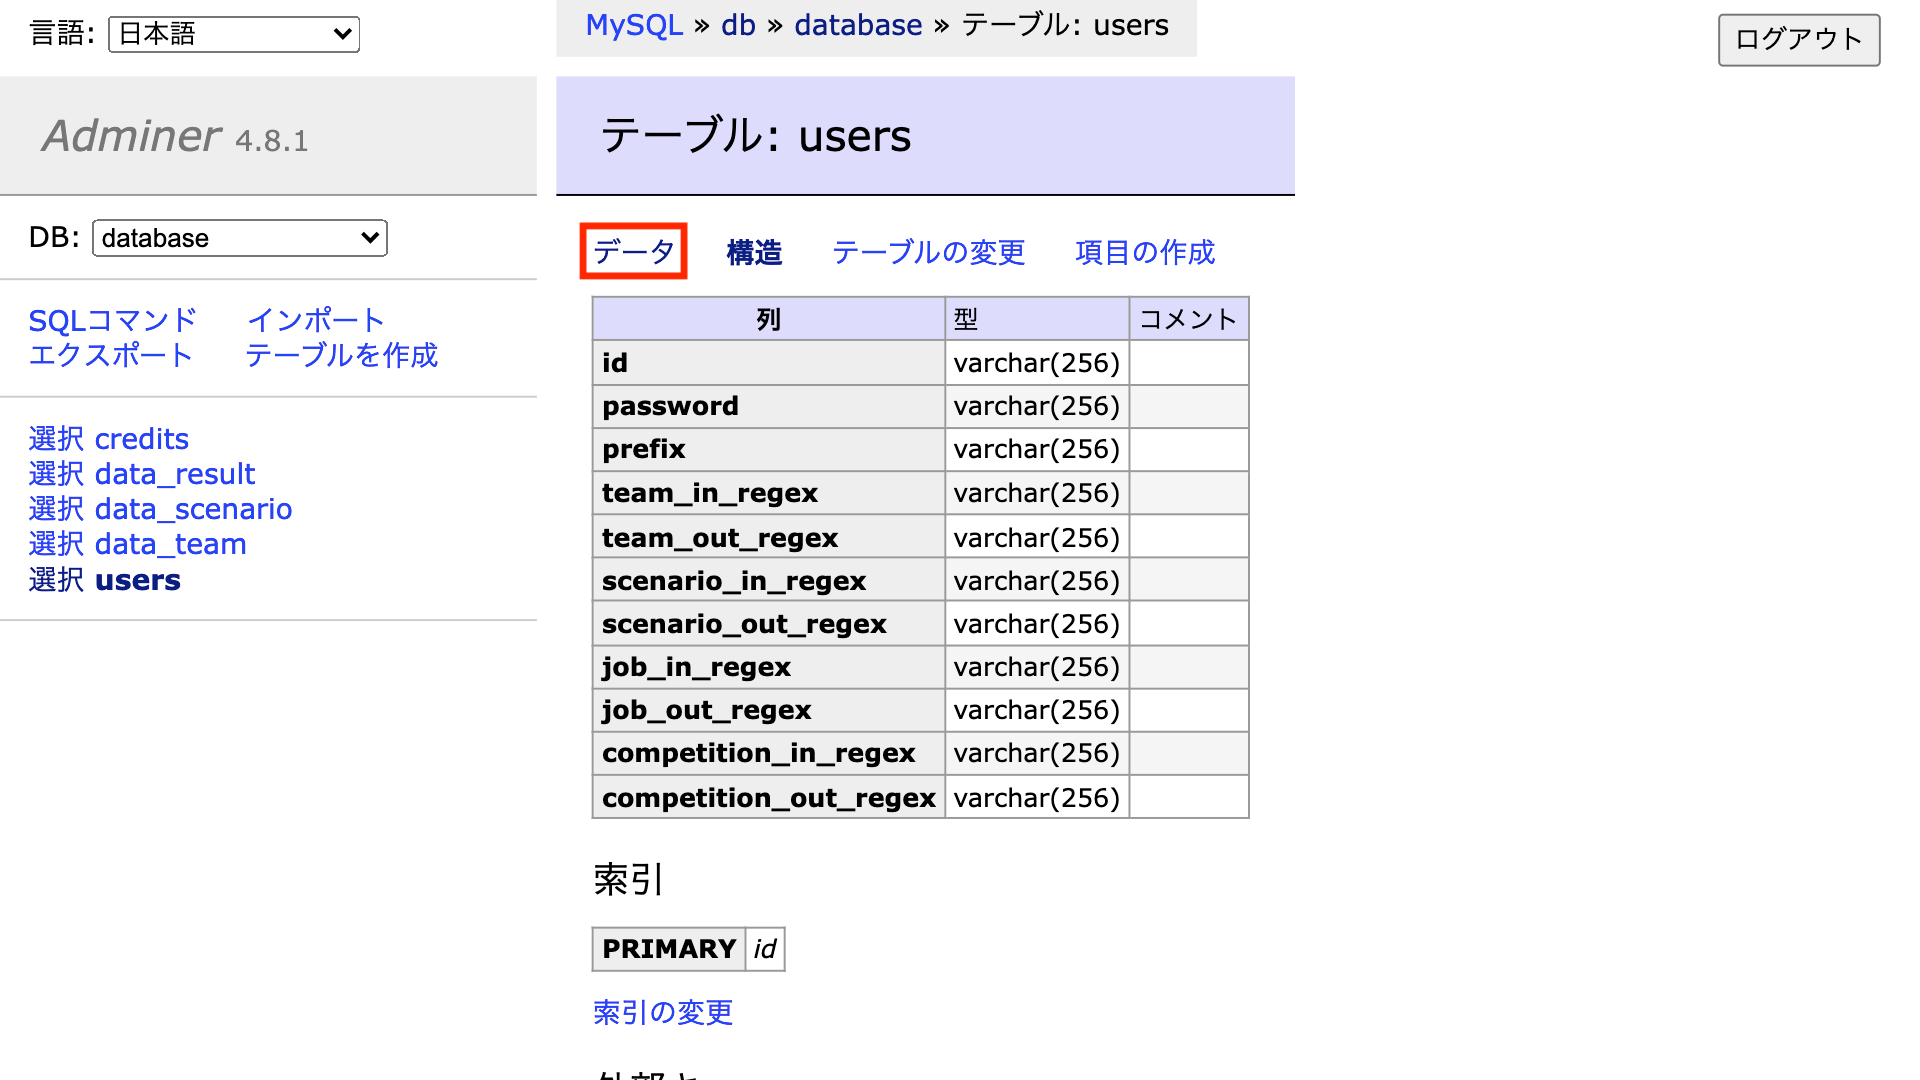
6. データを編集
左上の修正をクリックして必要な部分を修正してください。
修正し終わったら左下の保存ボタンをクリックして修正部分を保存してください。

-->
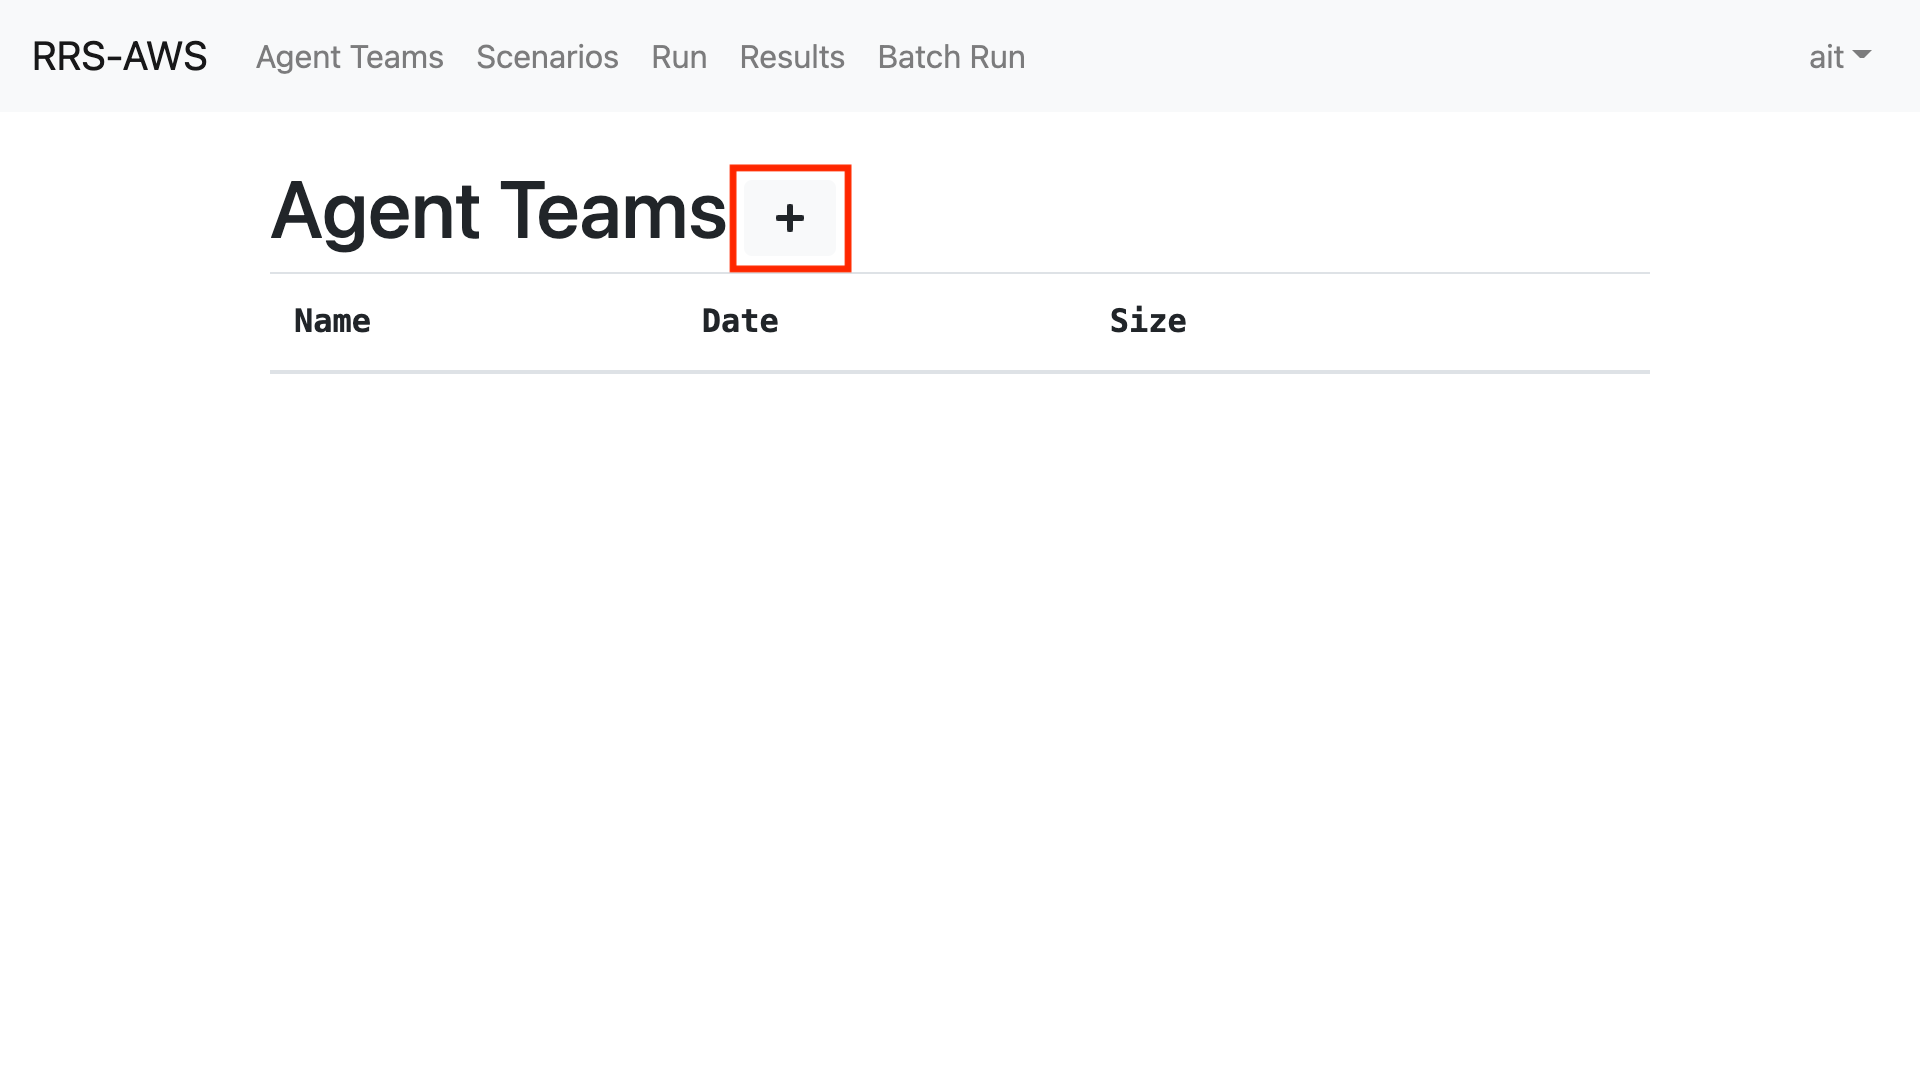
## Agent Submission
You can go to the agent submission page by clicking Agent Teams in the navigation bar.
::: warning
If more than one agent file has been uploaded, the last agent file uploaded will be used for the competition.
:::
### Uploading Agents
1. Check and zip the agent file
Please make sure that your agent file contains at least the following files, and then zip it.
```
ex) [any name].zip
.
├── config
│ ├── module.cfg
│ └── ...
├── data
│ └── develop.json
├── library
│ └── team
│ └── ...
└── src
└── [any name]
└── ...
```
::: info
You can name the zip file whatever you want.
:::
2. Click the + button
Click on the + button like in the red frame in the image.
3. Select the agent file
Click the "Select File" button and select the agent file you just zipped.
::: warning
If an agent file with the same name has already been uploaded, it will be overwritten.
:::
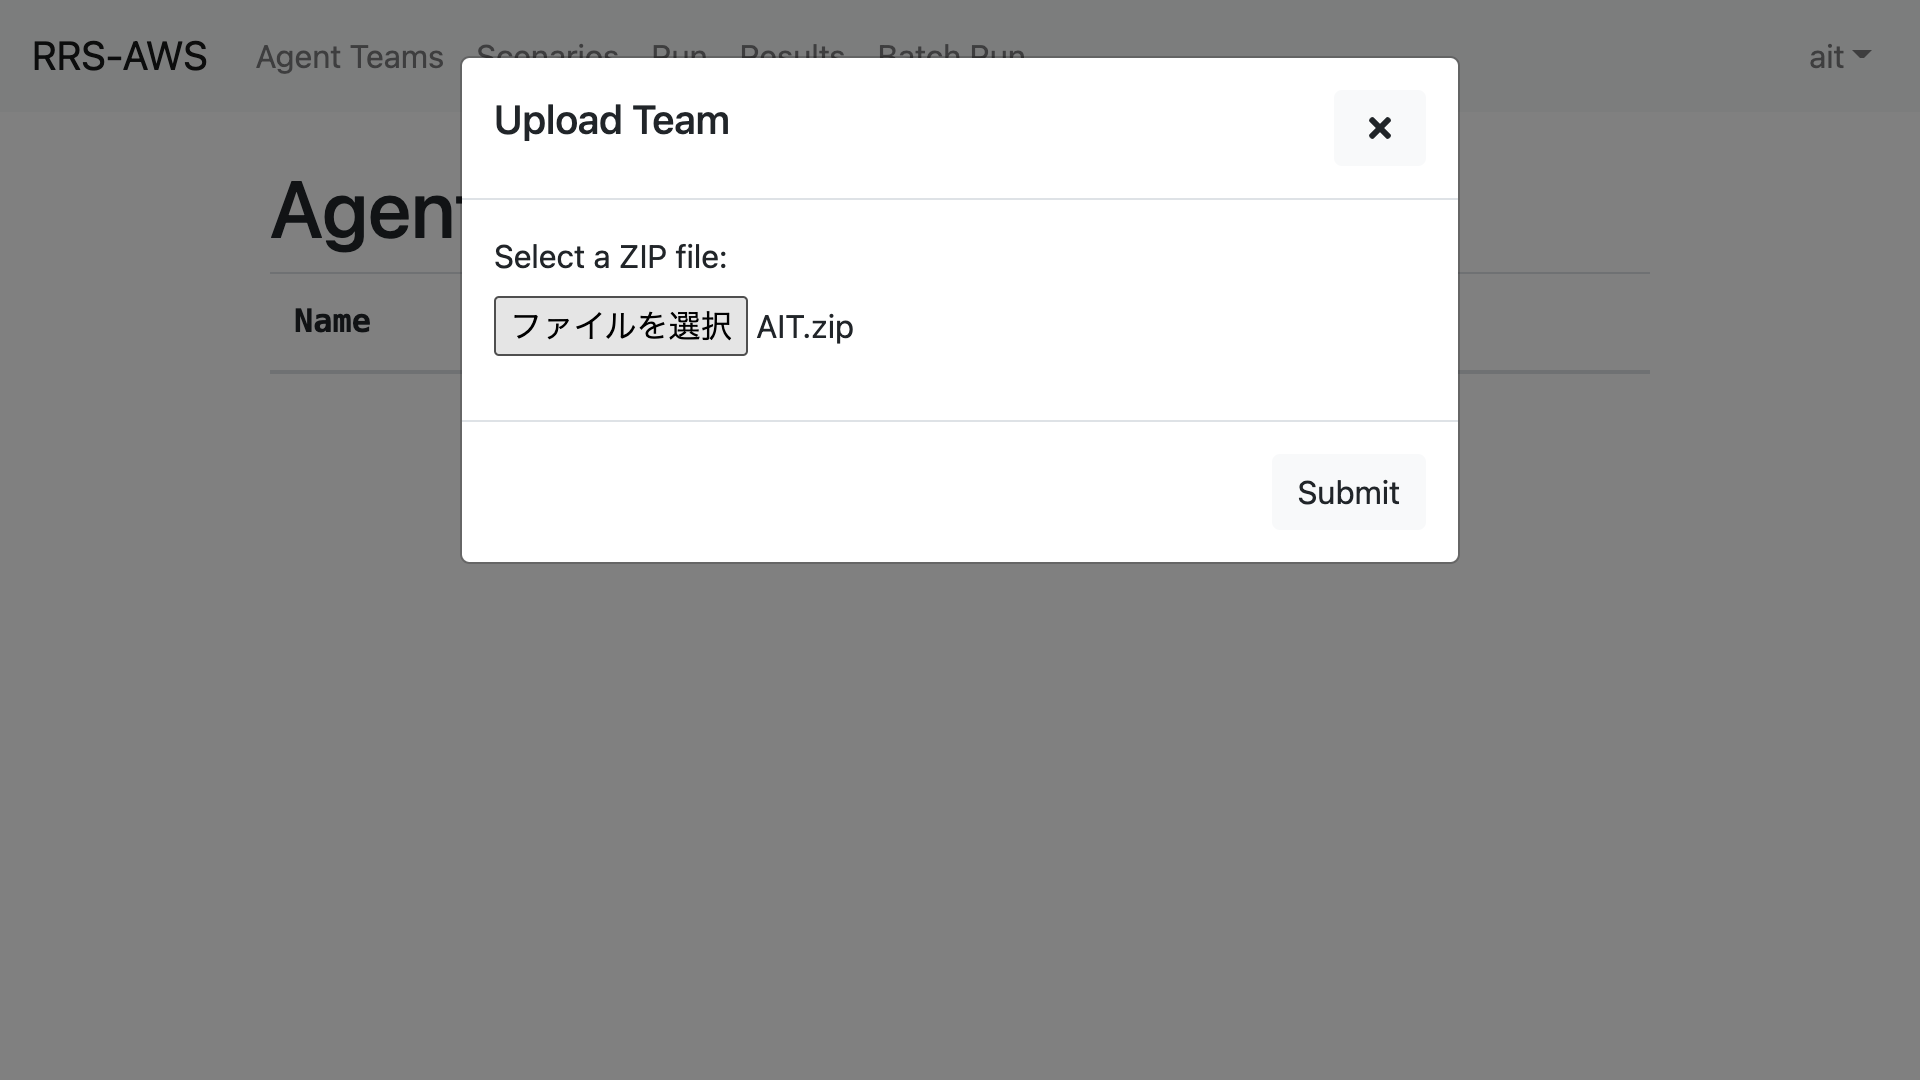
4. Click the Submit button
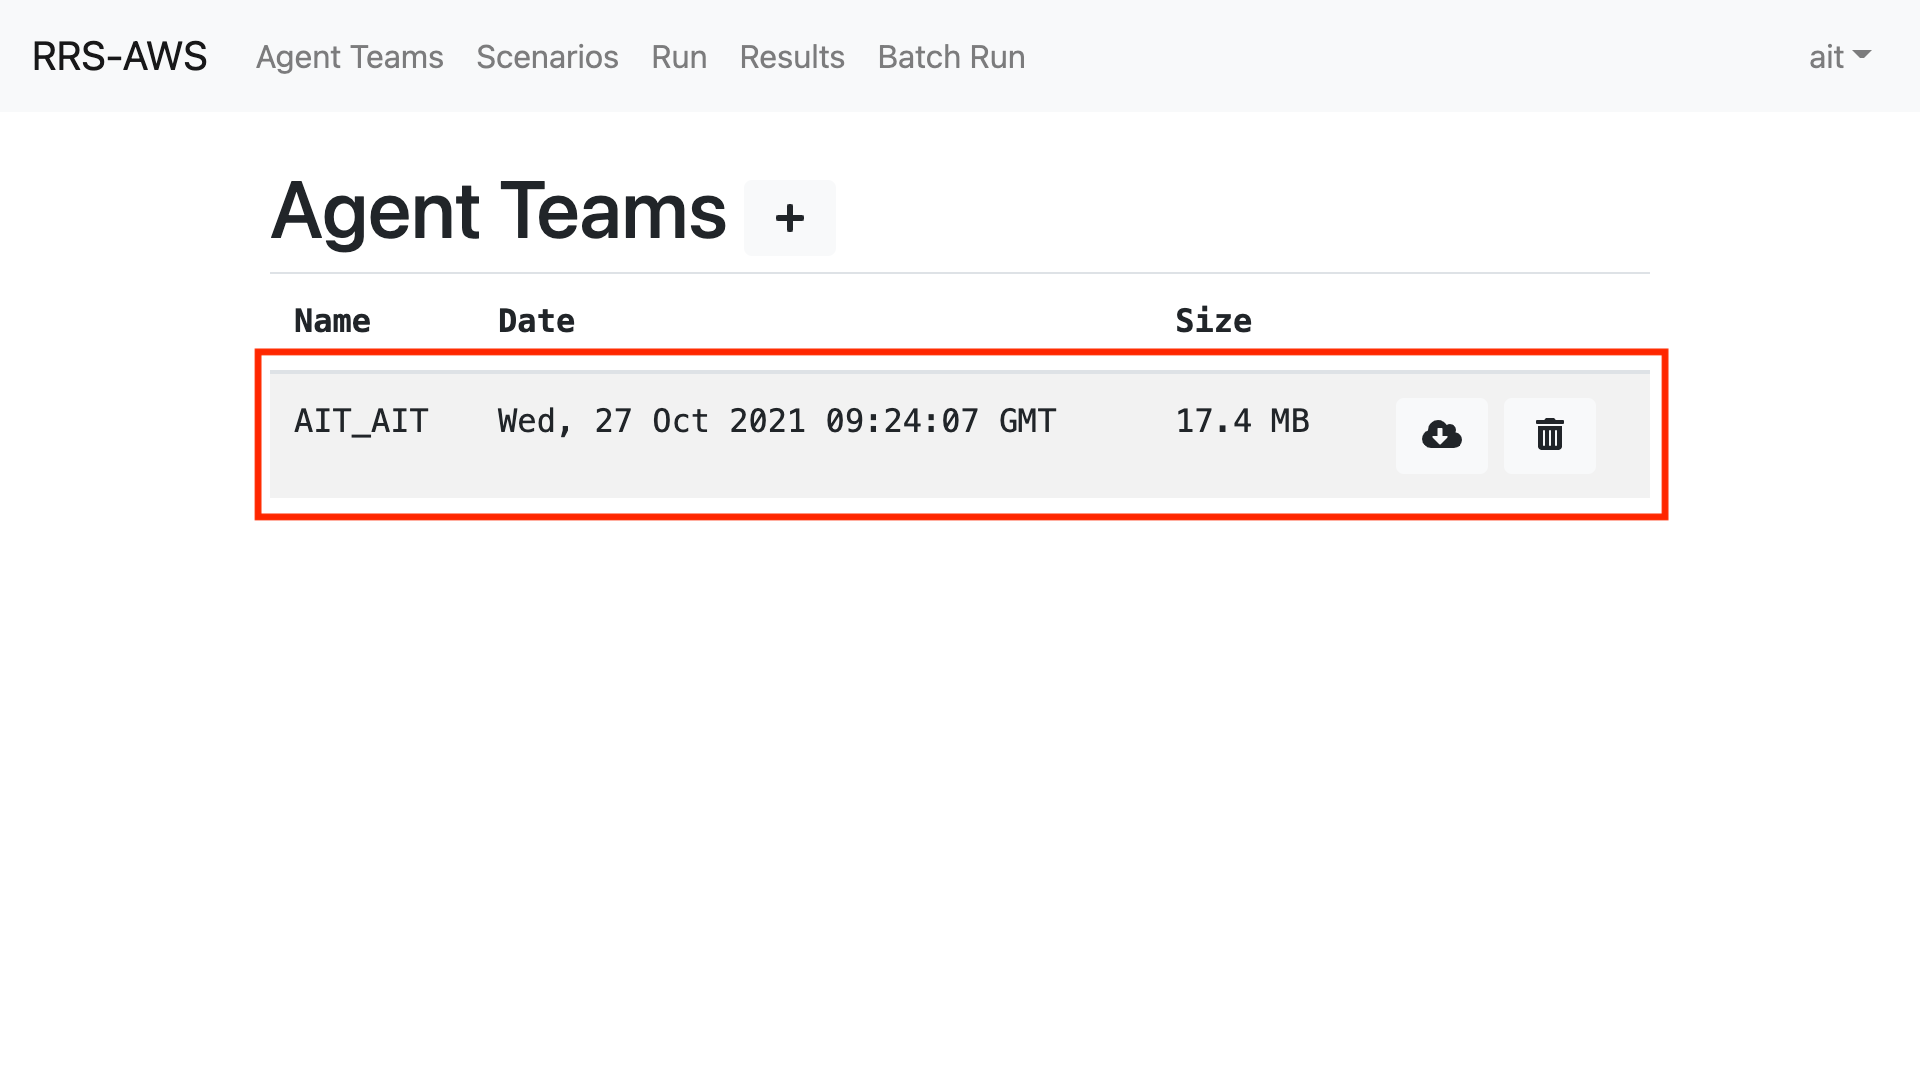
5. Confirm the upload
Make sure that your file has been uploaded correctly.
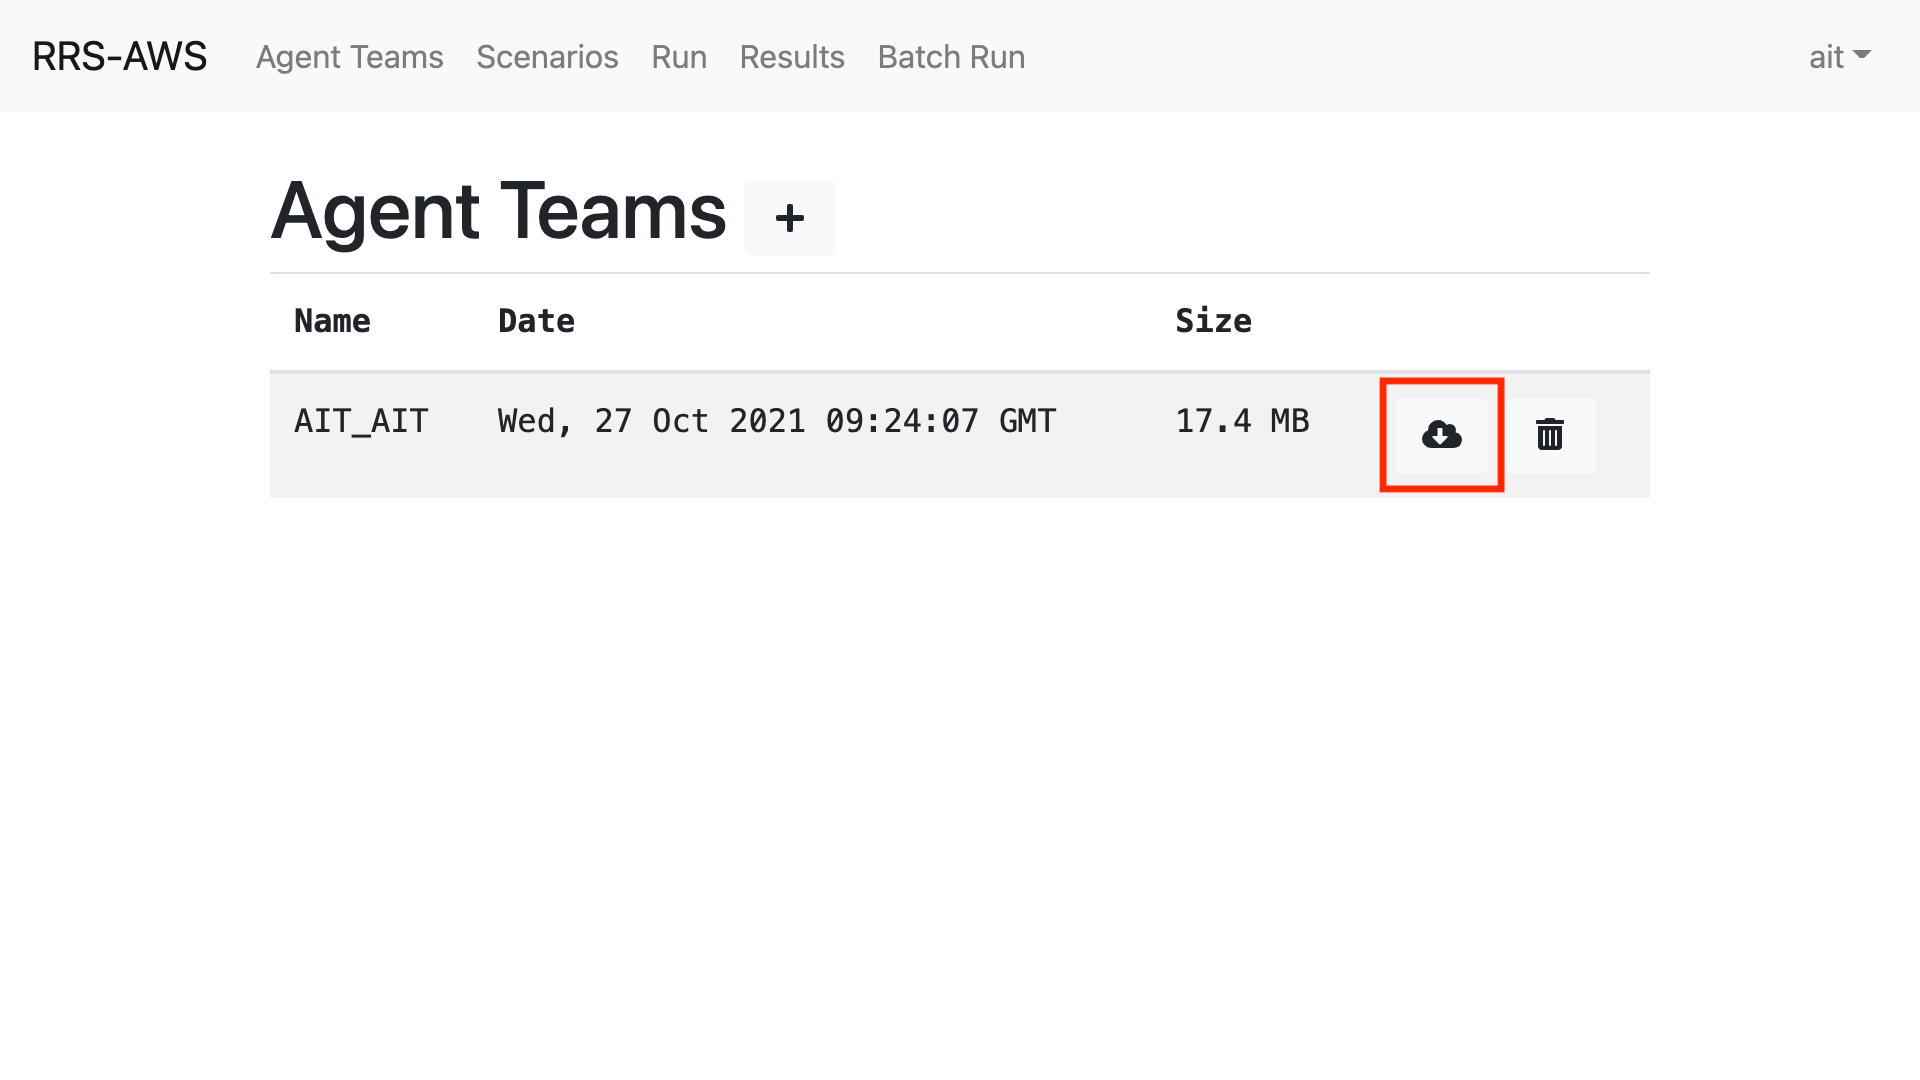
### Download the agent file
Click on the download icon in the red frame in the image to download the agent file.
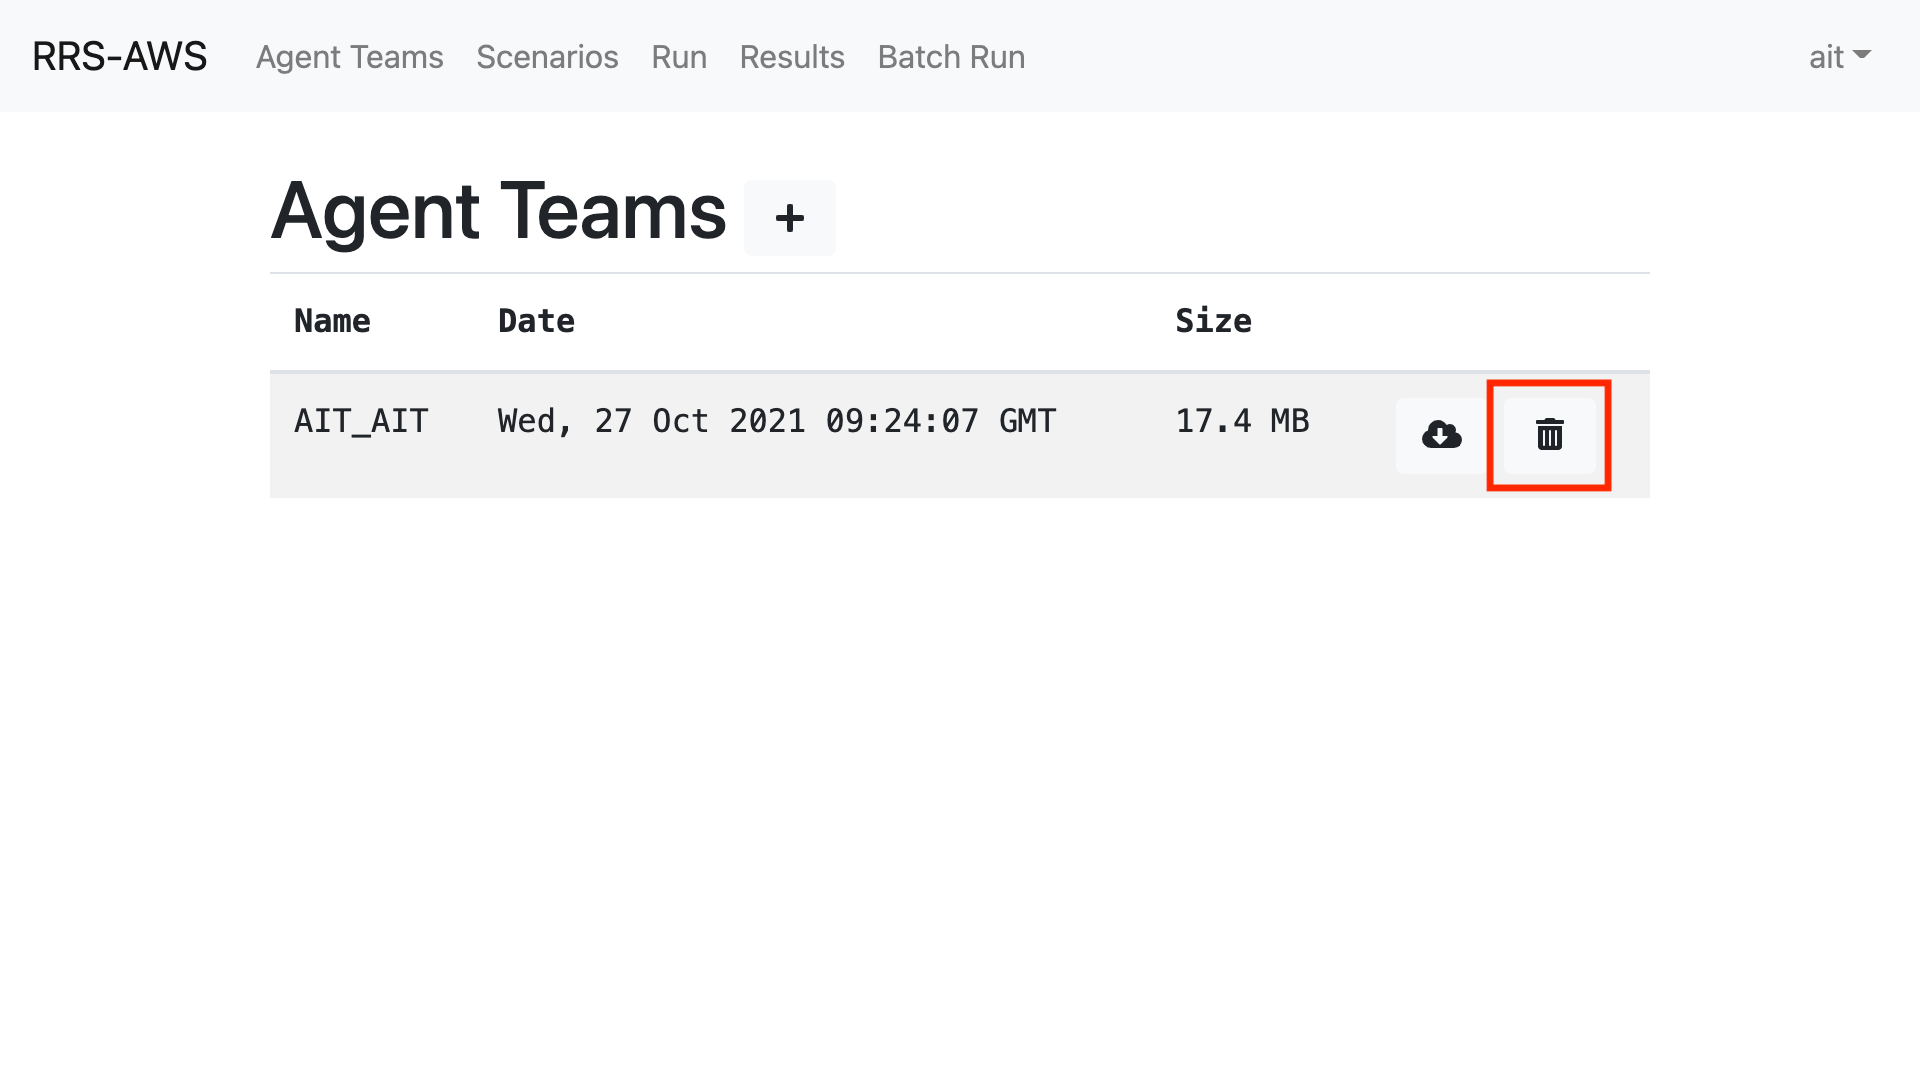
### Deleting the agent file
Click the trash can icon like in the red frame in the image to delete the agent file.
## Scenario
You can go to the Scenario Management page by clicking Scenario in the navigation bar.
### Uploading Scenarios
1. ZIP your scenario file
After making sure that the necessary files are included, please zip the file.
```
例) berlin.zip
.
├── config
│ ├── civilian.cfg
│ ├── clear.cfg
│ ├── collapse.cfg
│ ├── common.cfg
│ ├── comms
│ │ ├── comms-01-full.cfg
│ │ ├── comms-02-unreliable.cfg
│ │ ├── comms-03-mixed.cfg
│ │ ├── comms-04-many.cfg
│ │ ├── comms-05-medium.cfg
│ │ ├── comms-06-none.cfg
│ │ └── very-limited.cfg
│ ├── comms.cfg
│ ├── generator.cfg
│ ├── gis.cfg
│ ├── ignition.cfg
│ ├── kernel-inline.cfg
│ ├── kernel.cfg
│ ├── logviewer.cfg
│ ├── misc.cfg
│ ├── perception.cfg
│ ├── resq-fire.cfg
│ ├── sample-agents.cfg
│ ├── score.cfg
│ ├── traffic3.cfg
│ ├── types.cfg
│ └── viewer.cfg
└── map
├── map.gml
└── scenario.xml
```
::: info
You can name the zip file whatever you like, but since it will be shown to the competitors, we recommend that you use a name that is easy to understand, such as the name of the city.
:::
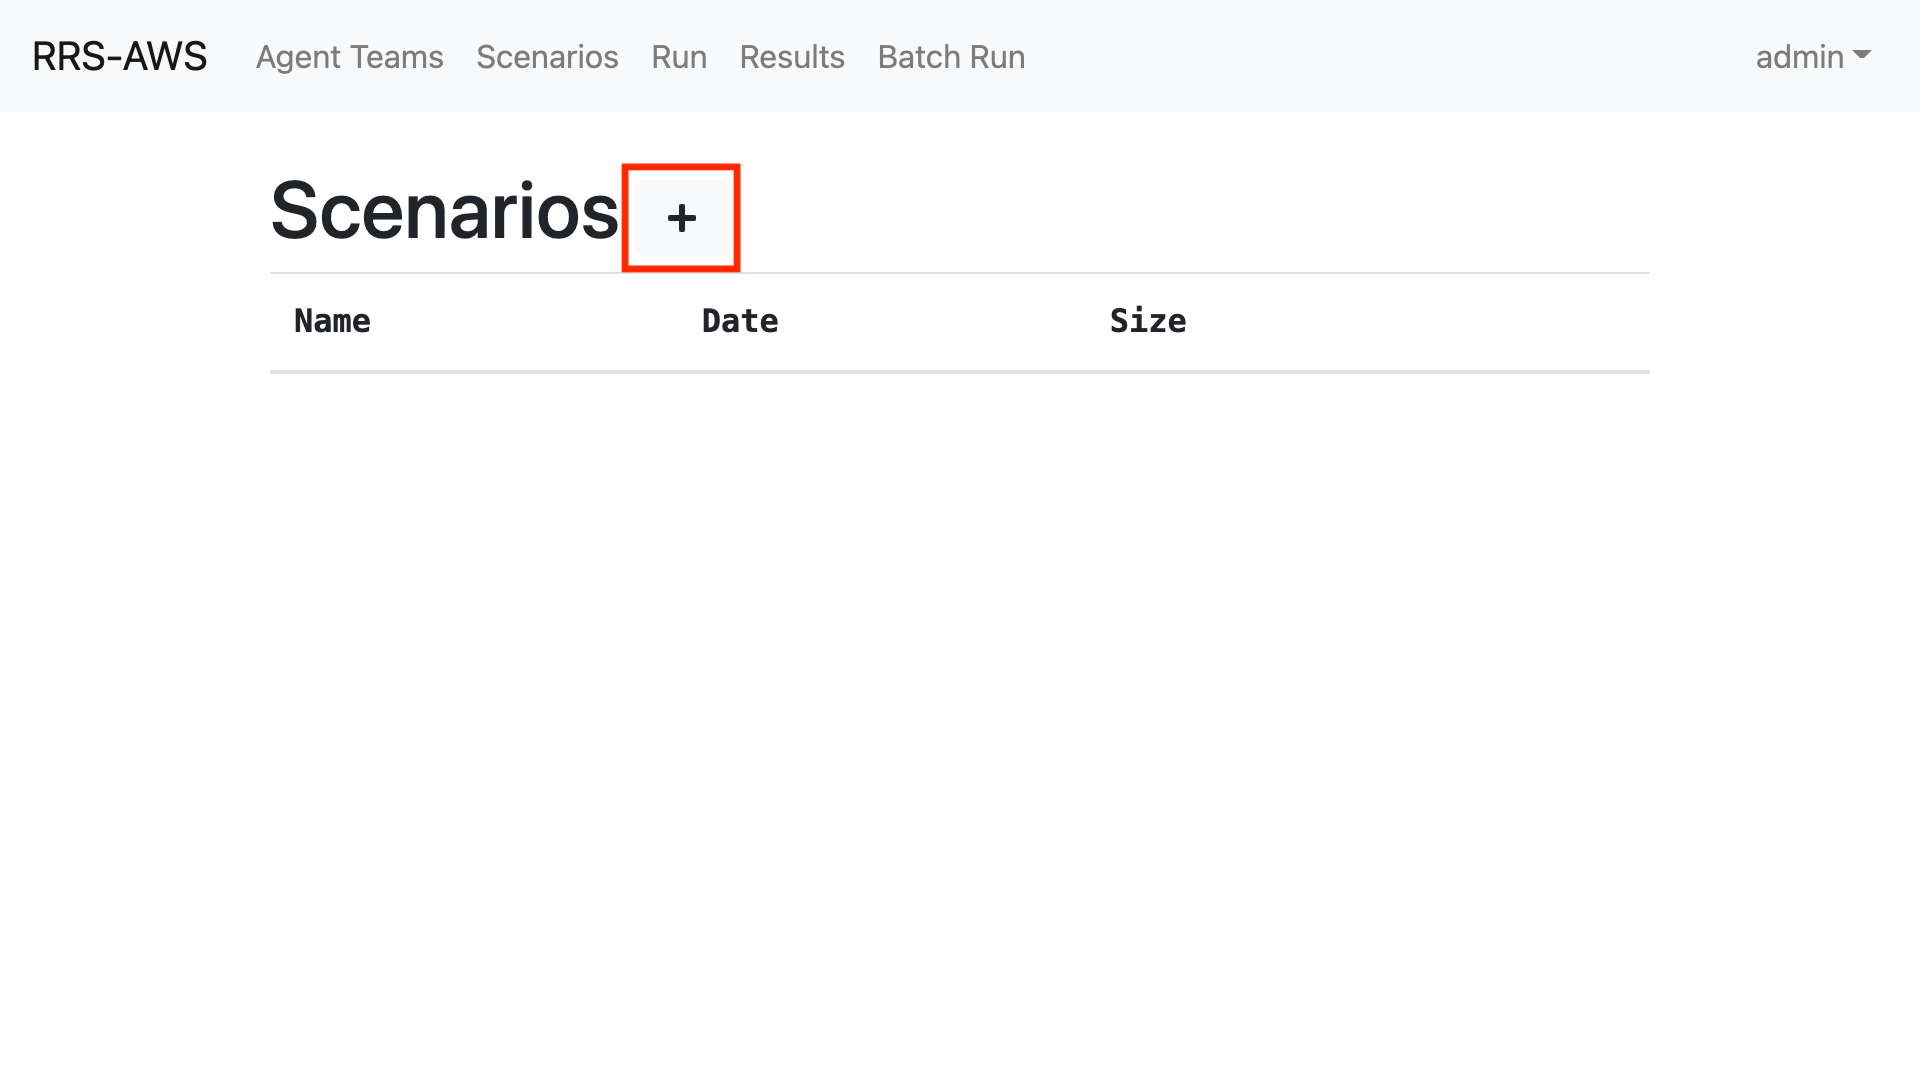
2. Click the + button
Click the + button like in the red frame in the image.
3. Select a scenario file
Click the Select File button and select the agent file you want to upload.
::: warning
If a scenario file with the same name has already been uploaded, it will be overwritten.
:::
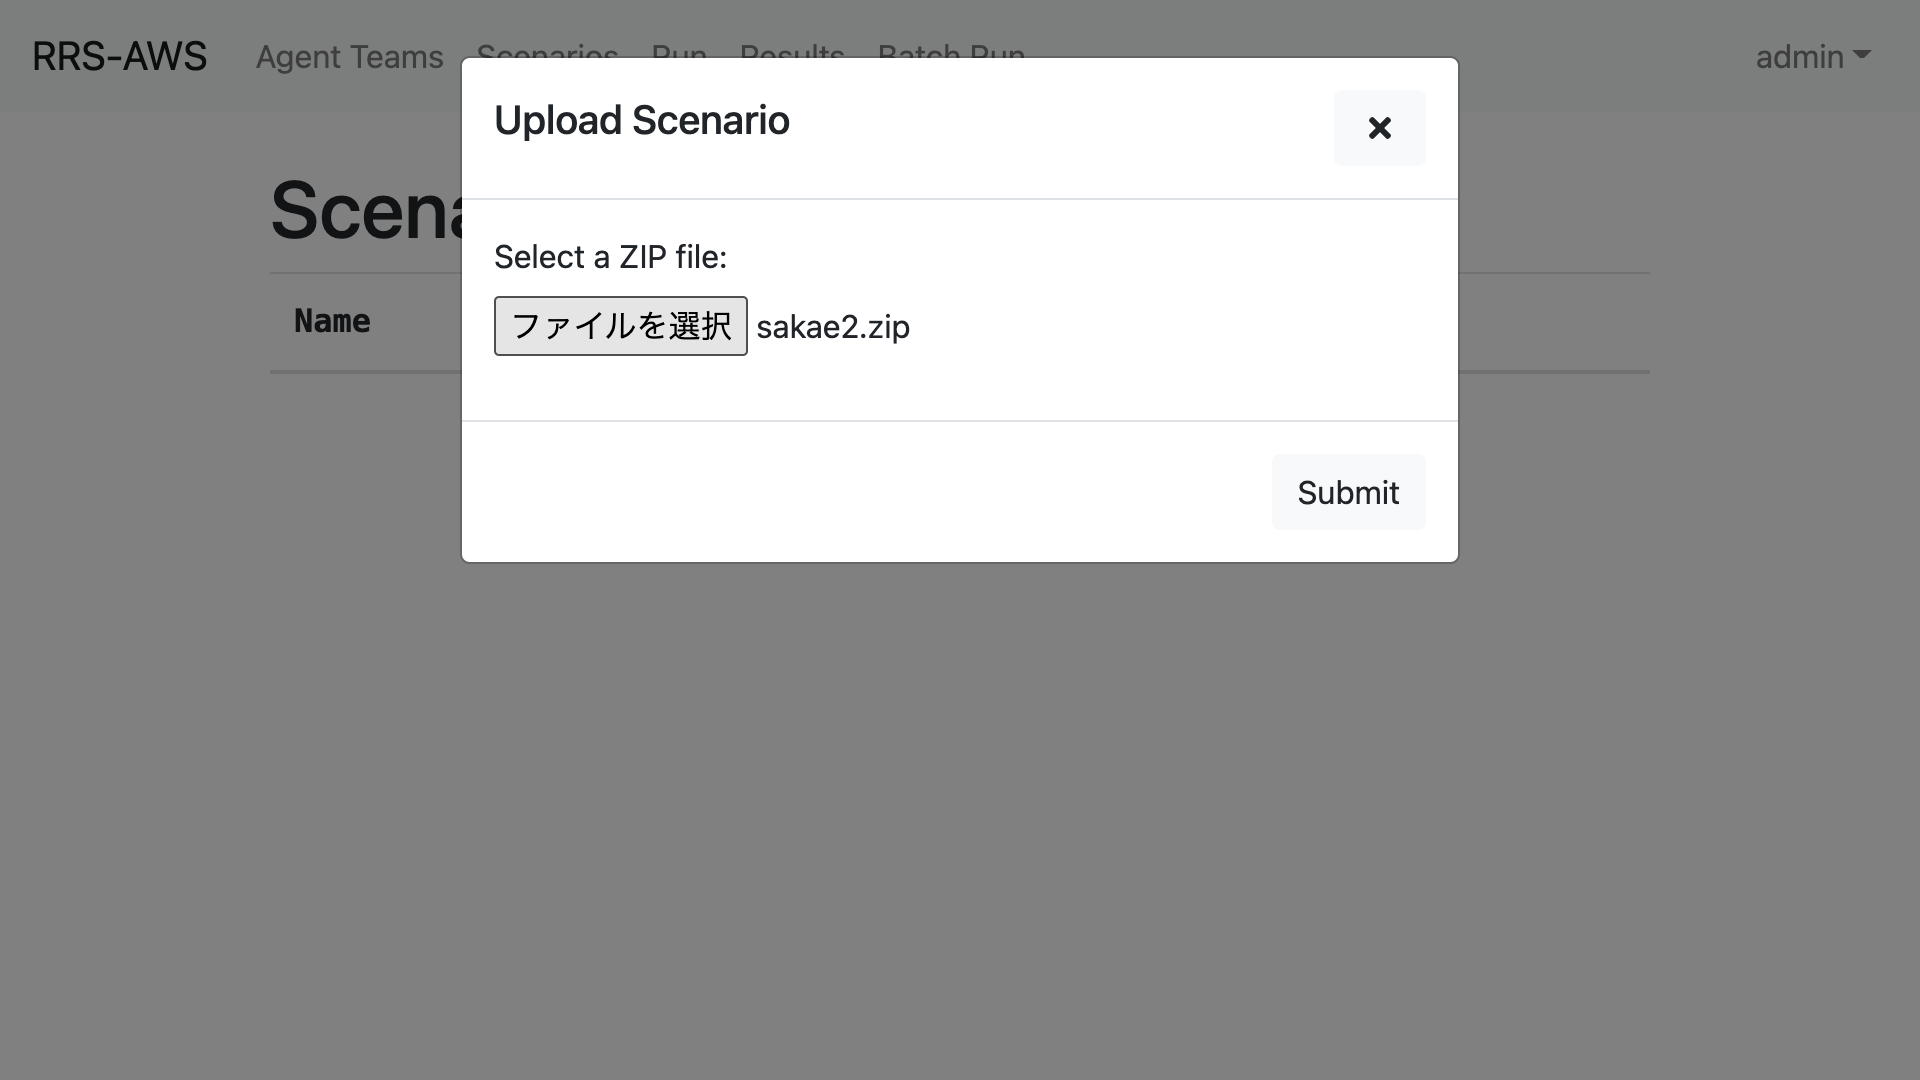
4. Click the Submit button
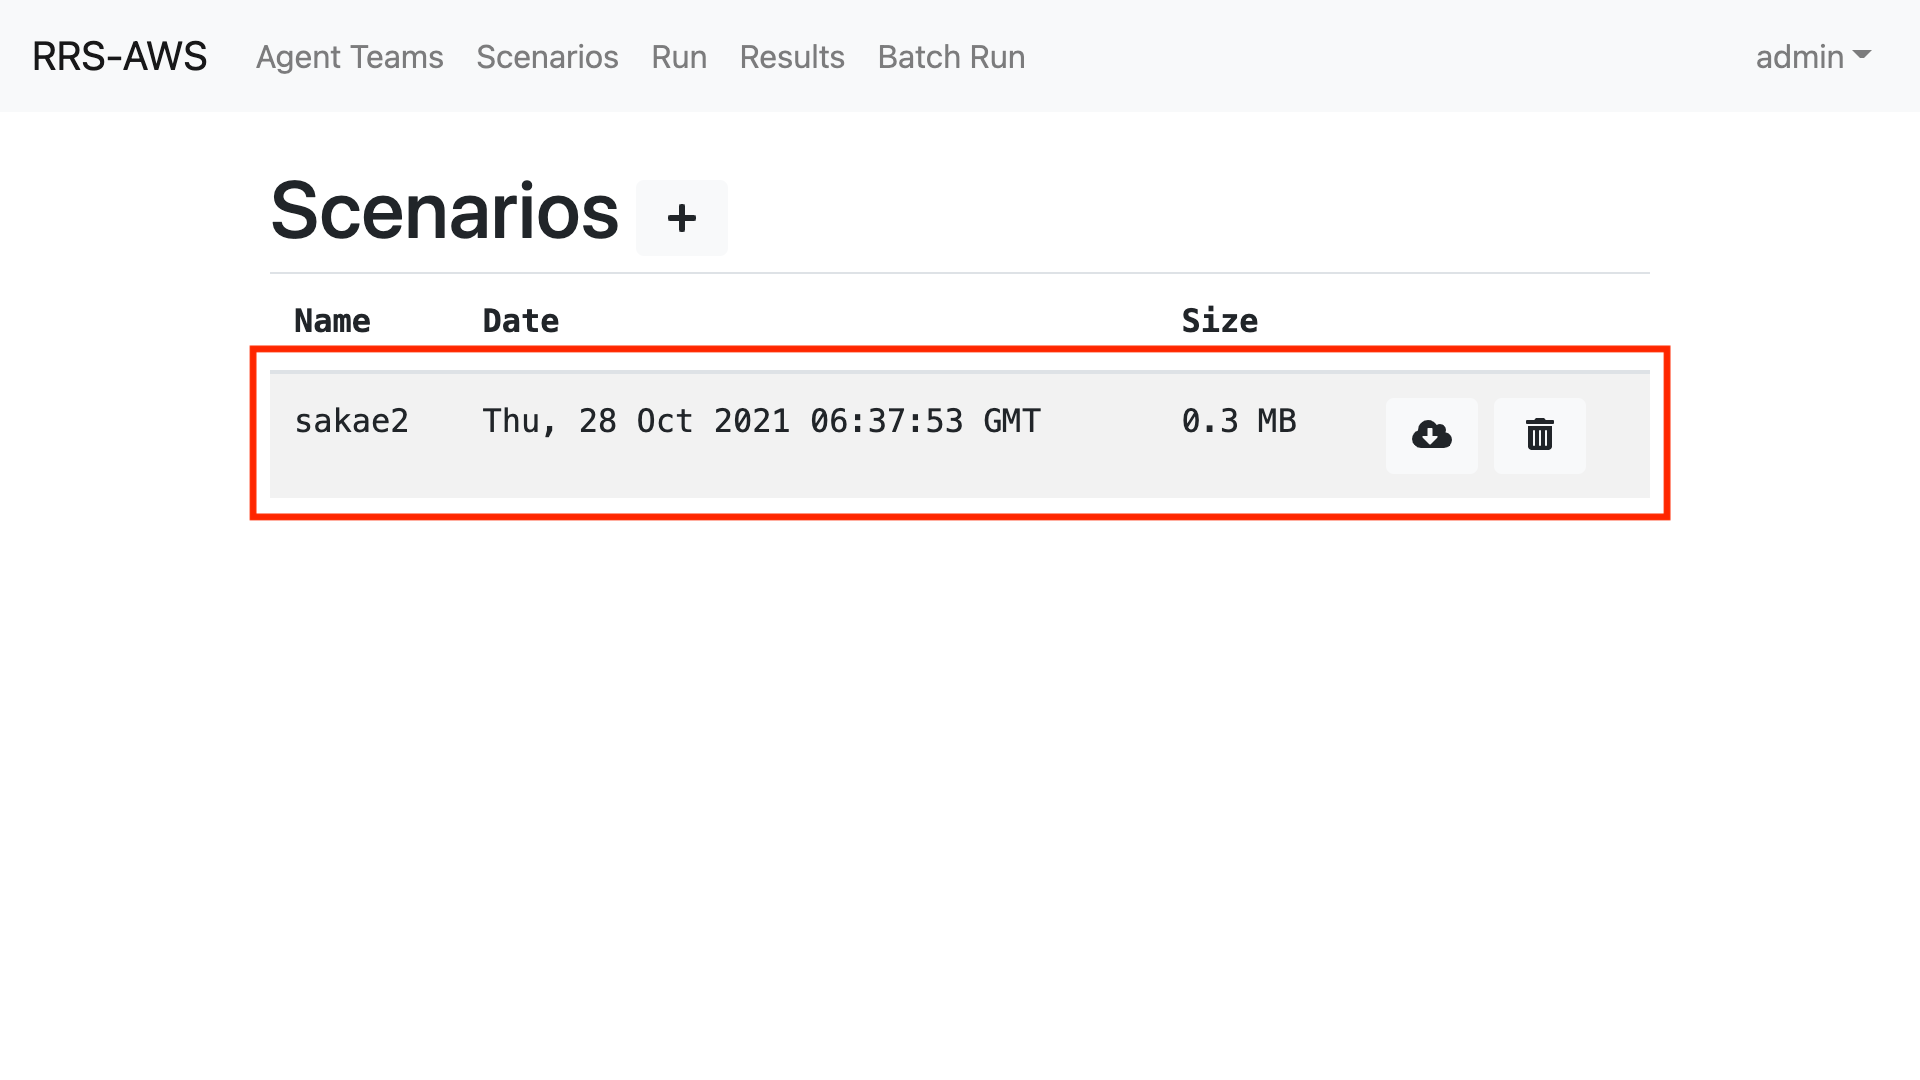
5. Upload Confirmation
Make sure that the scenario file has been uploaded correctly.
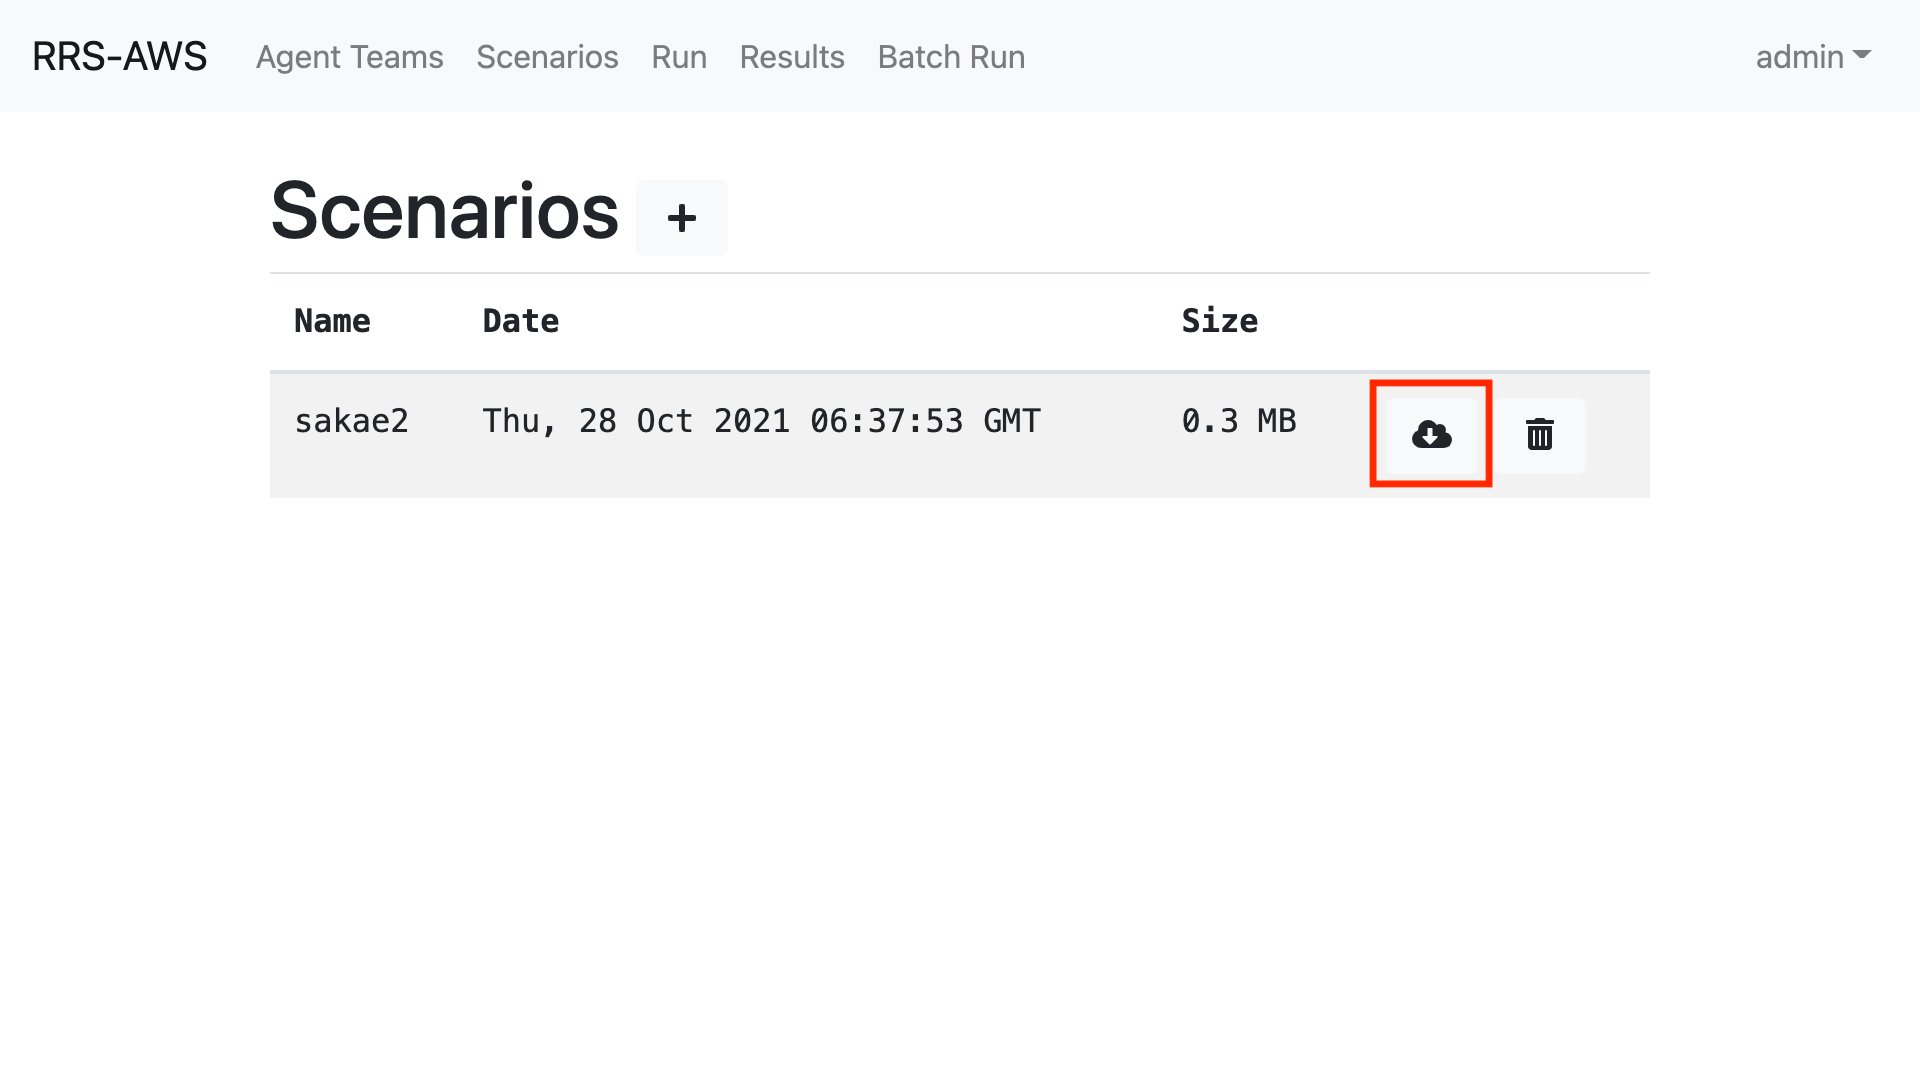
### Download the scenario
You can download the scenario file by clicking the download icon like in the red frame in the image.
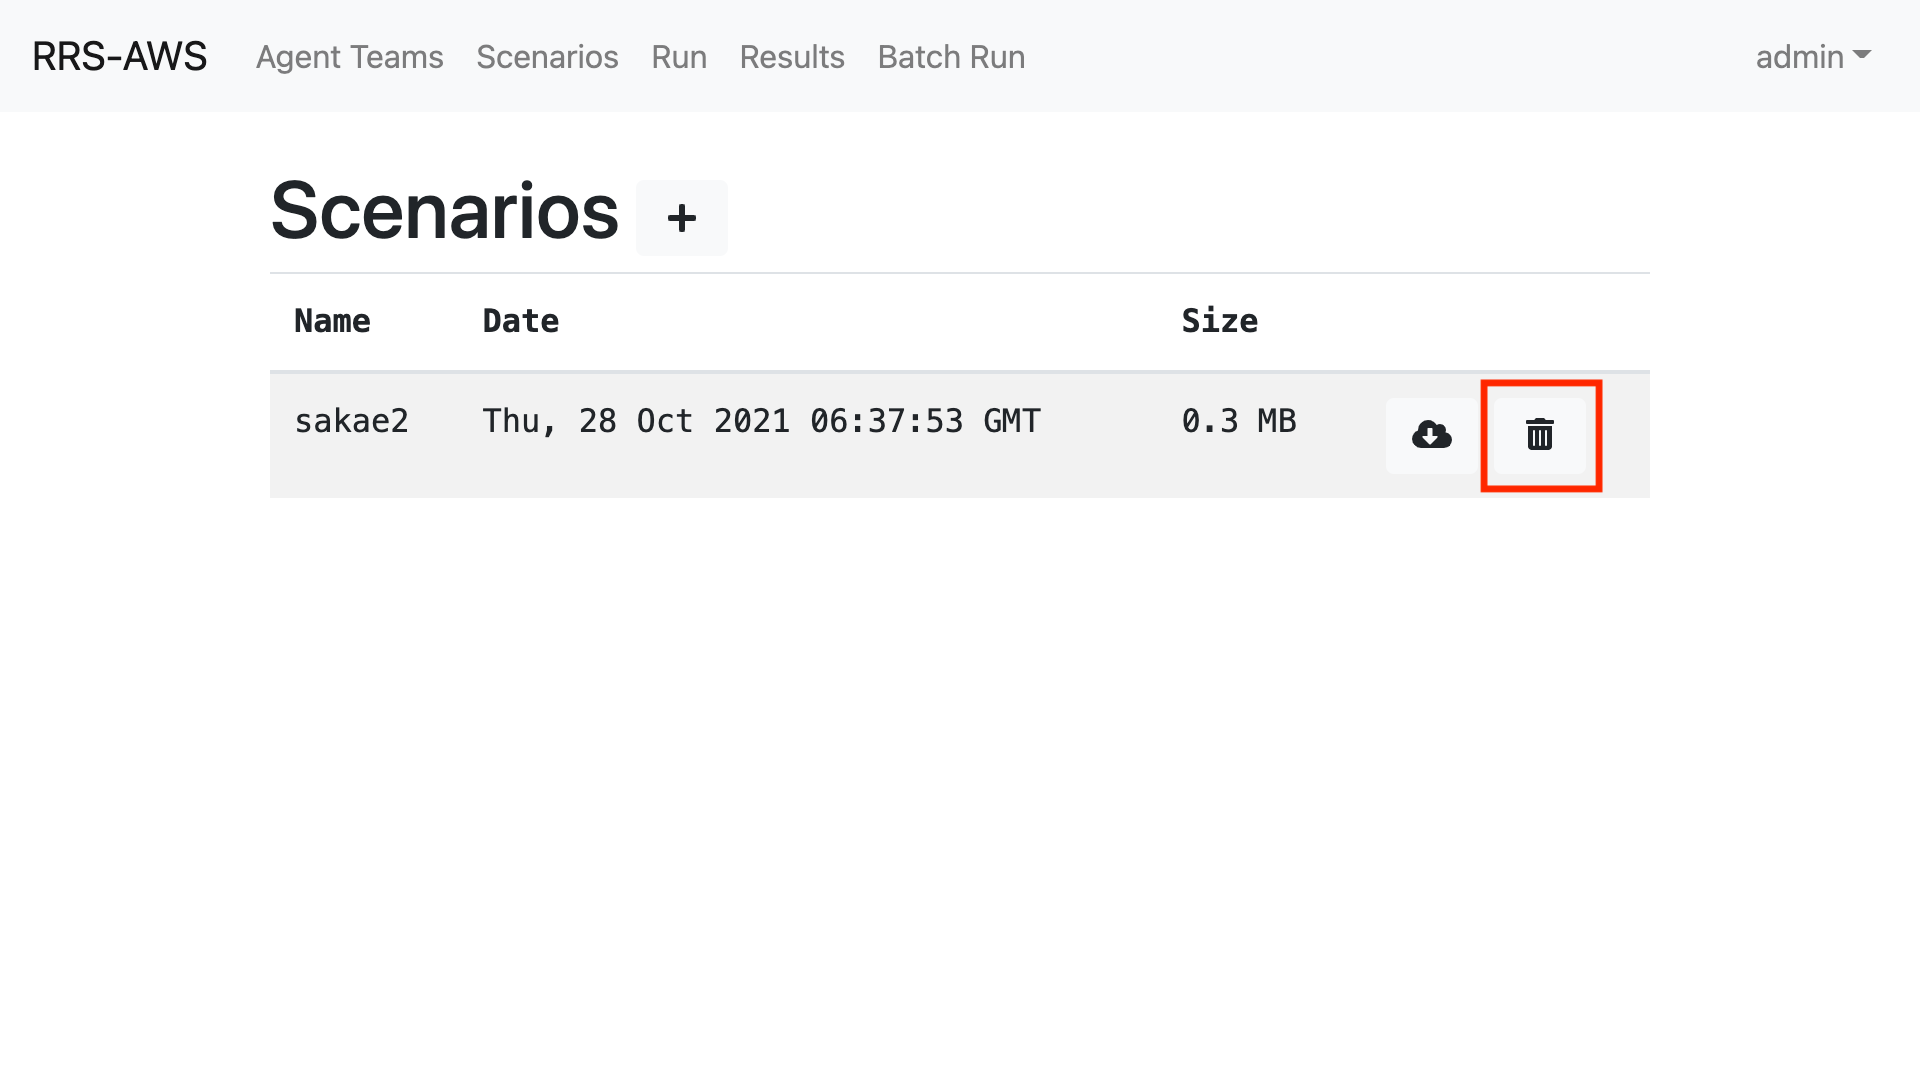
### Deleting a Scenario
You can delete the scenario file by clicking the trash icon like in the red frame in the image.
## Simulations
### Run & Confirm simlation
You can go to the simulation execution page by clicking Run in the navigation bar.
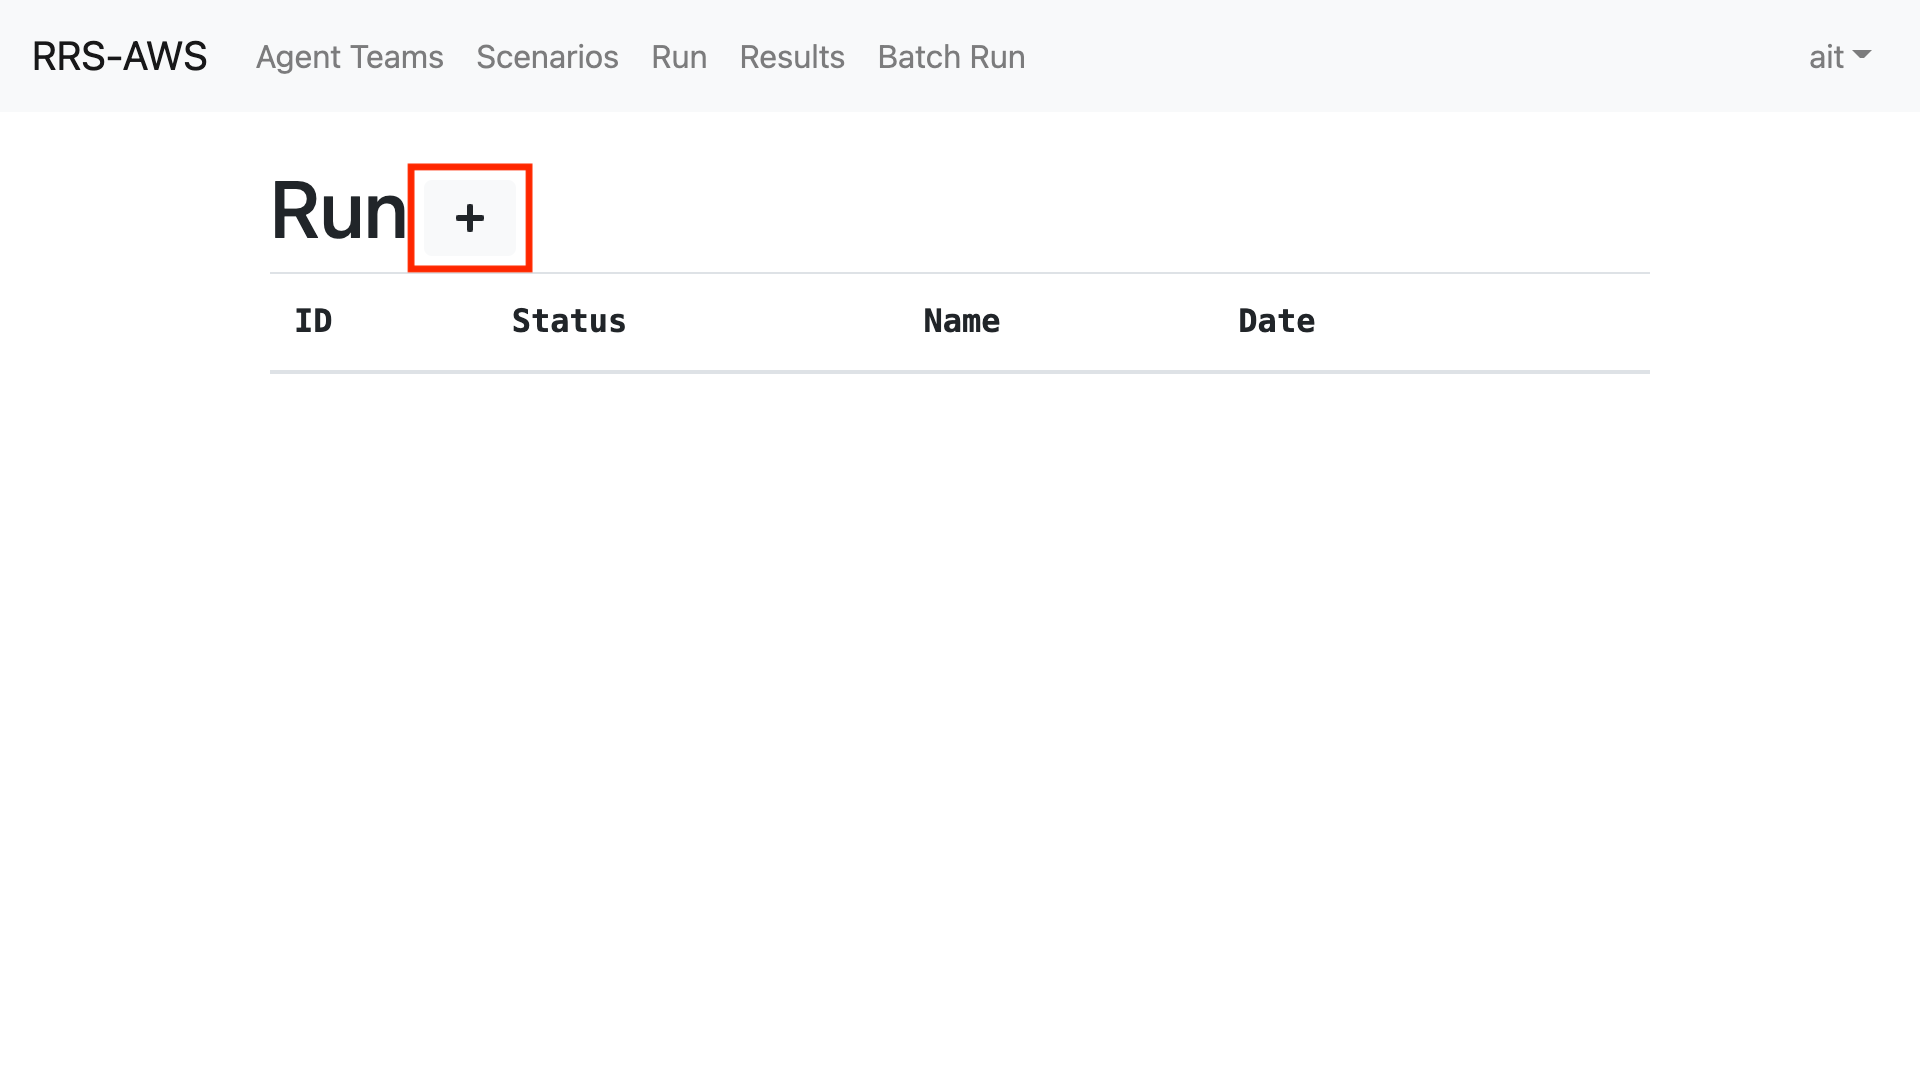
1. Click the + button
Click on the + button like in the red frame in the image.
2. Select the agent and scenario you want to run
The number to the right of the credit is the number of simulations you can currently use. (The number to the right of Credit is the number of simulations you can currently use (5 in the case of the image).
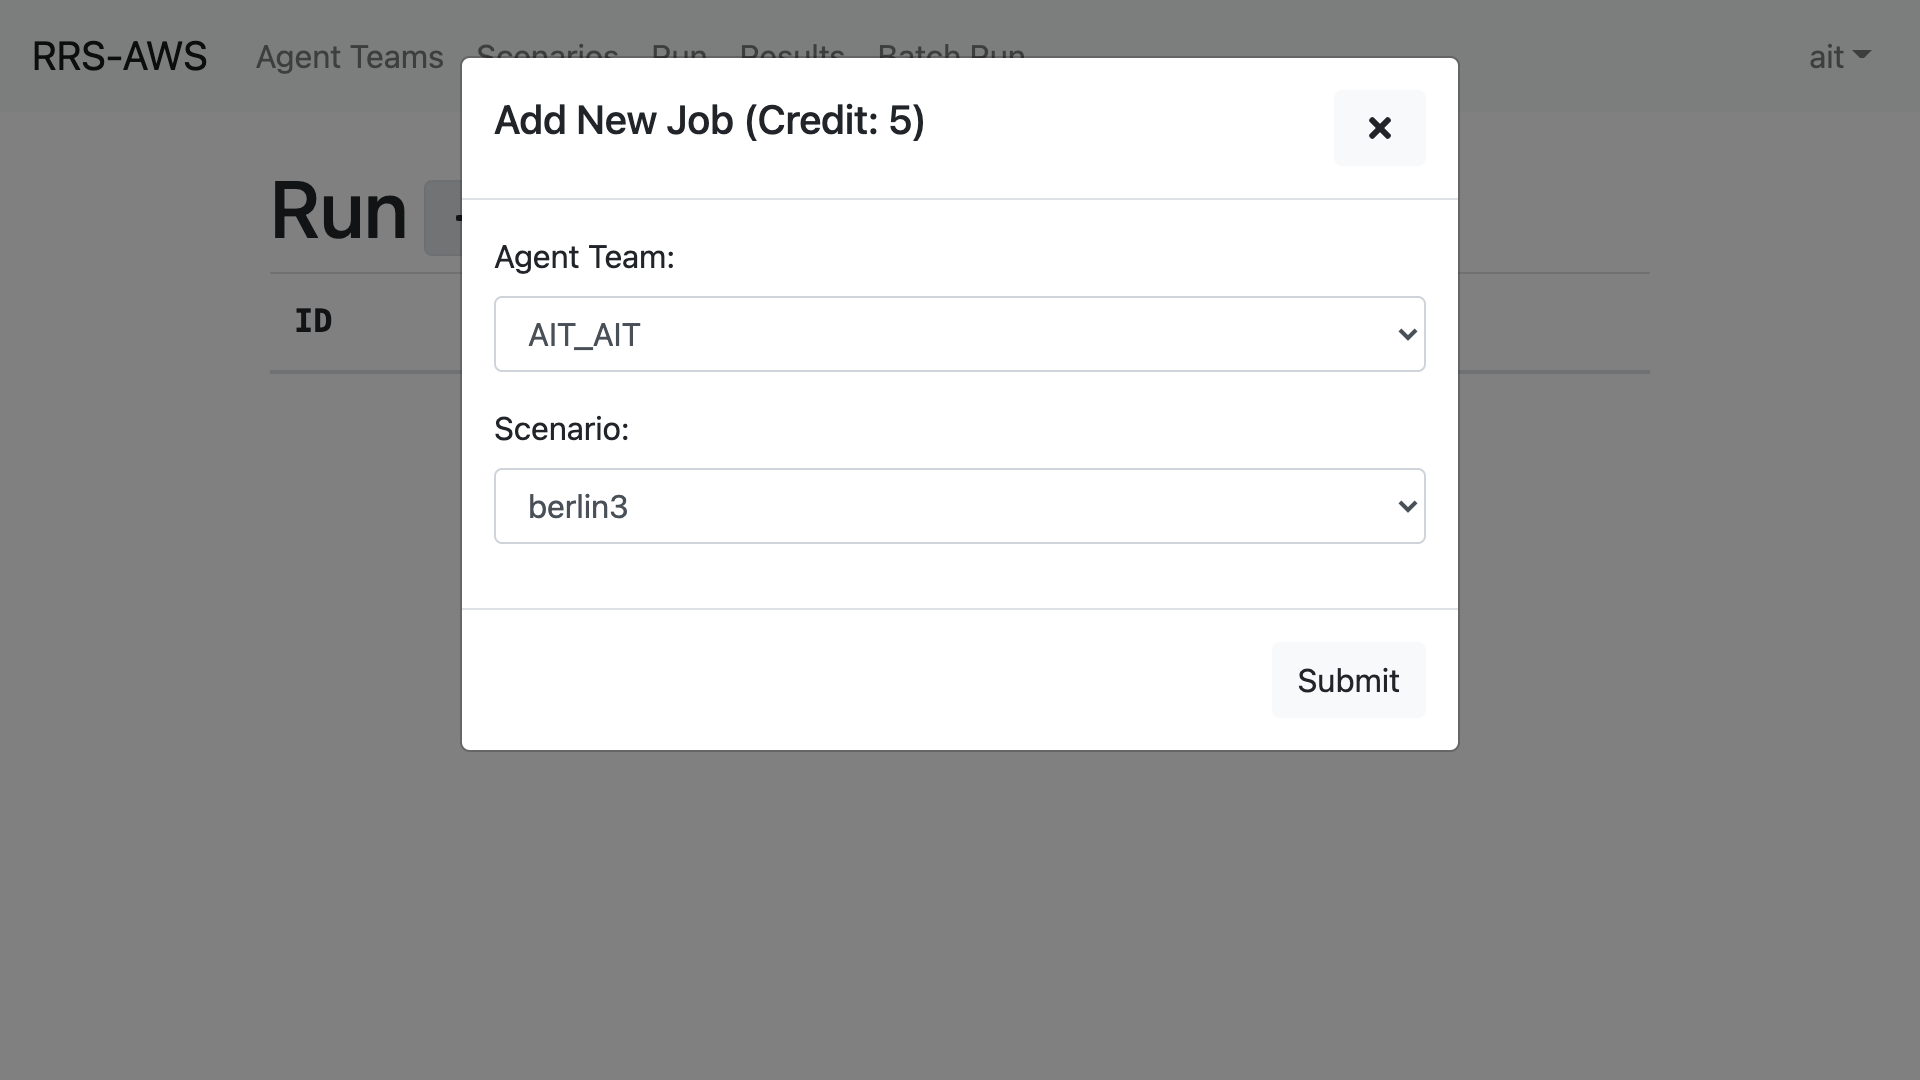
3. Click the "Submit" button
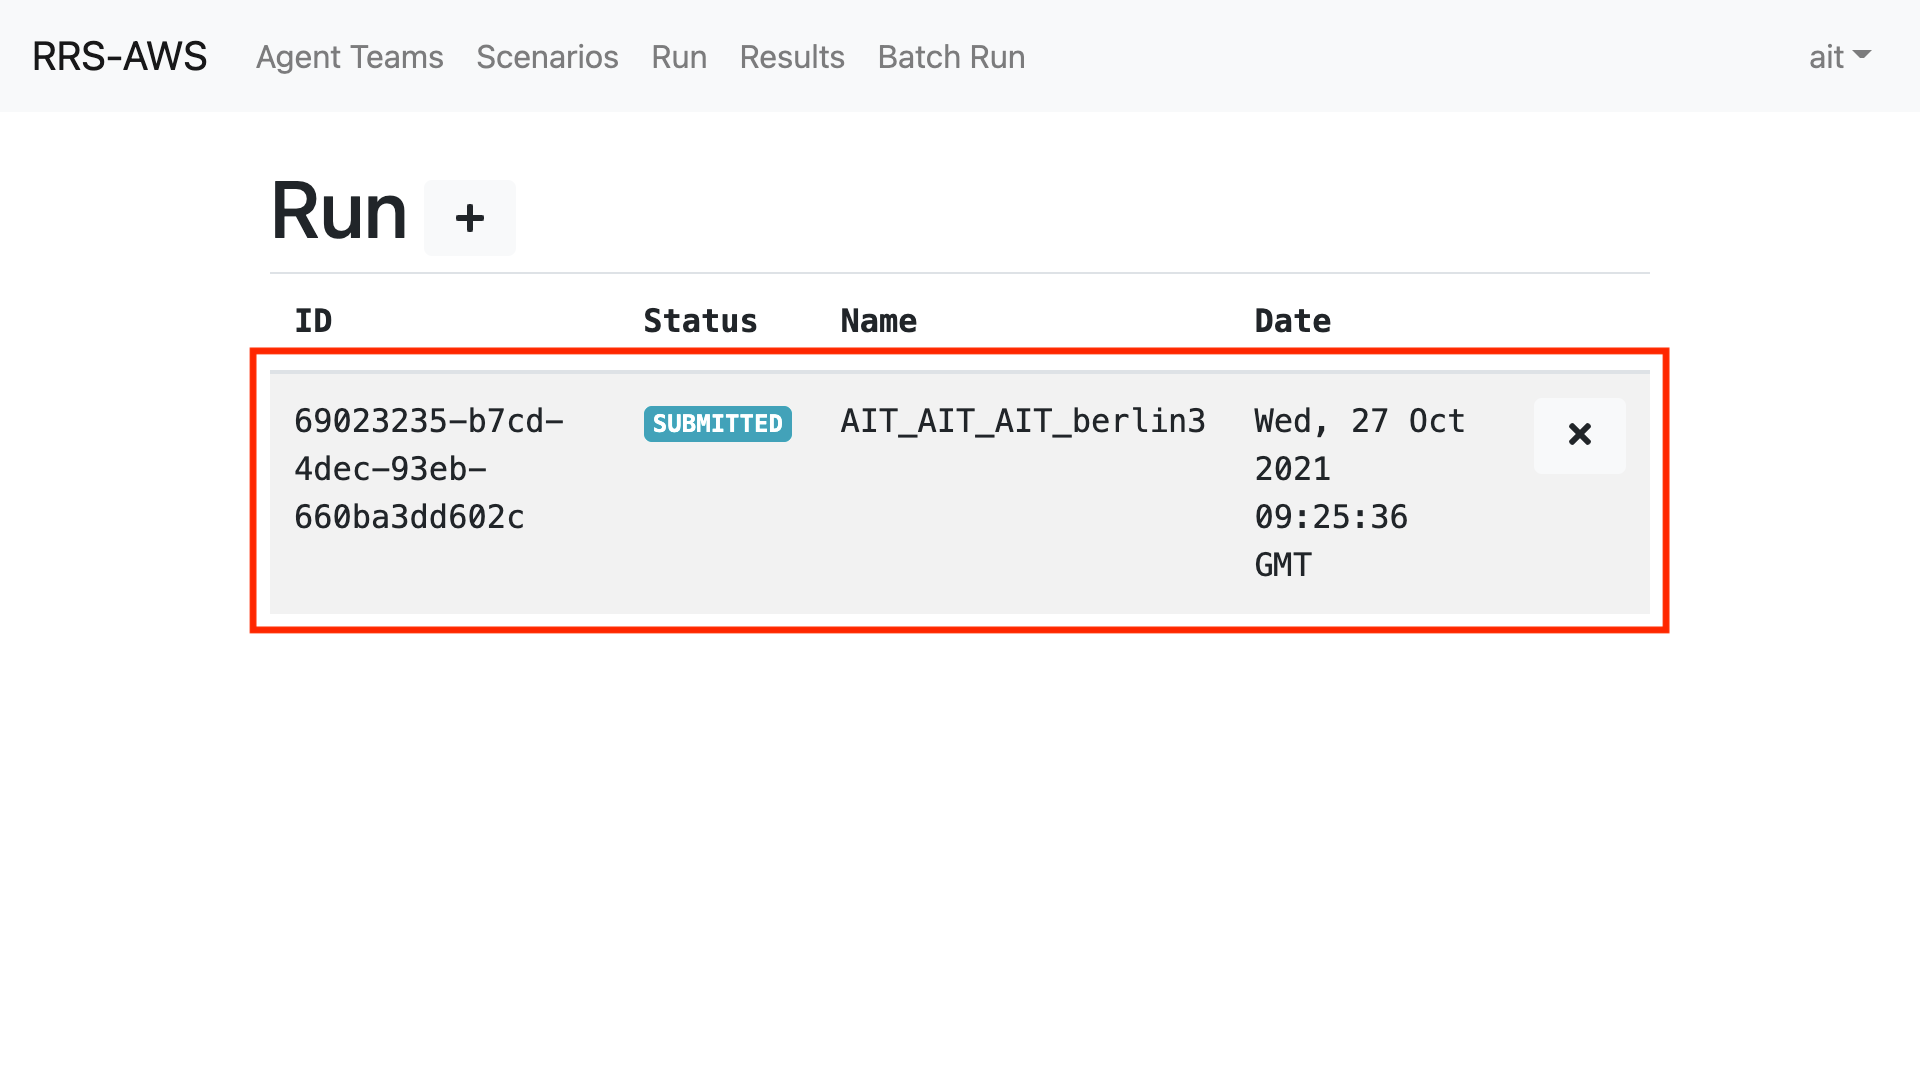
4. Confirmation of simulation execution
Please check if the simulation is executed correctly.
(For more information about the status of the simulation, please check [Meaning of Status](#Meaning-of-Status).
:::info
Simulations usually take several tens of minutes.
:::
#### Meaning of Status
:::info
Status is not updated, so please reload your browser manually.
:::
| Status | Meaning |
|:--------- |:------------------------------------------- |
| SUBMITTED | Your simulation has been accepted |
| PENDING | The simulation dependencies are being resolved |
| RUNNABLE | Waiting for your turn to run the simulation |
| STARTING | Simulation is initializing |
| RUNNING | Simulation is running |
| SUCCEEDED | Simulation is complete |
| FAILED | Simulation has failed for some reason. |
#### The instance
- c5.4xlarge
CPU : 1st or 2nd generation Intel Xeon Platinum 8000 series (Skylake-SP or Cascade Lake) processor
Maximum CPU clock frequency : 3.6 GHz
vCPU (number of cores): 16
Memory : 32GiB
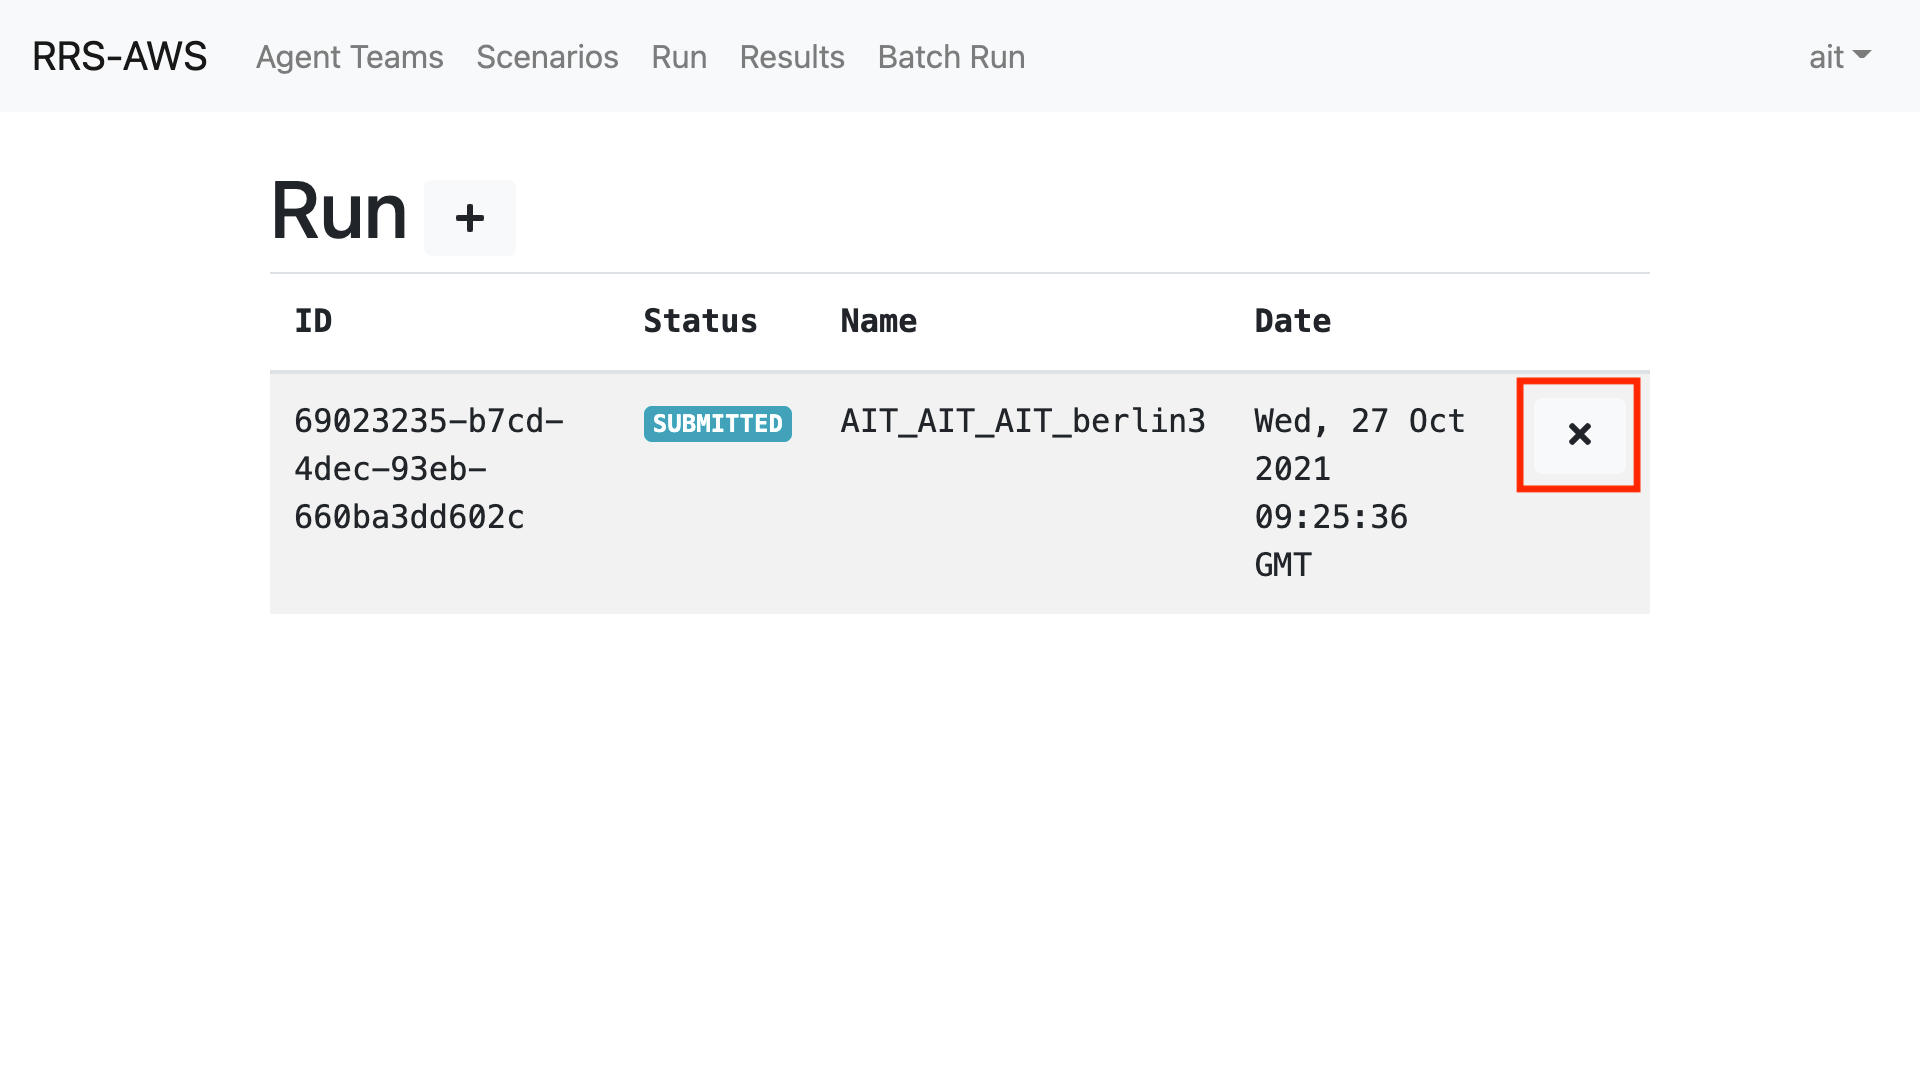
### Canceling the simulation
If you want to cancel the simulation, click on the x button like in the red frame in the image.
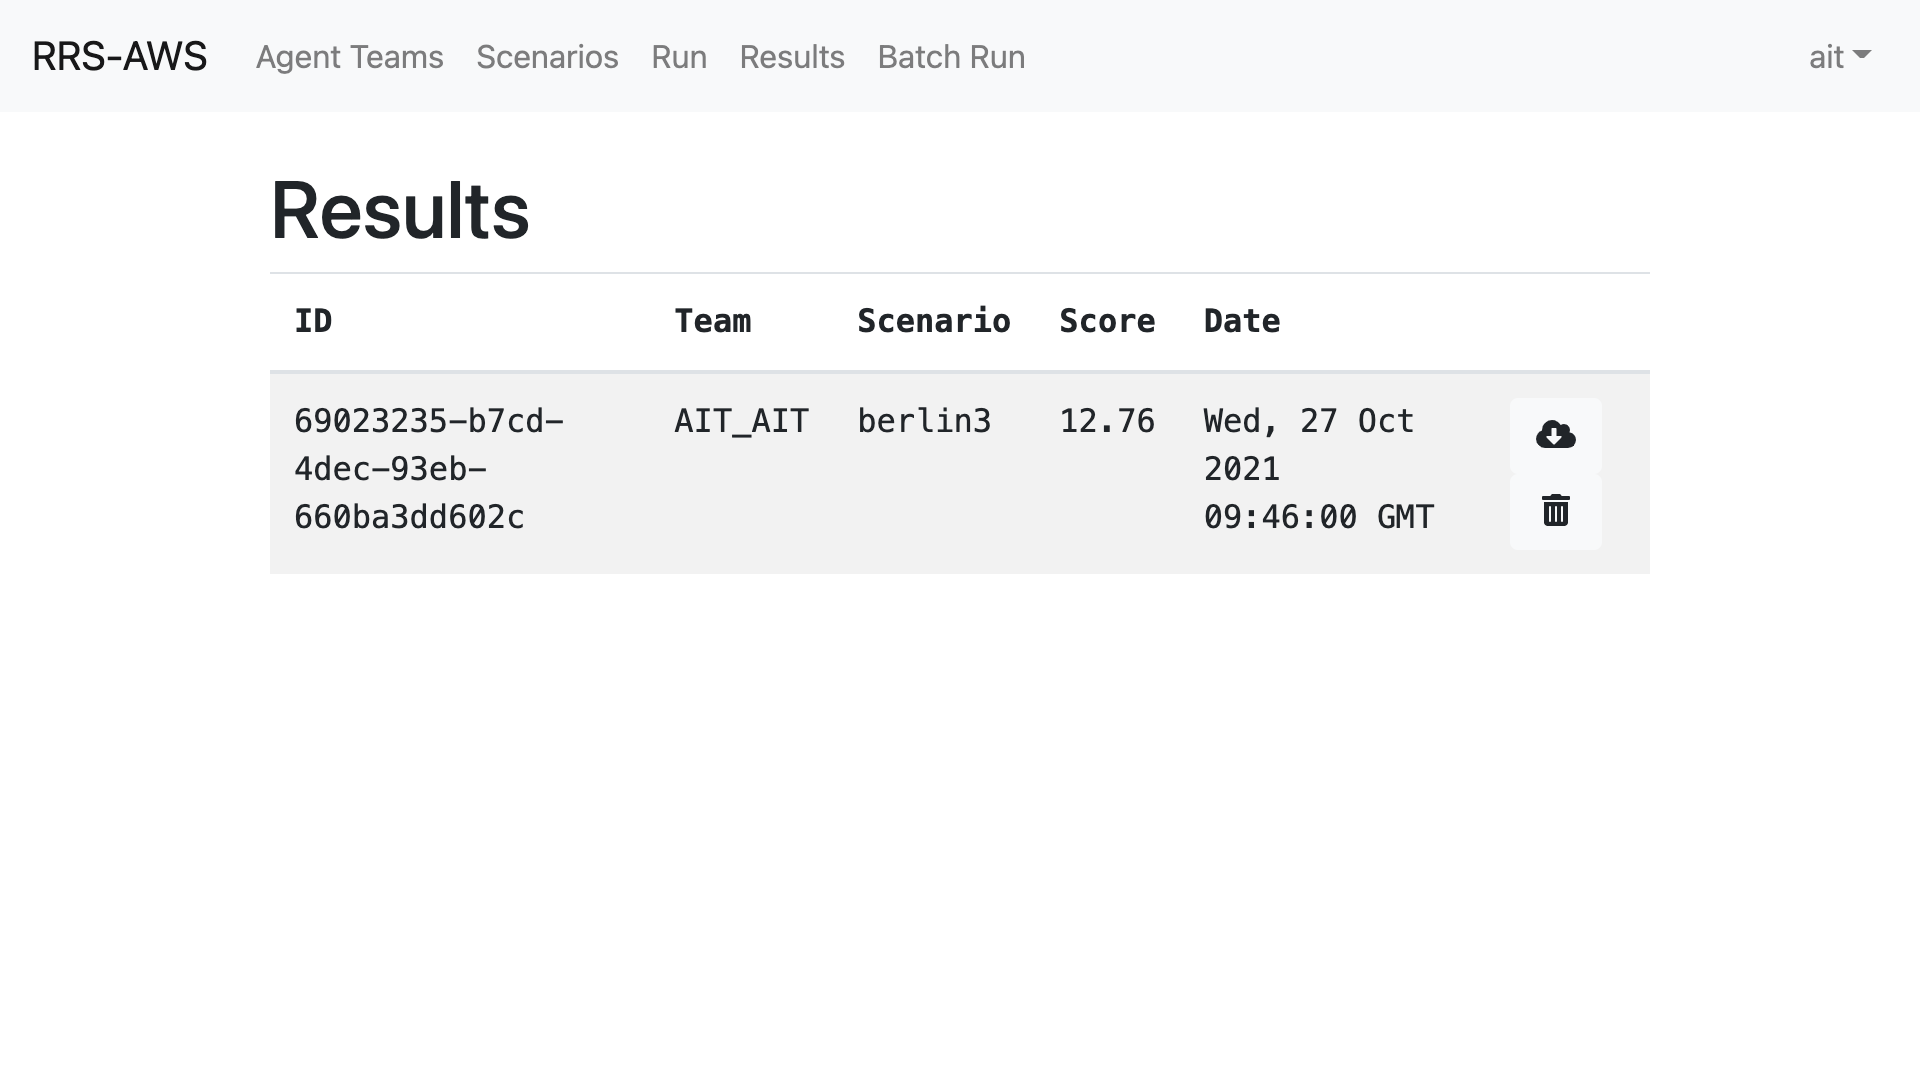
## Simulations Results
### Viewing the results
You can go to the result viewing page by clicking Results in the navigation bar.
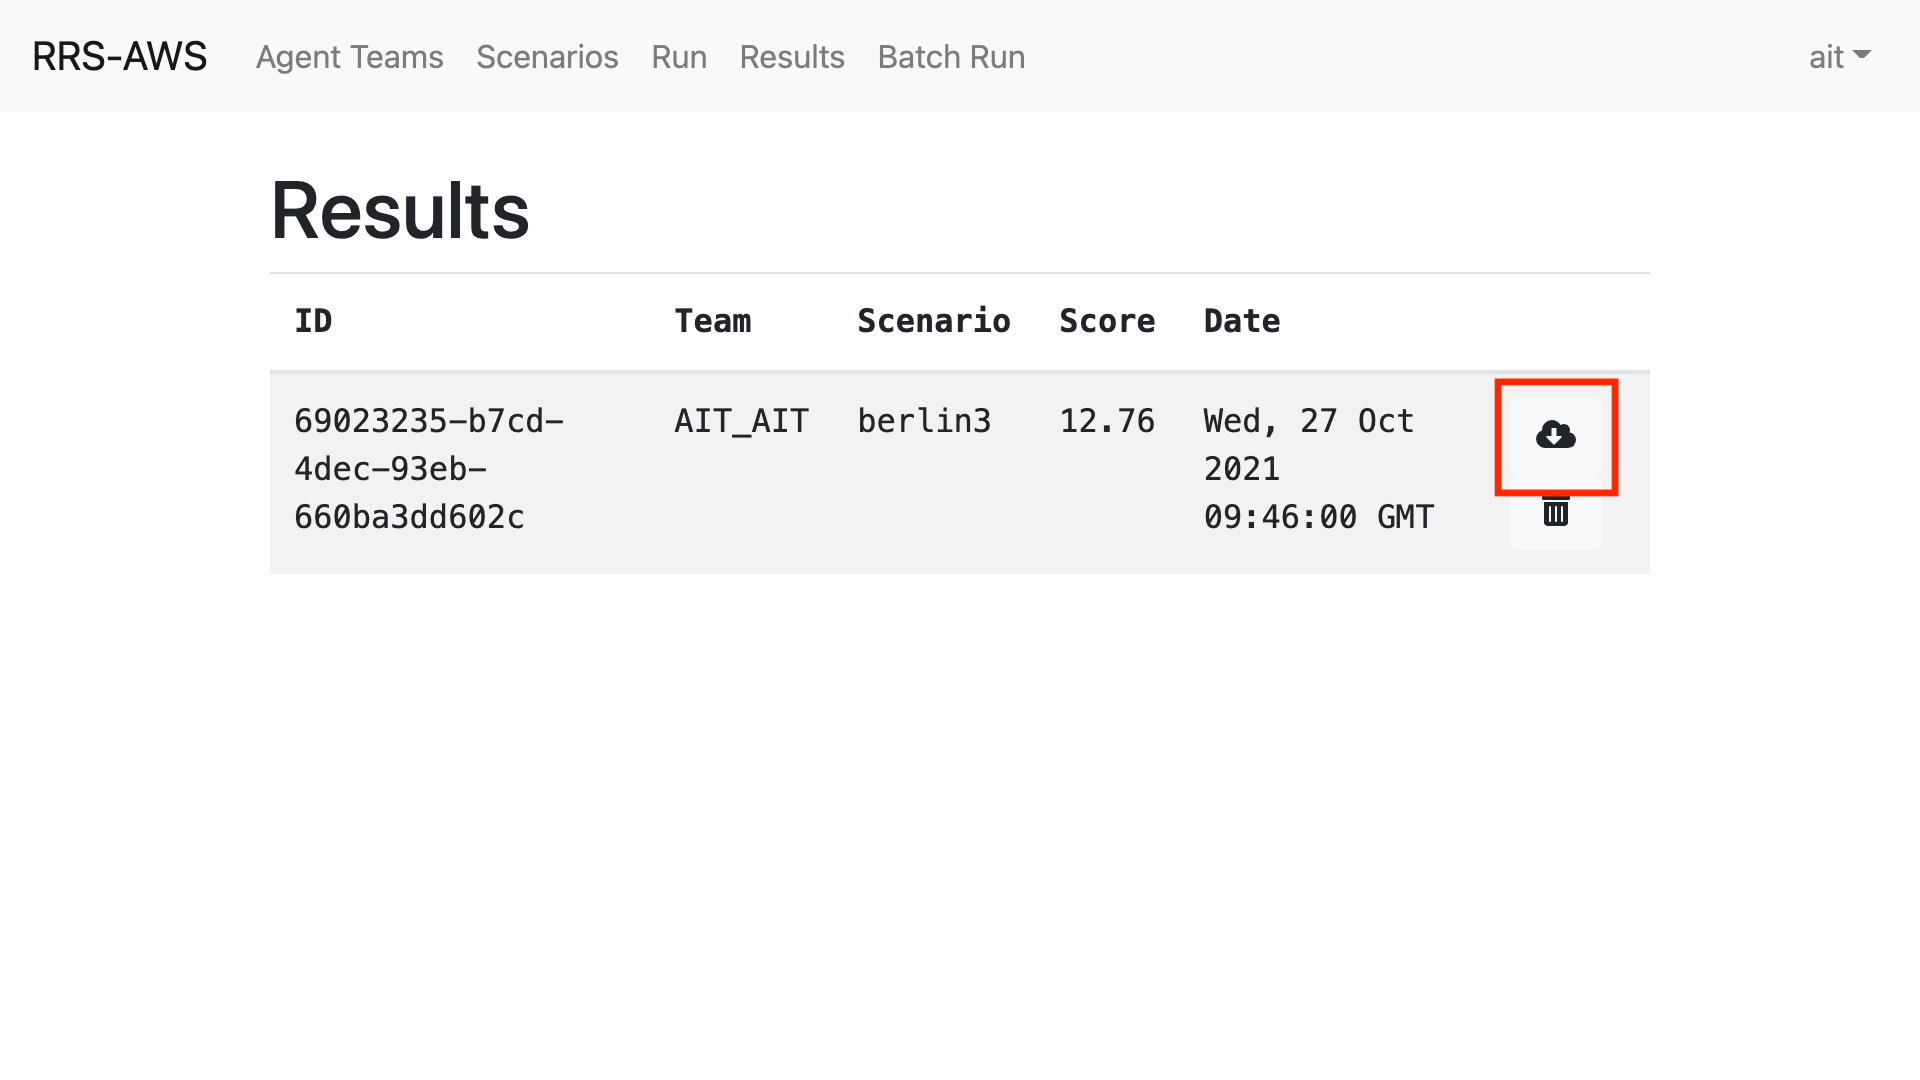
### Downloading the results
Click the download button in the red frame in the image to download the log file.
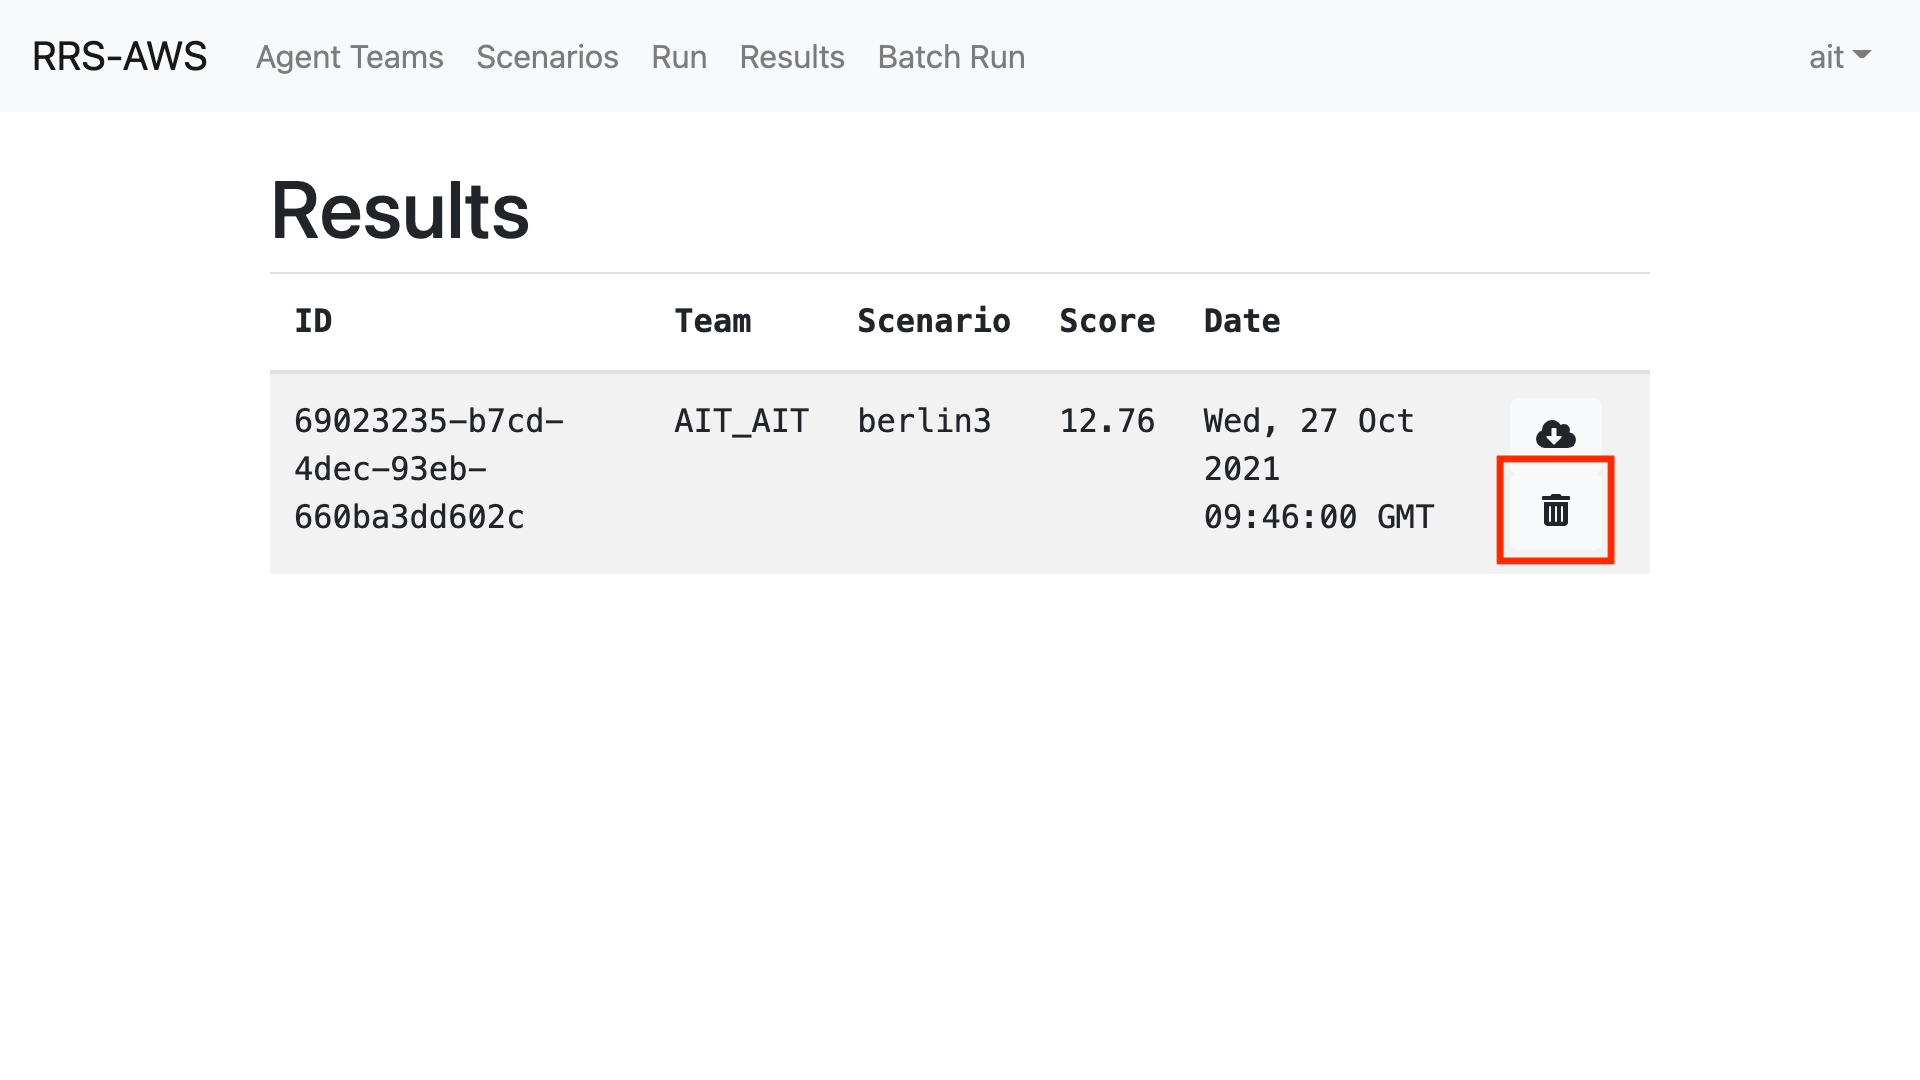
### Delete the results
You can delete the results by clicking the trash button like in the red frame in the image.
## Batch Run
Batch Run is a mode that allows you to run a simulation with multiple agents and scenarios simultaneously.
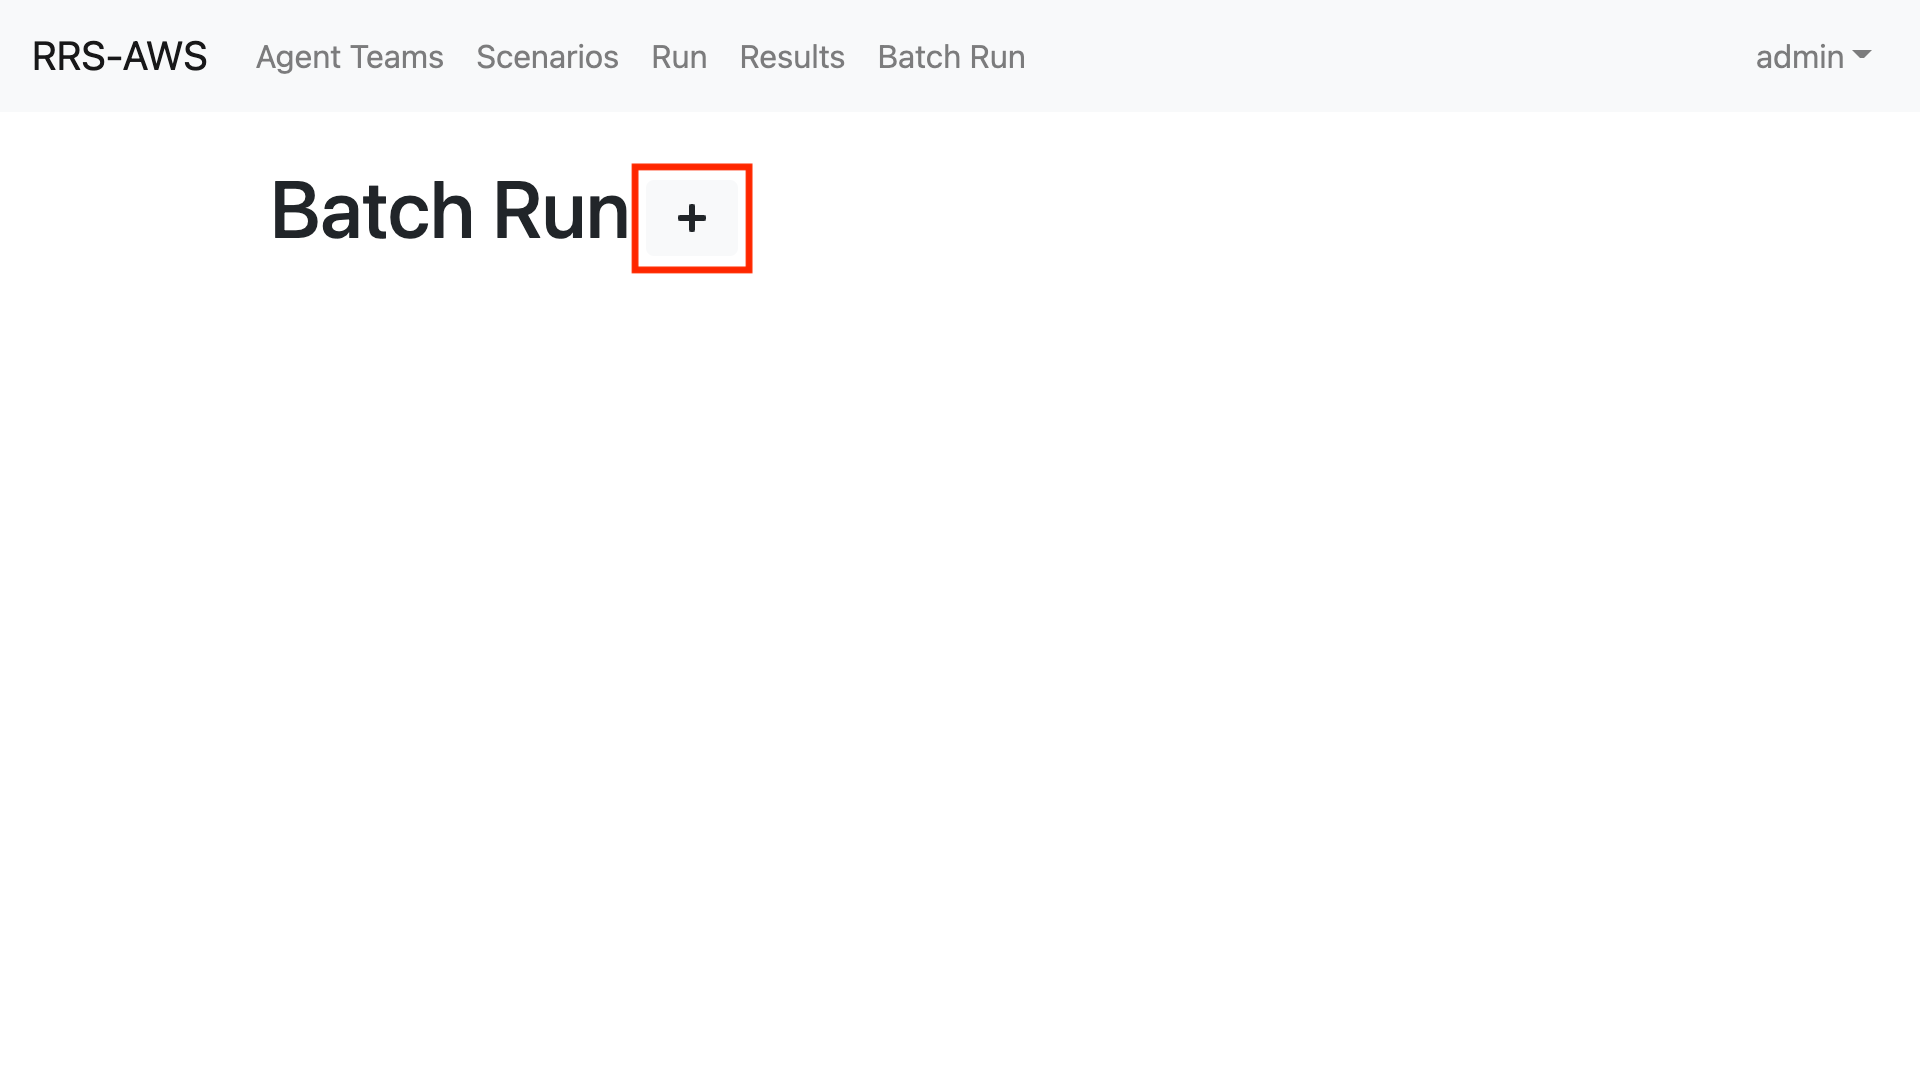
### Execute Batch Run
Click Batch Run in the navigation bar to go to the Batch Run management page.
1. Click the + button
Click the + button like in the red frame in the image.
2. Select a name and the agent and scenario you want to run
Enter a name of your choice in the Name input field.
You can select Agent Teams and Scenario by holding down `Shift` and left-clicking on them.
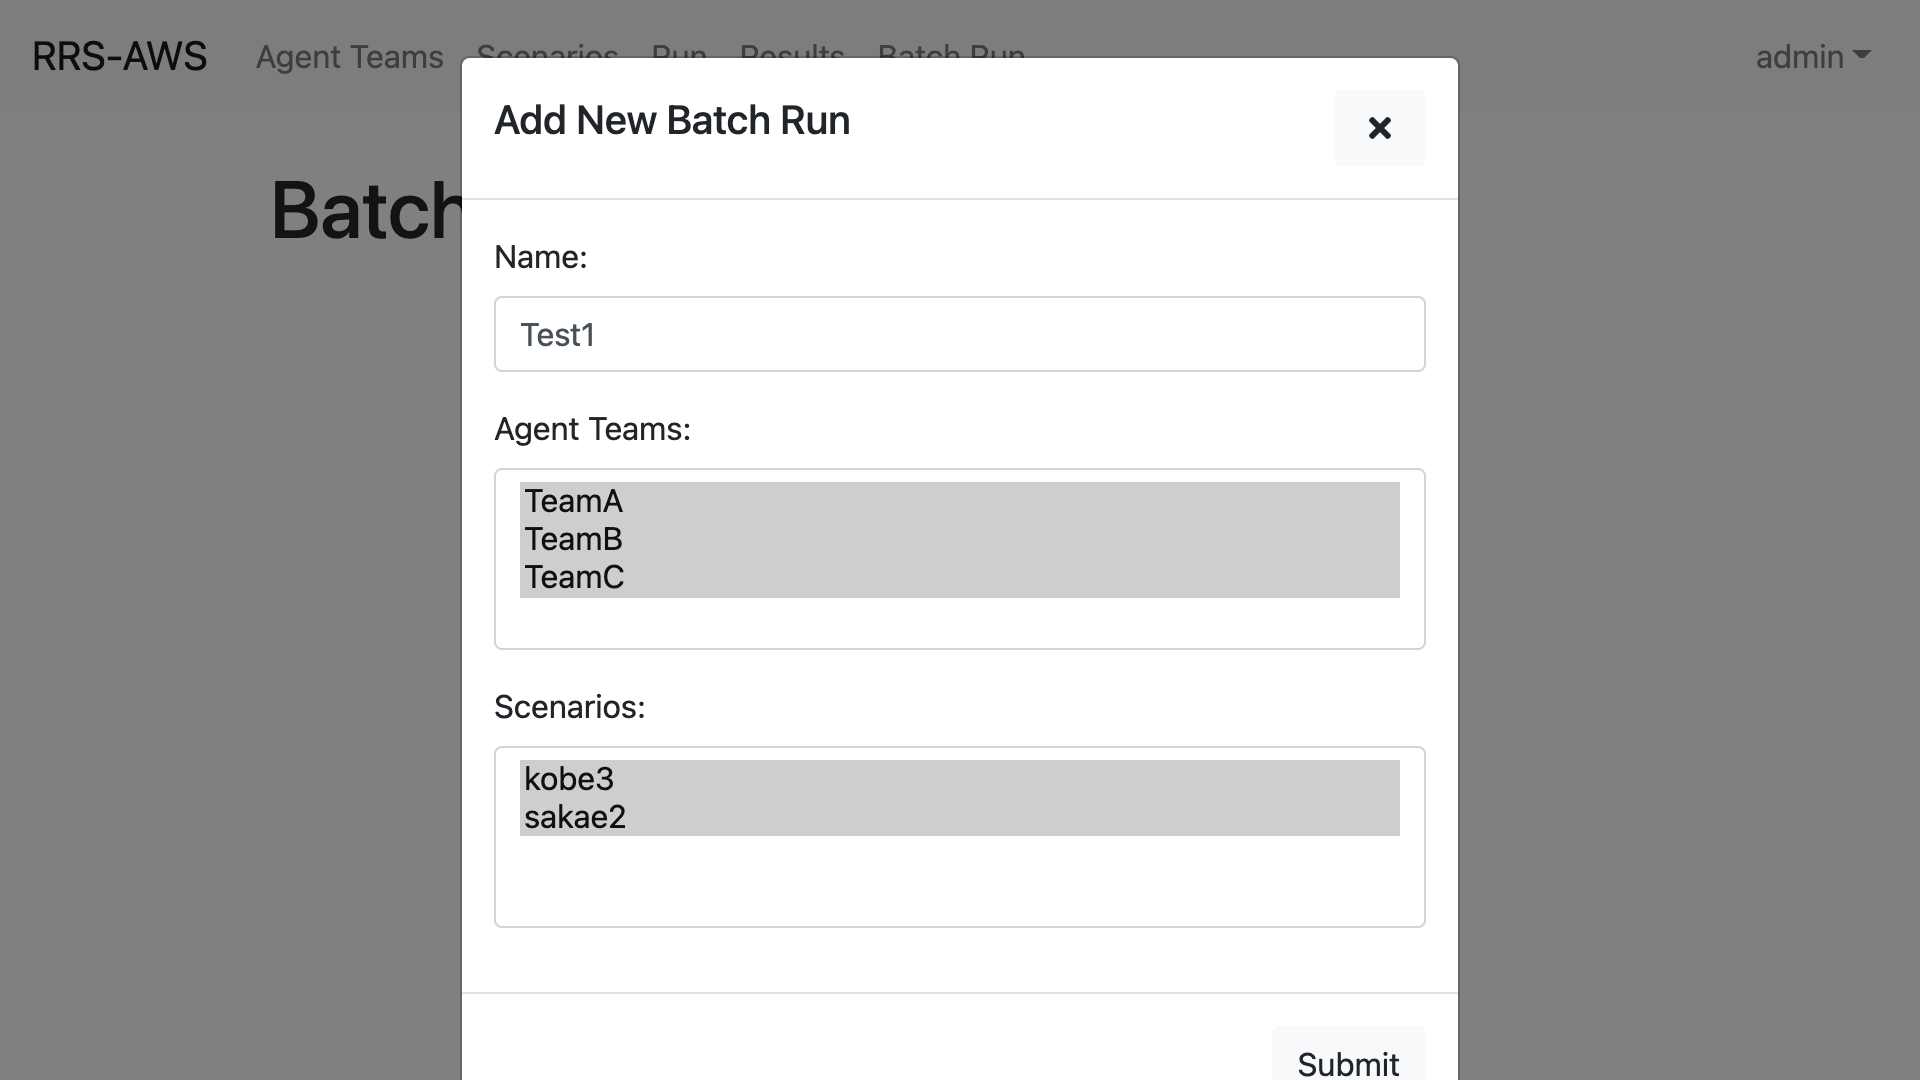
3. Click the Submit button
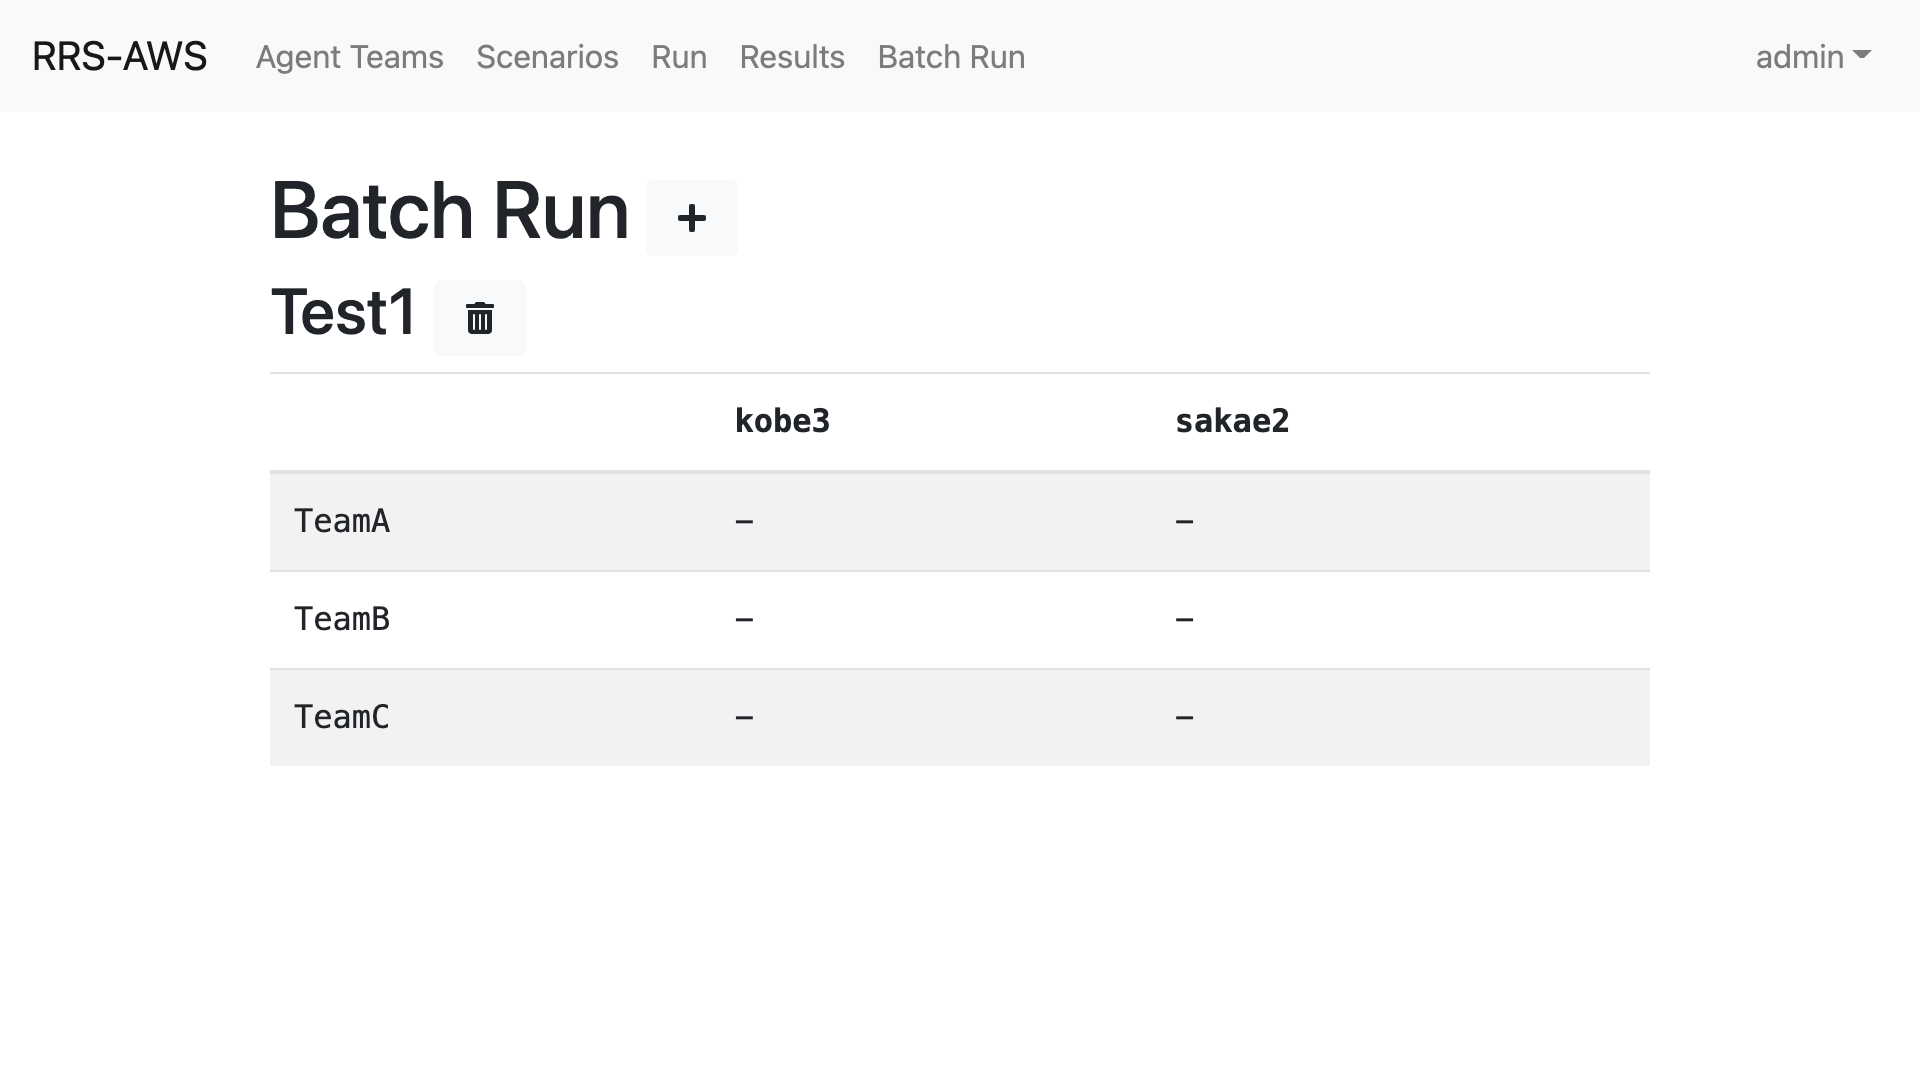
4. Confirm the batch run
Make sure that the batch run has been added correctly.
You can also check the status of each simulation by clicking on Run.
### Viewing Batch Run Results
Once the simulation is complete, the results will be displayed.
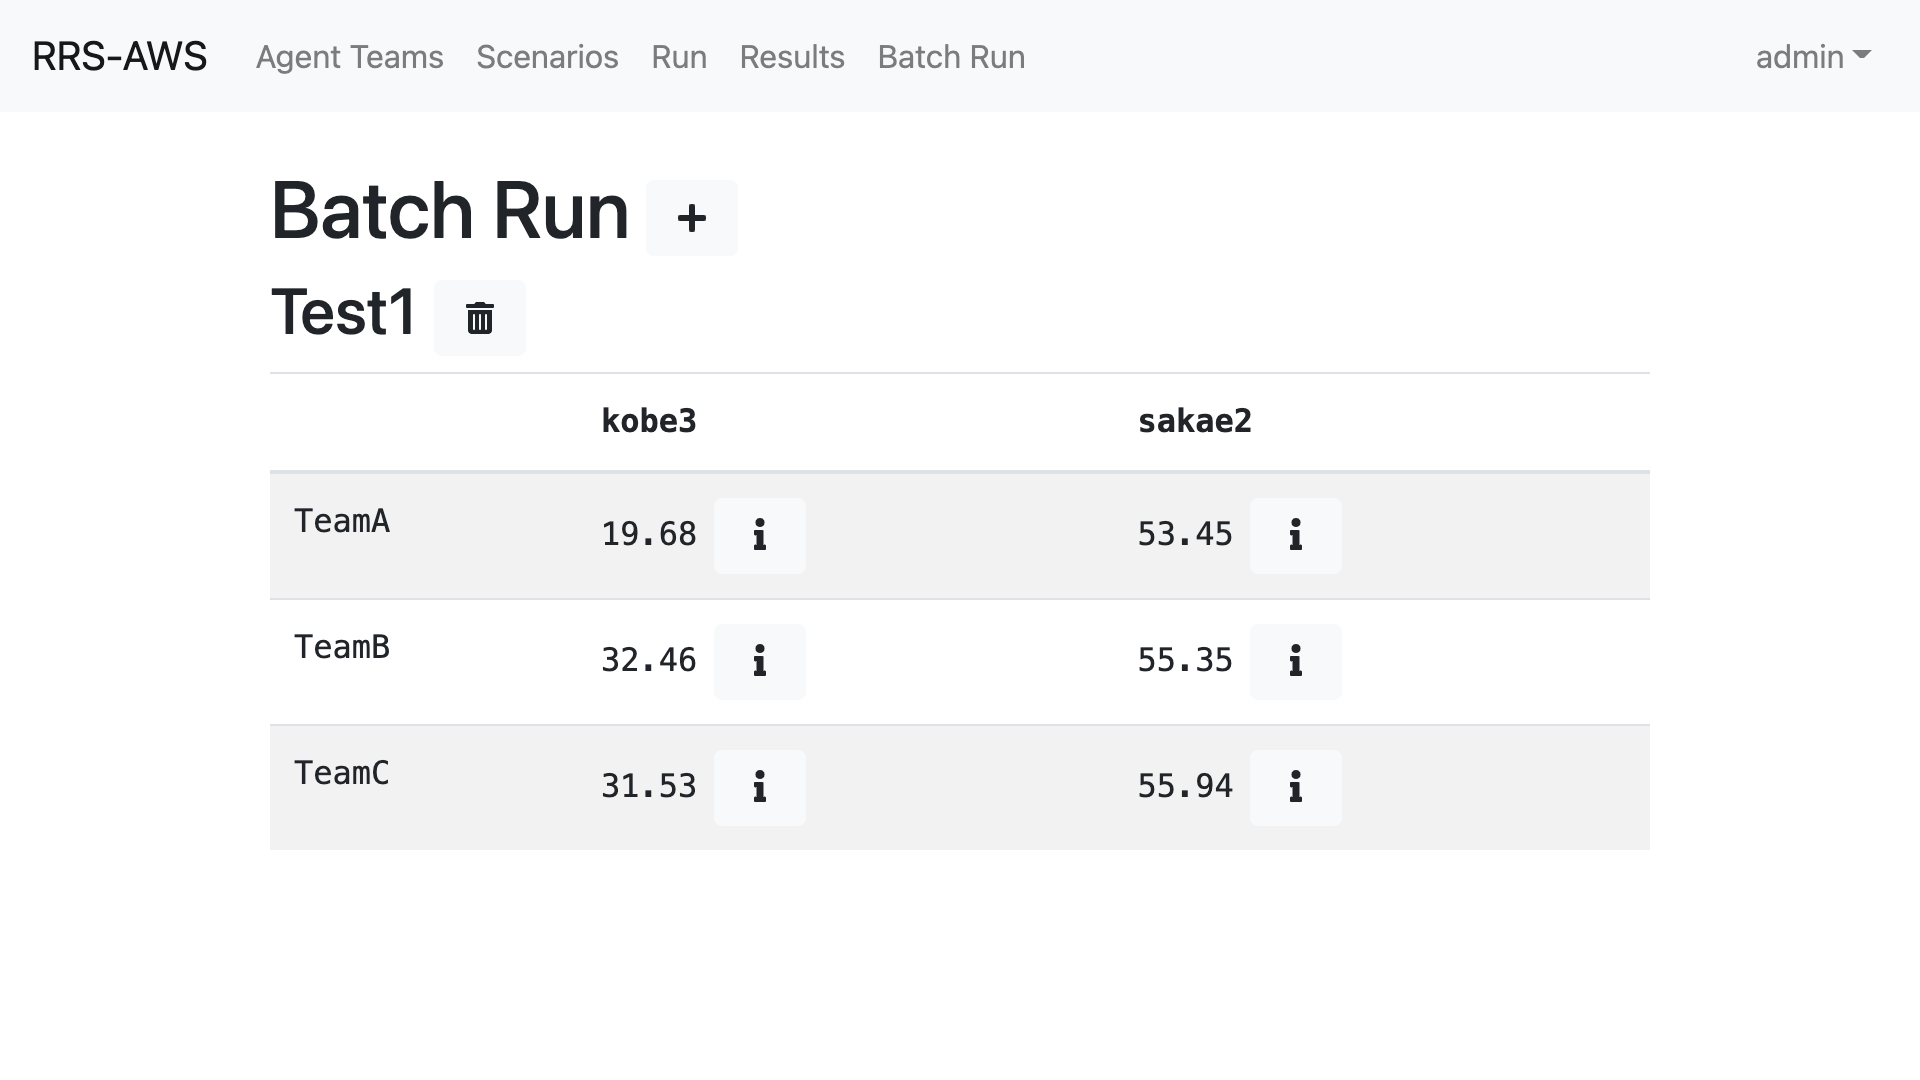
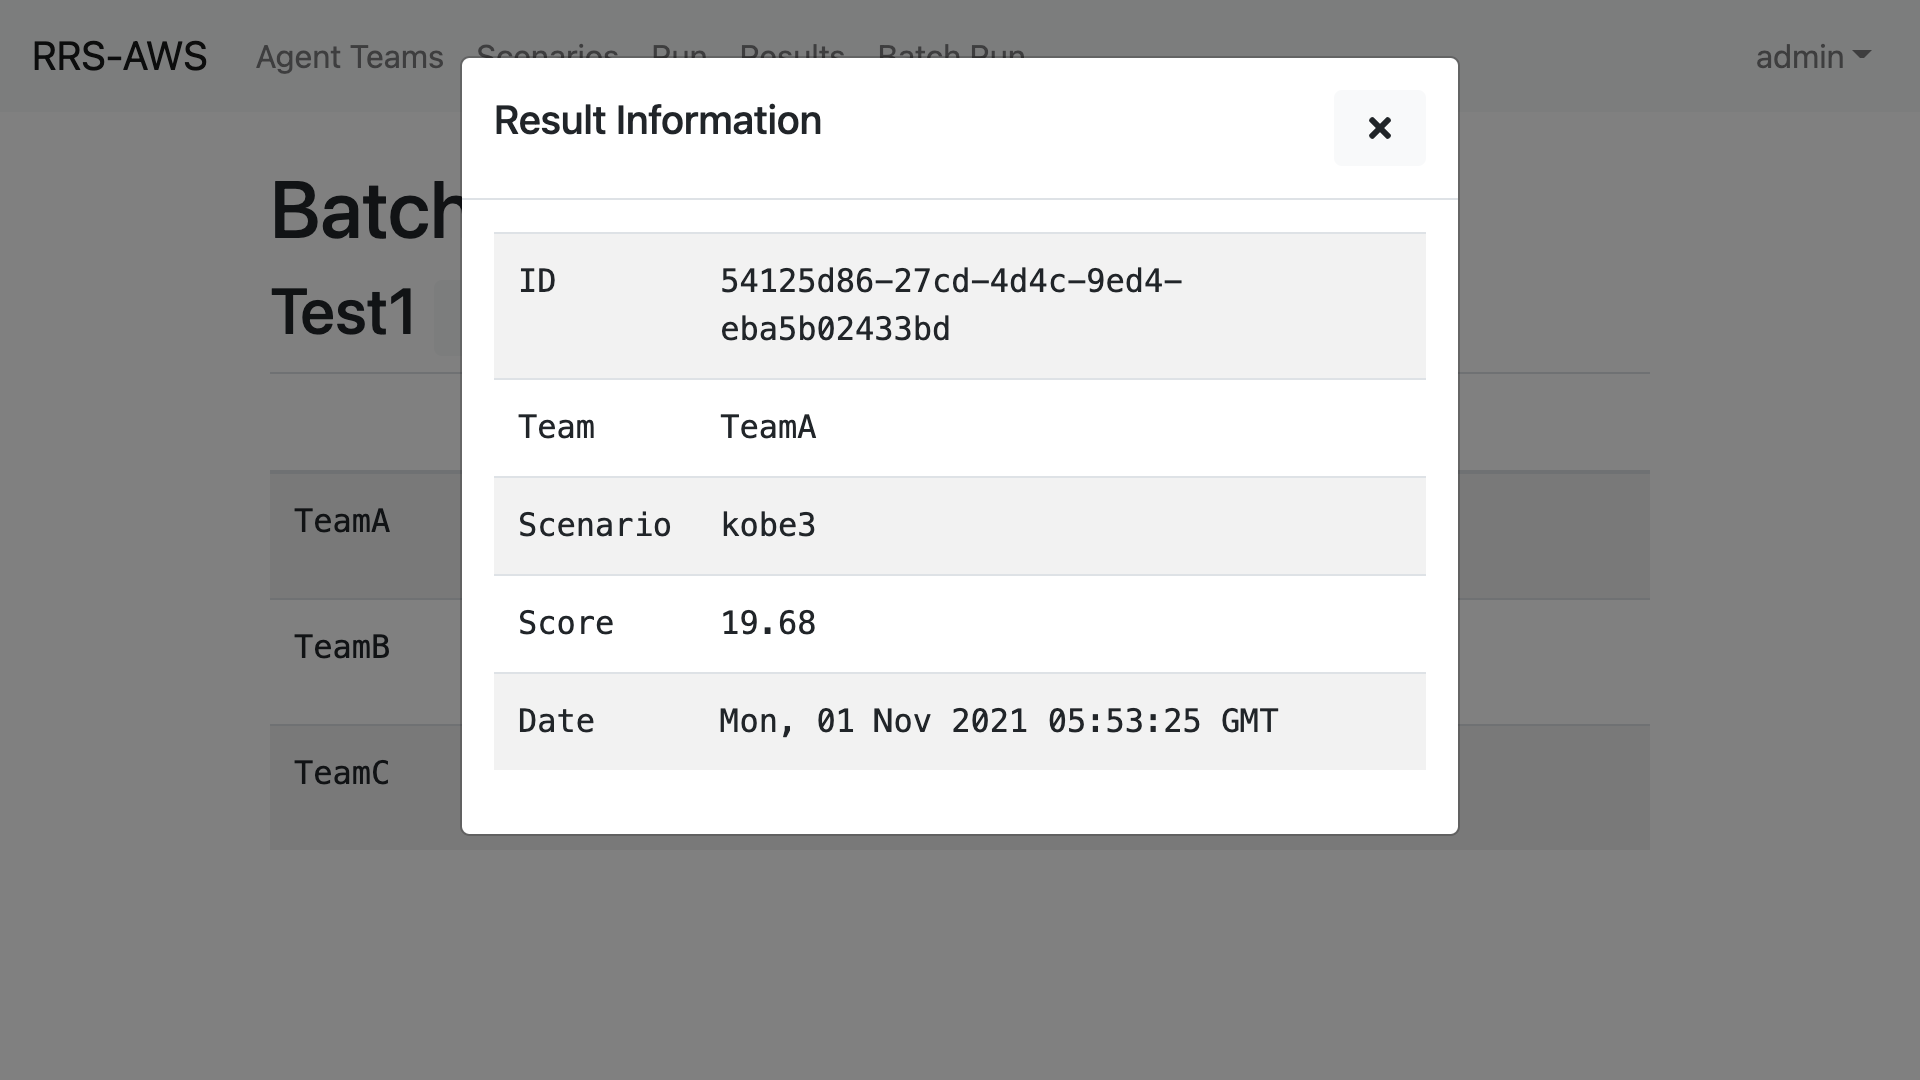
You can click on the i button next to each simulation result to get more detailed information about that simulation.
## Delete Environment
### Terminate & delete the web server
```
cd rrs-aws-ui-docker
sudo docker-compose down
//Delete rrs-aws-ui-docker file if necessary
cd ..
rm -rf rrs-aws-ui-docker
```
### AWS
::: warning
This is written based on the AWS as of October 2021. It may be slightly different with future updates.
:::
::: info
In this article, the language is set to English and the region is set to us-east-1.
You can change the language and region if necessary.
:::
Before deleting the cloudformation stack, it is necessary to delete unnecessary files (agent files, scenario files, etc.) in S3. Therefore, first delete the unnecessary files in S3.
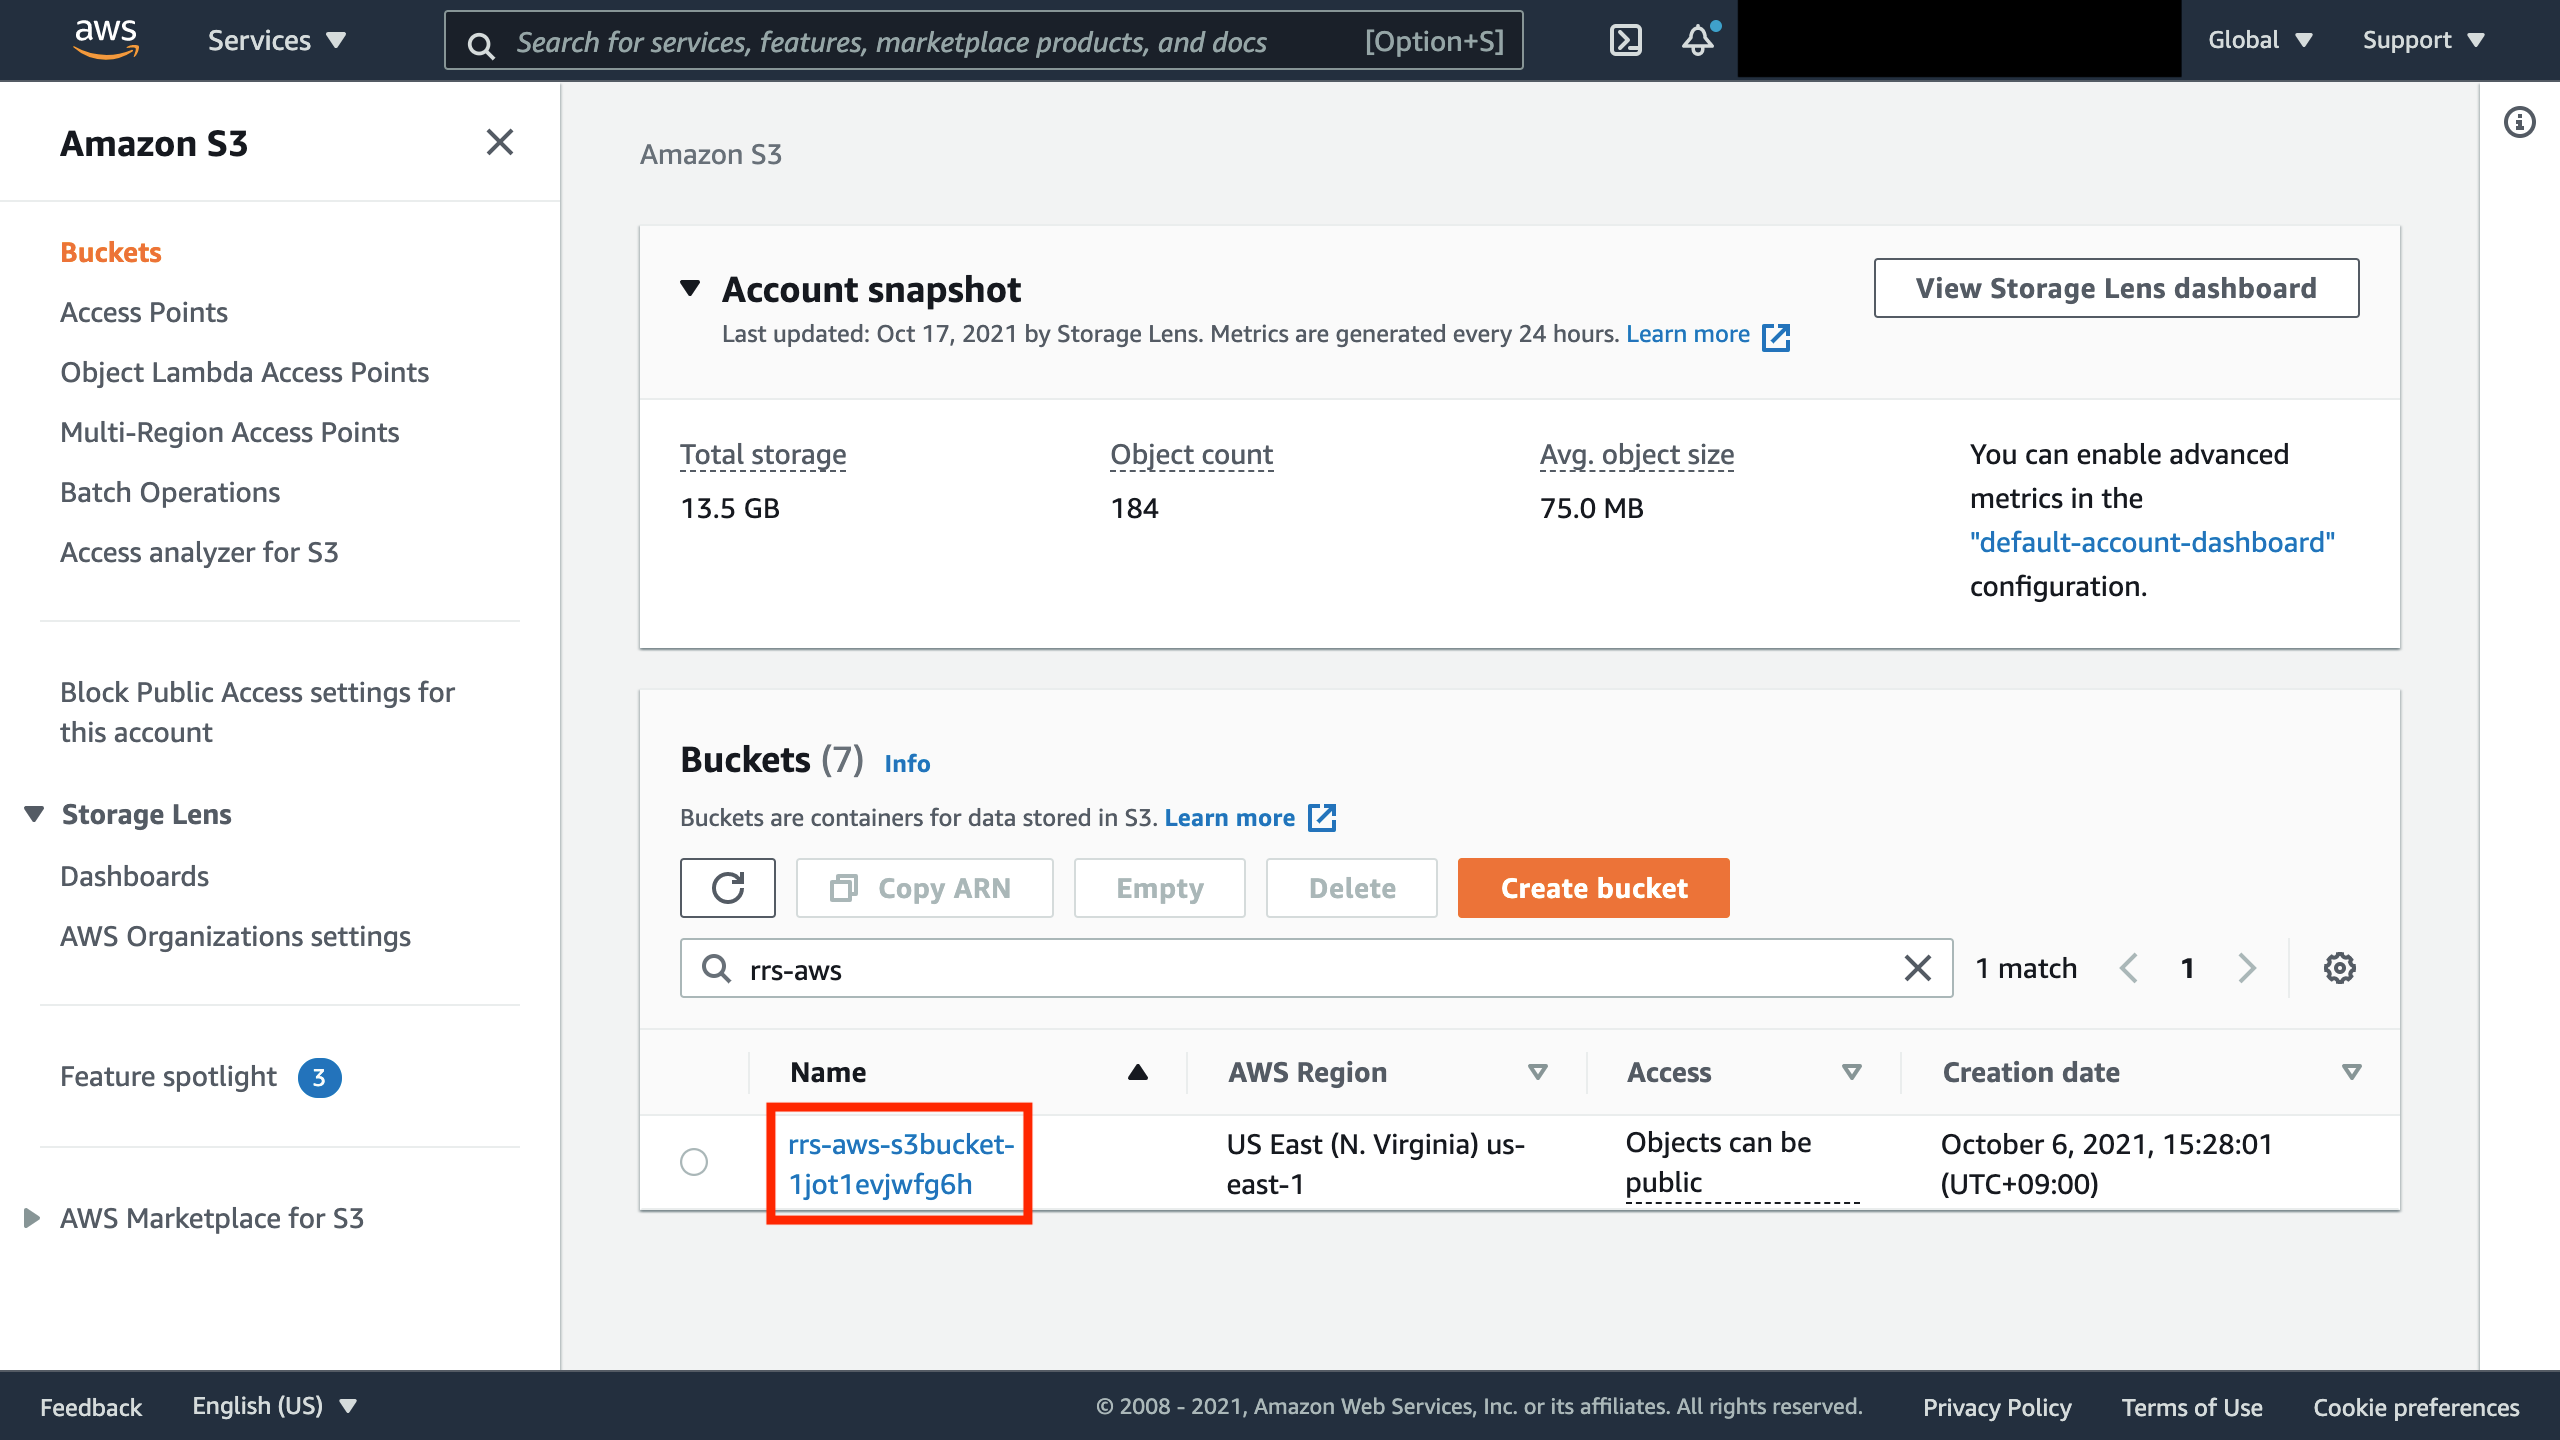
1. Go to [S3](https://console.aws.amazon.com/s3/)
2. Select the appropriate Bucket
Select the bucket whose prefix is the name you created in 6. of [Build Environment](#Build-Environment).
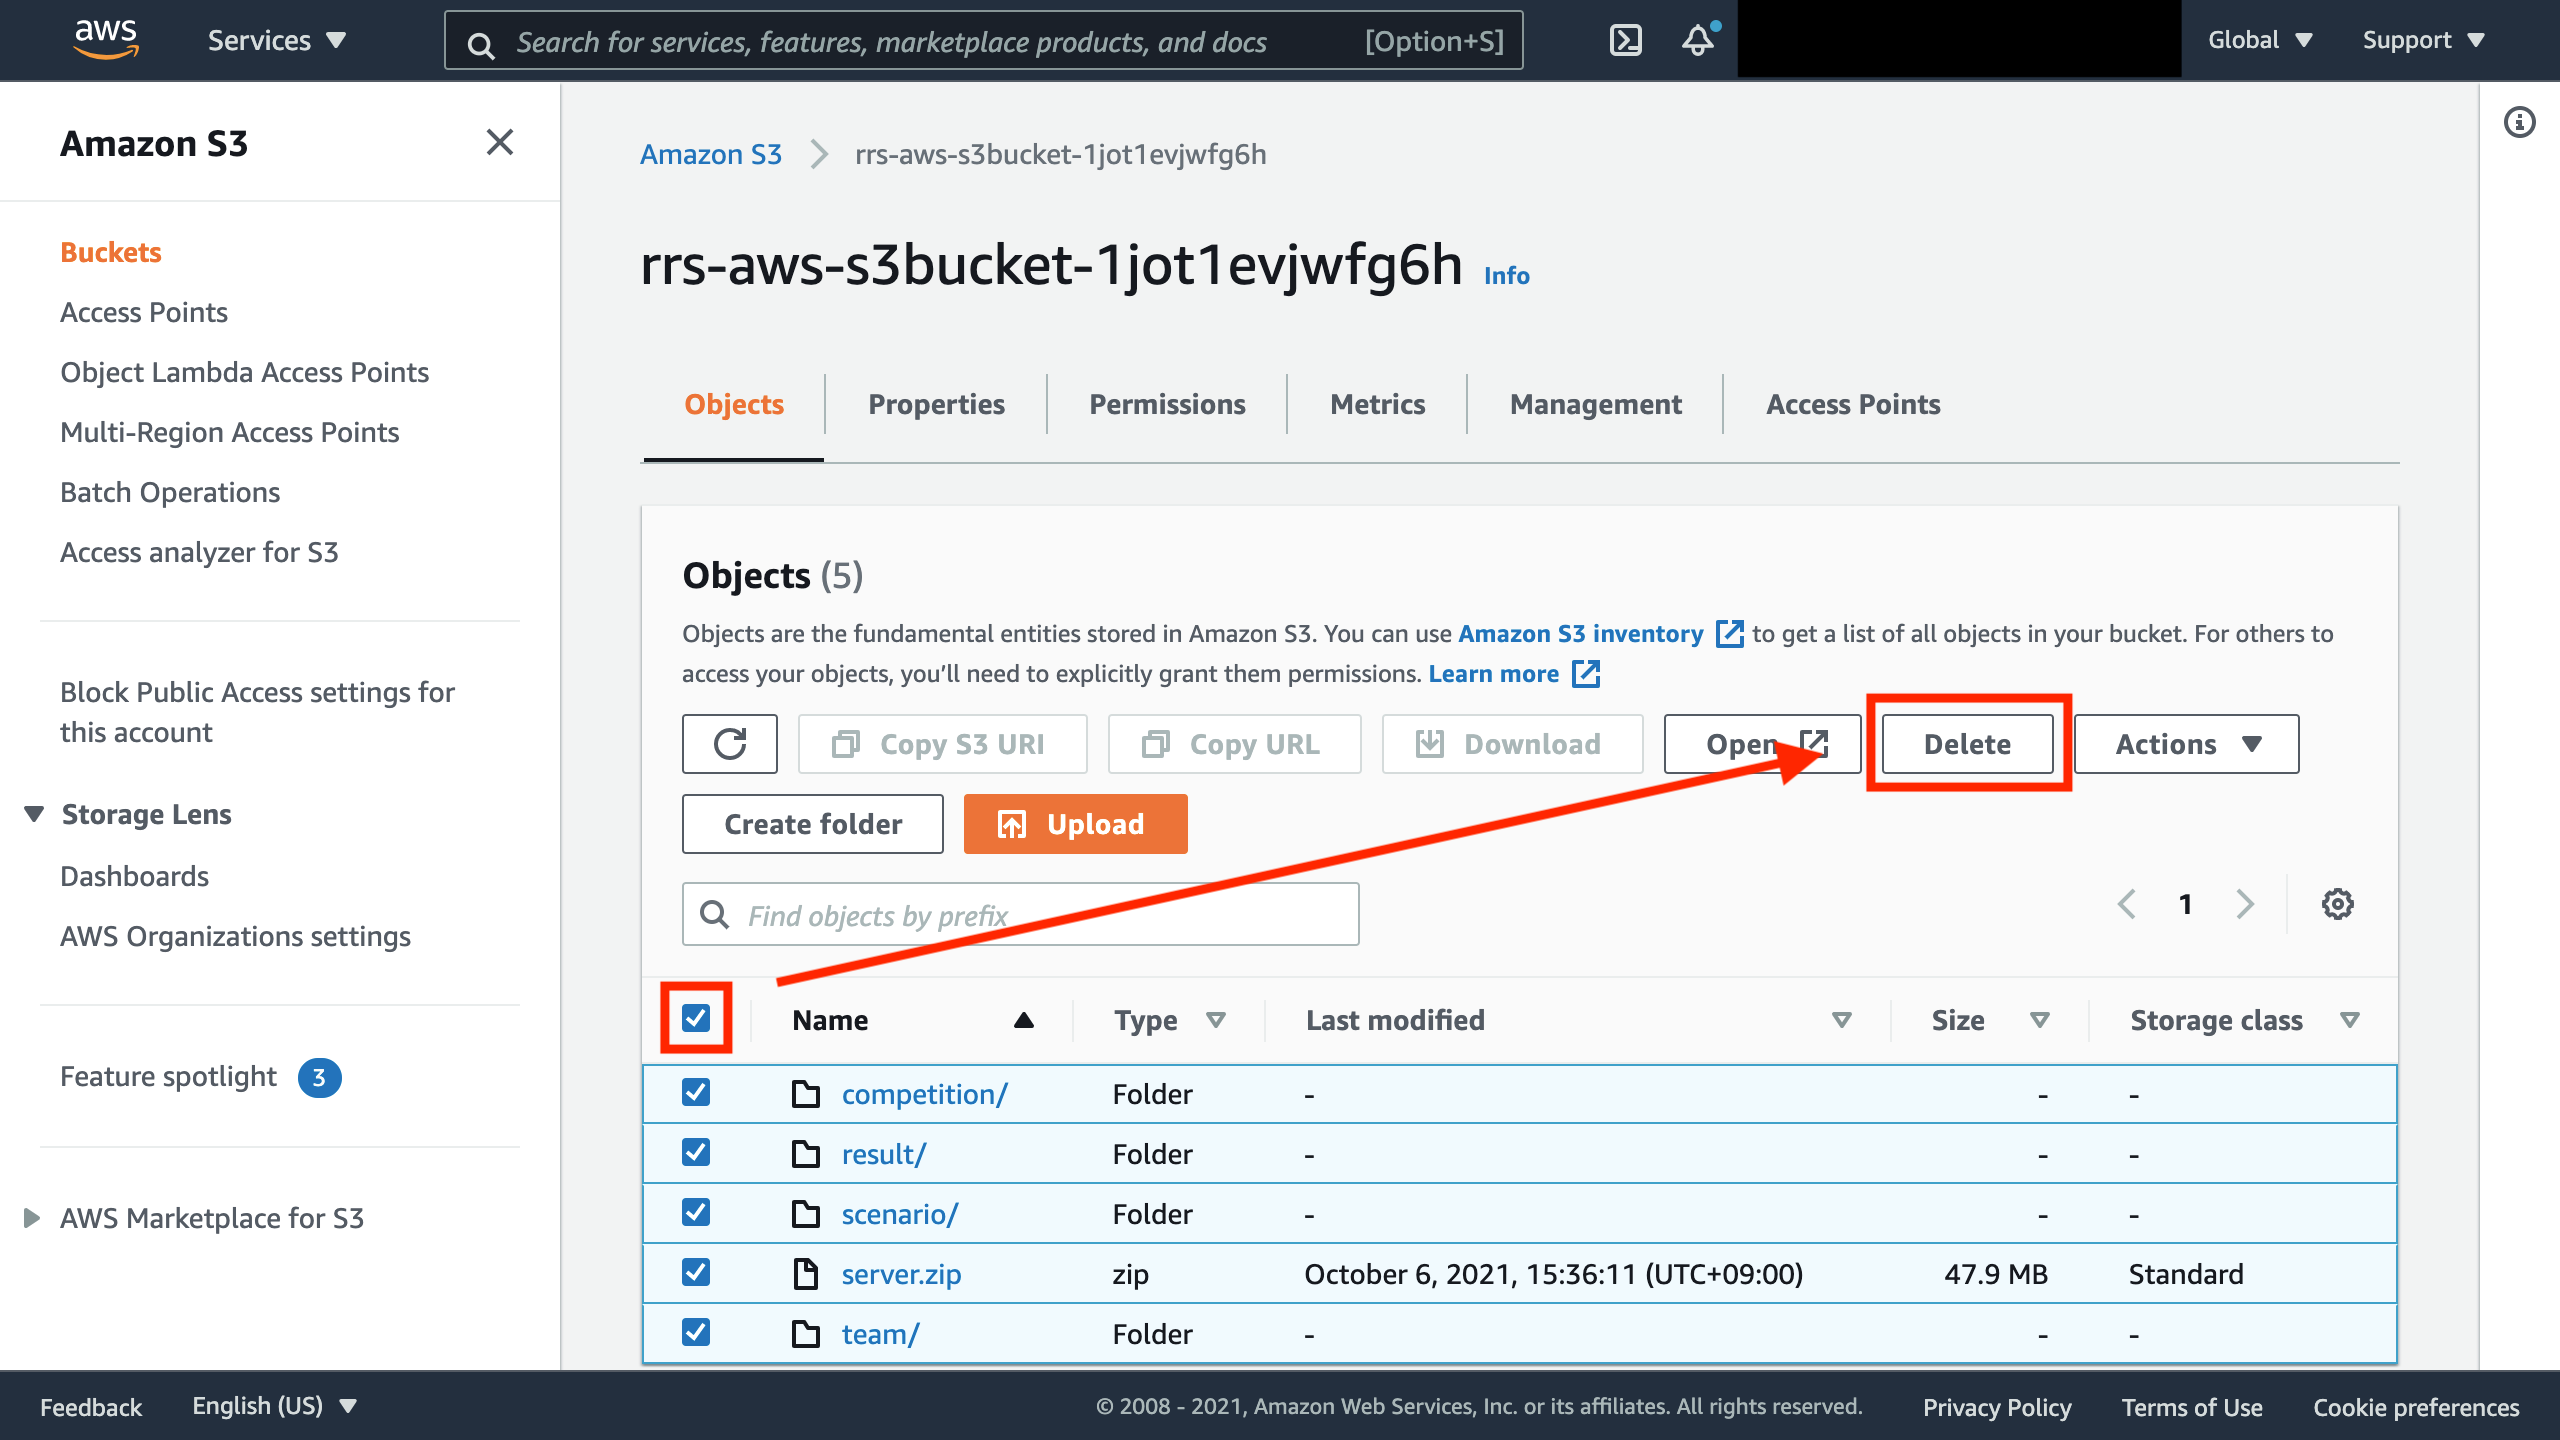
3. Check all the files and click "Delete"
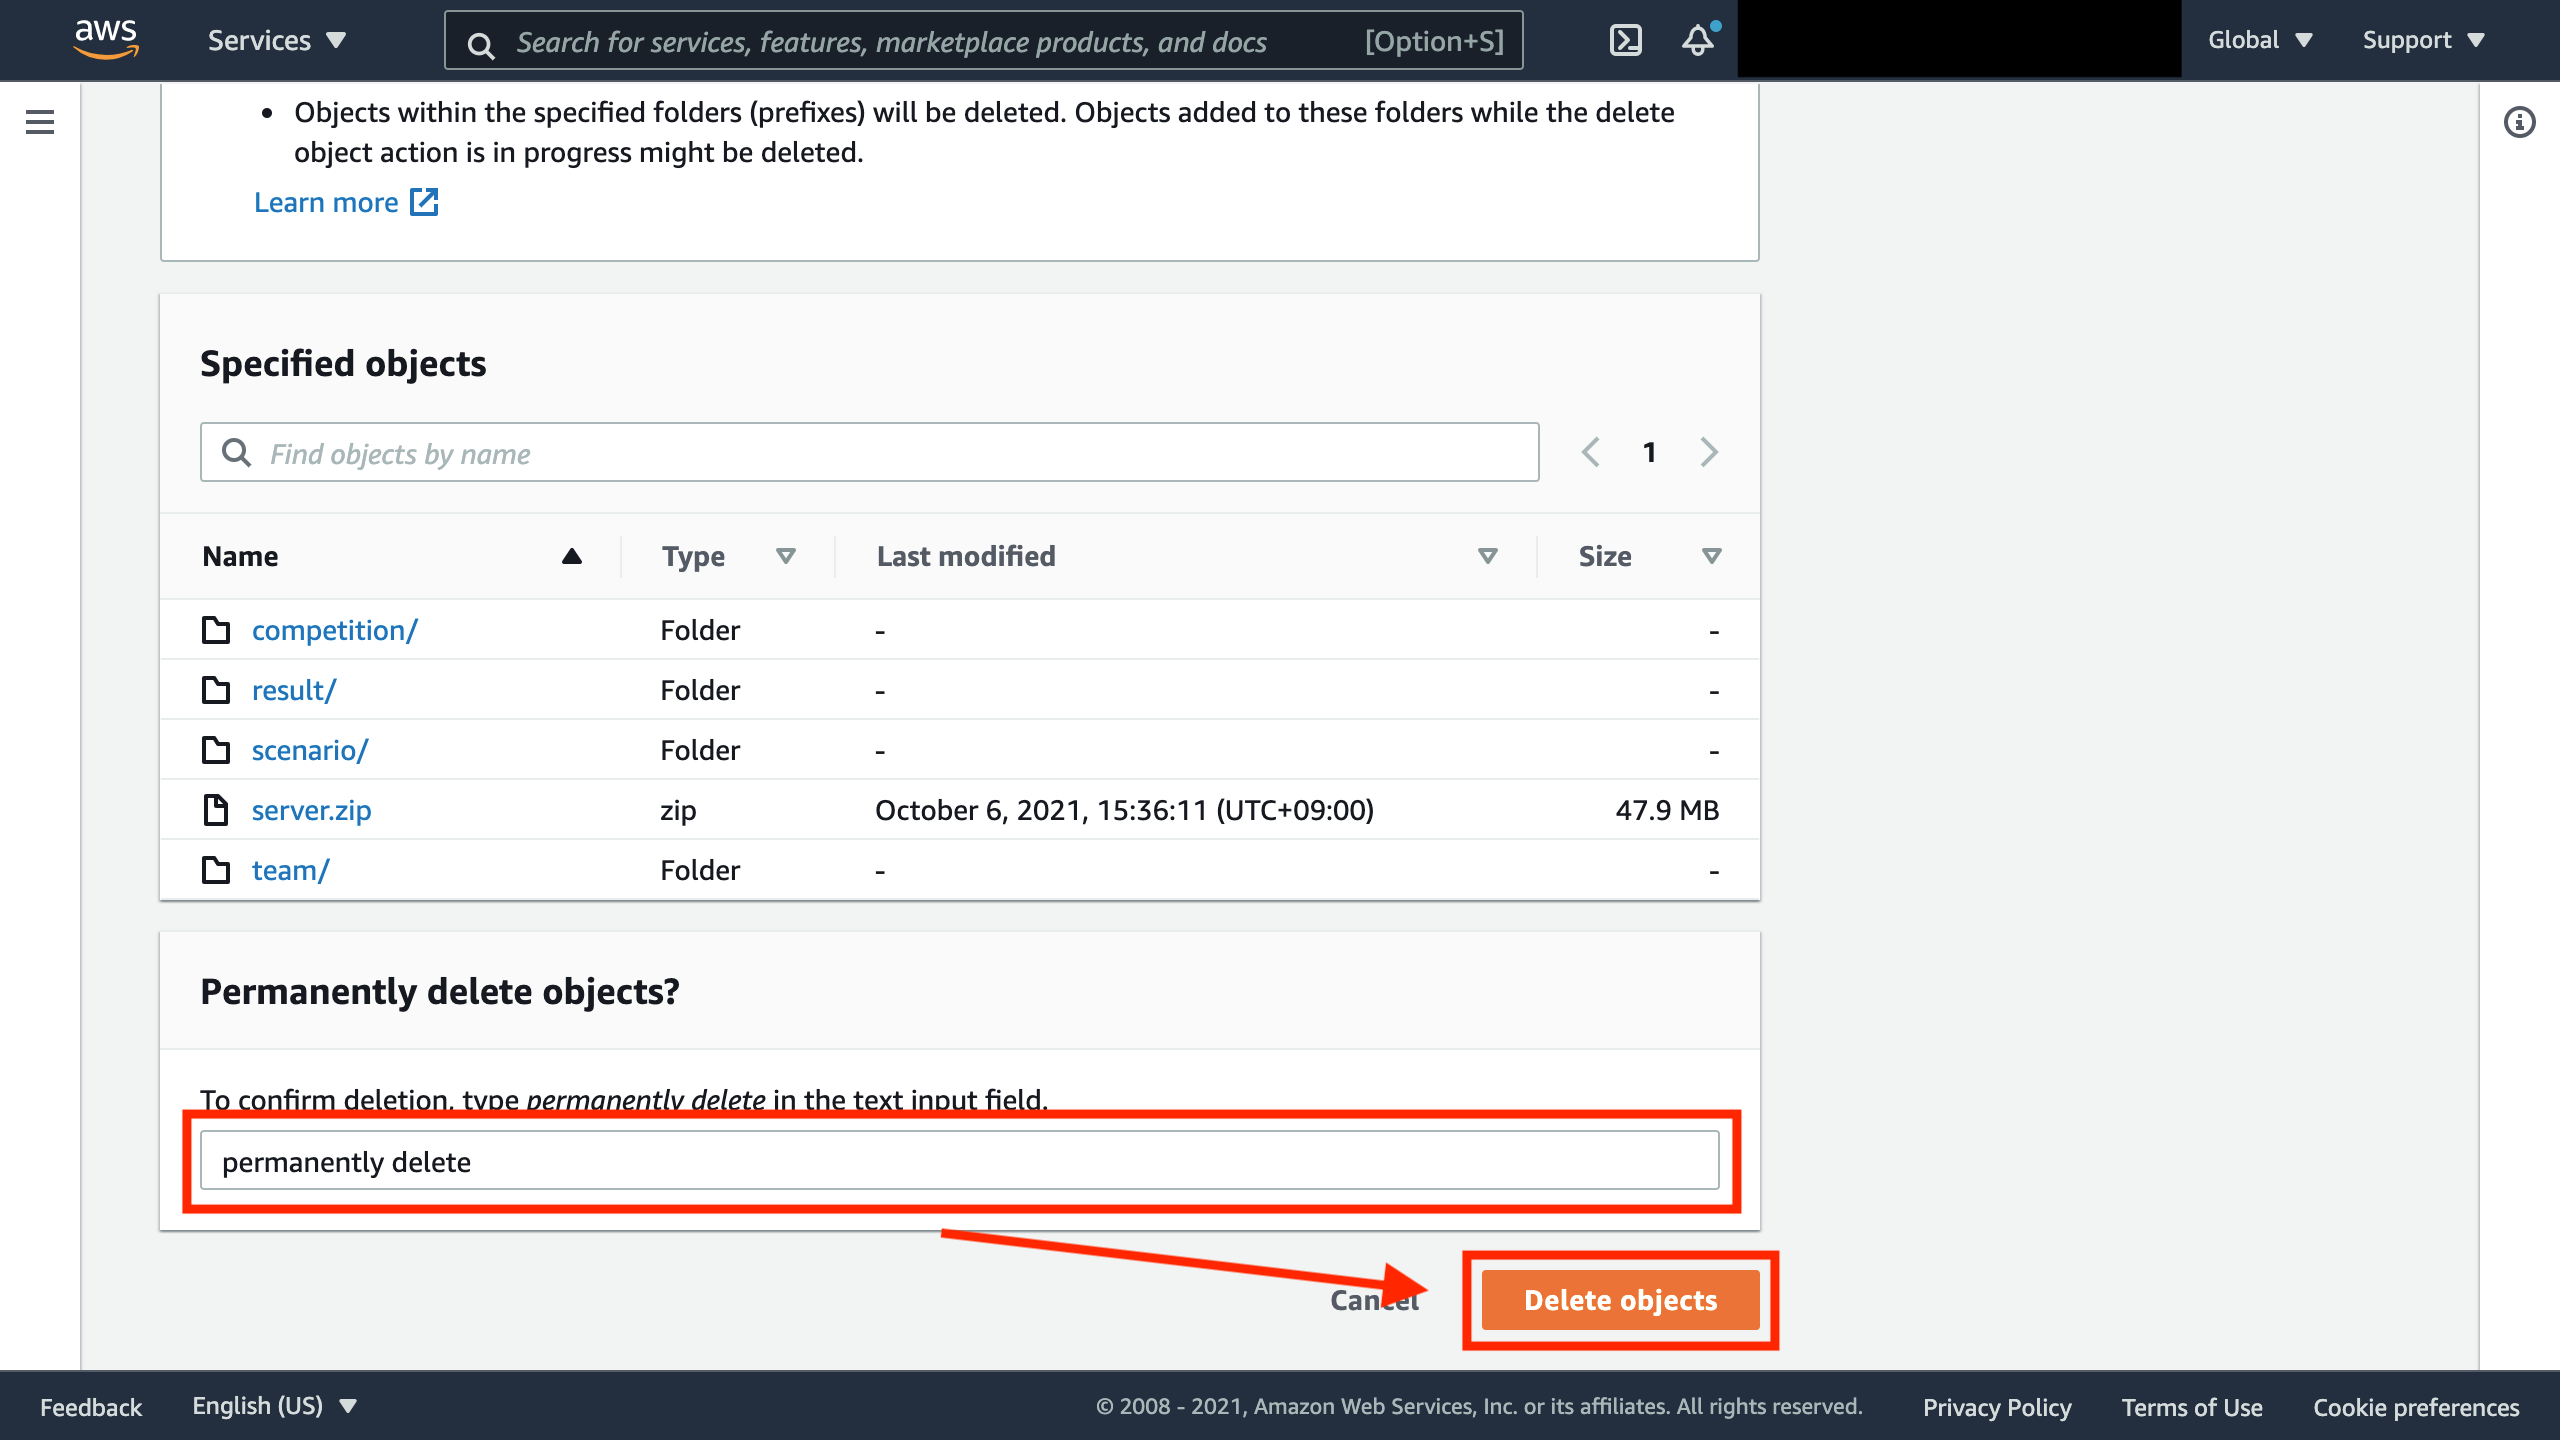
4. Enter *permanently delete* and click "Delete objects"
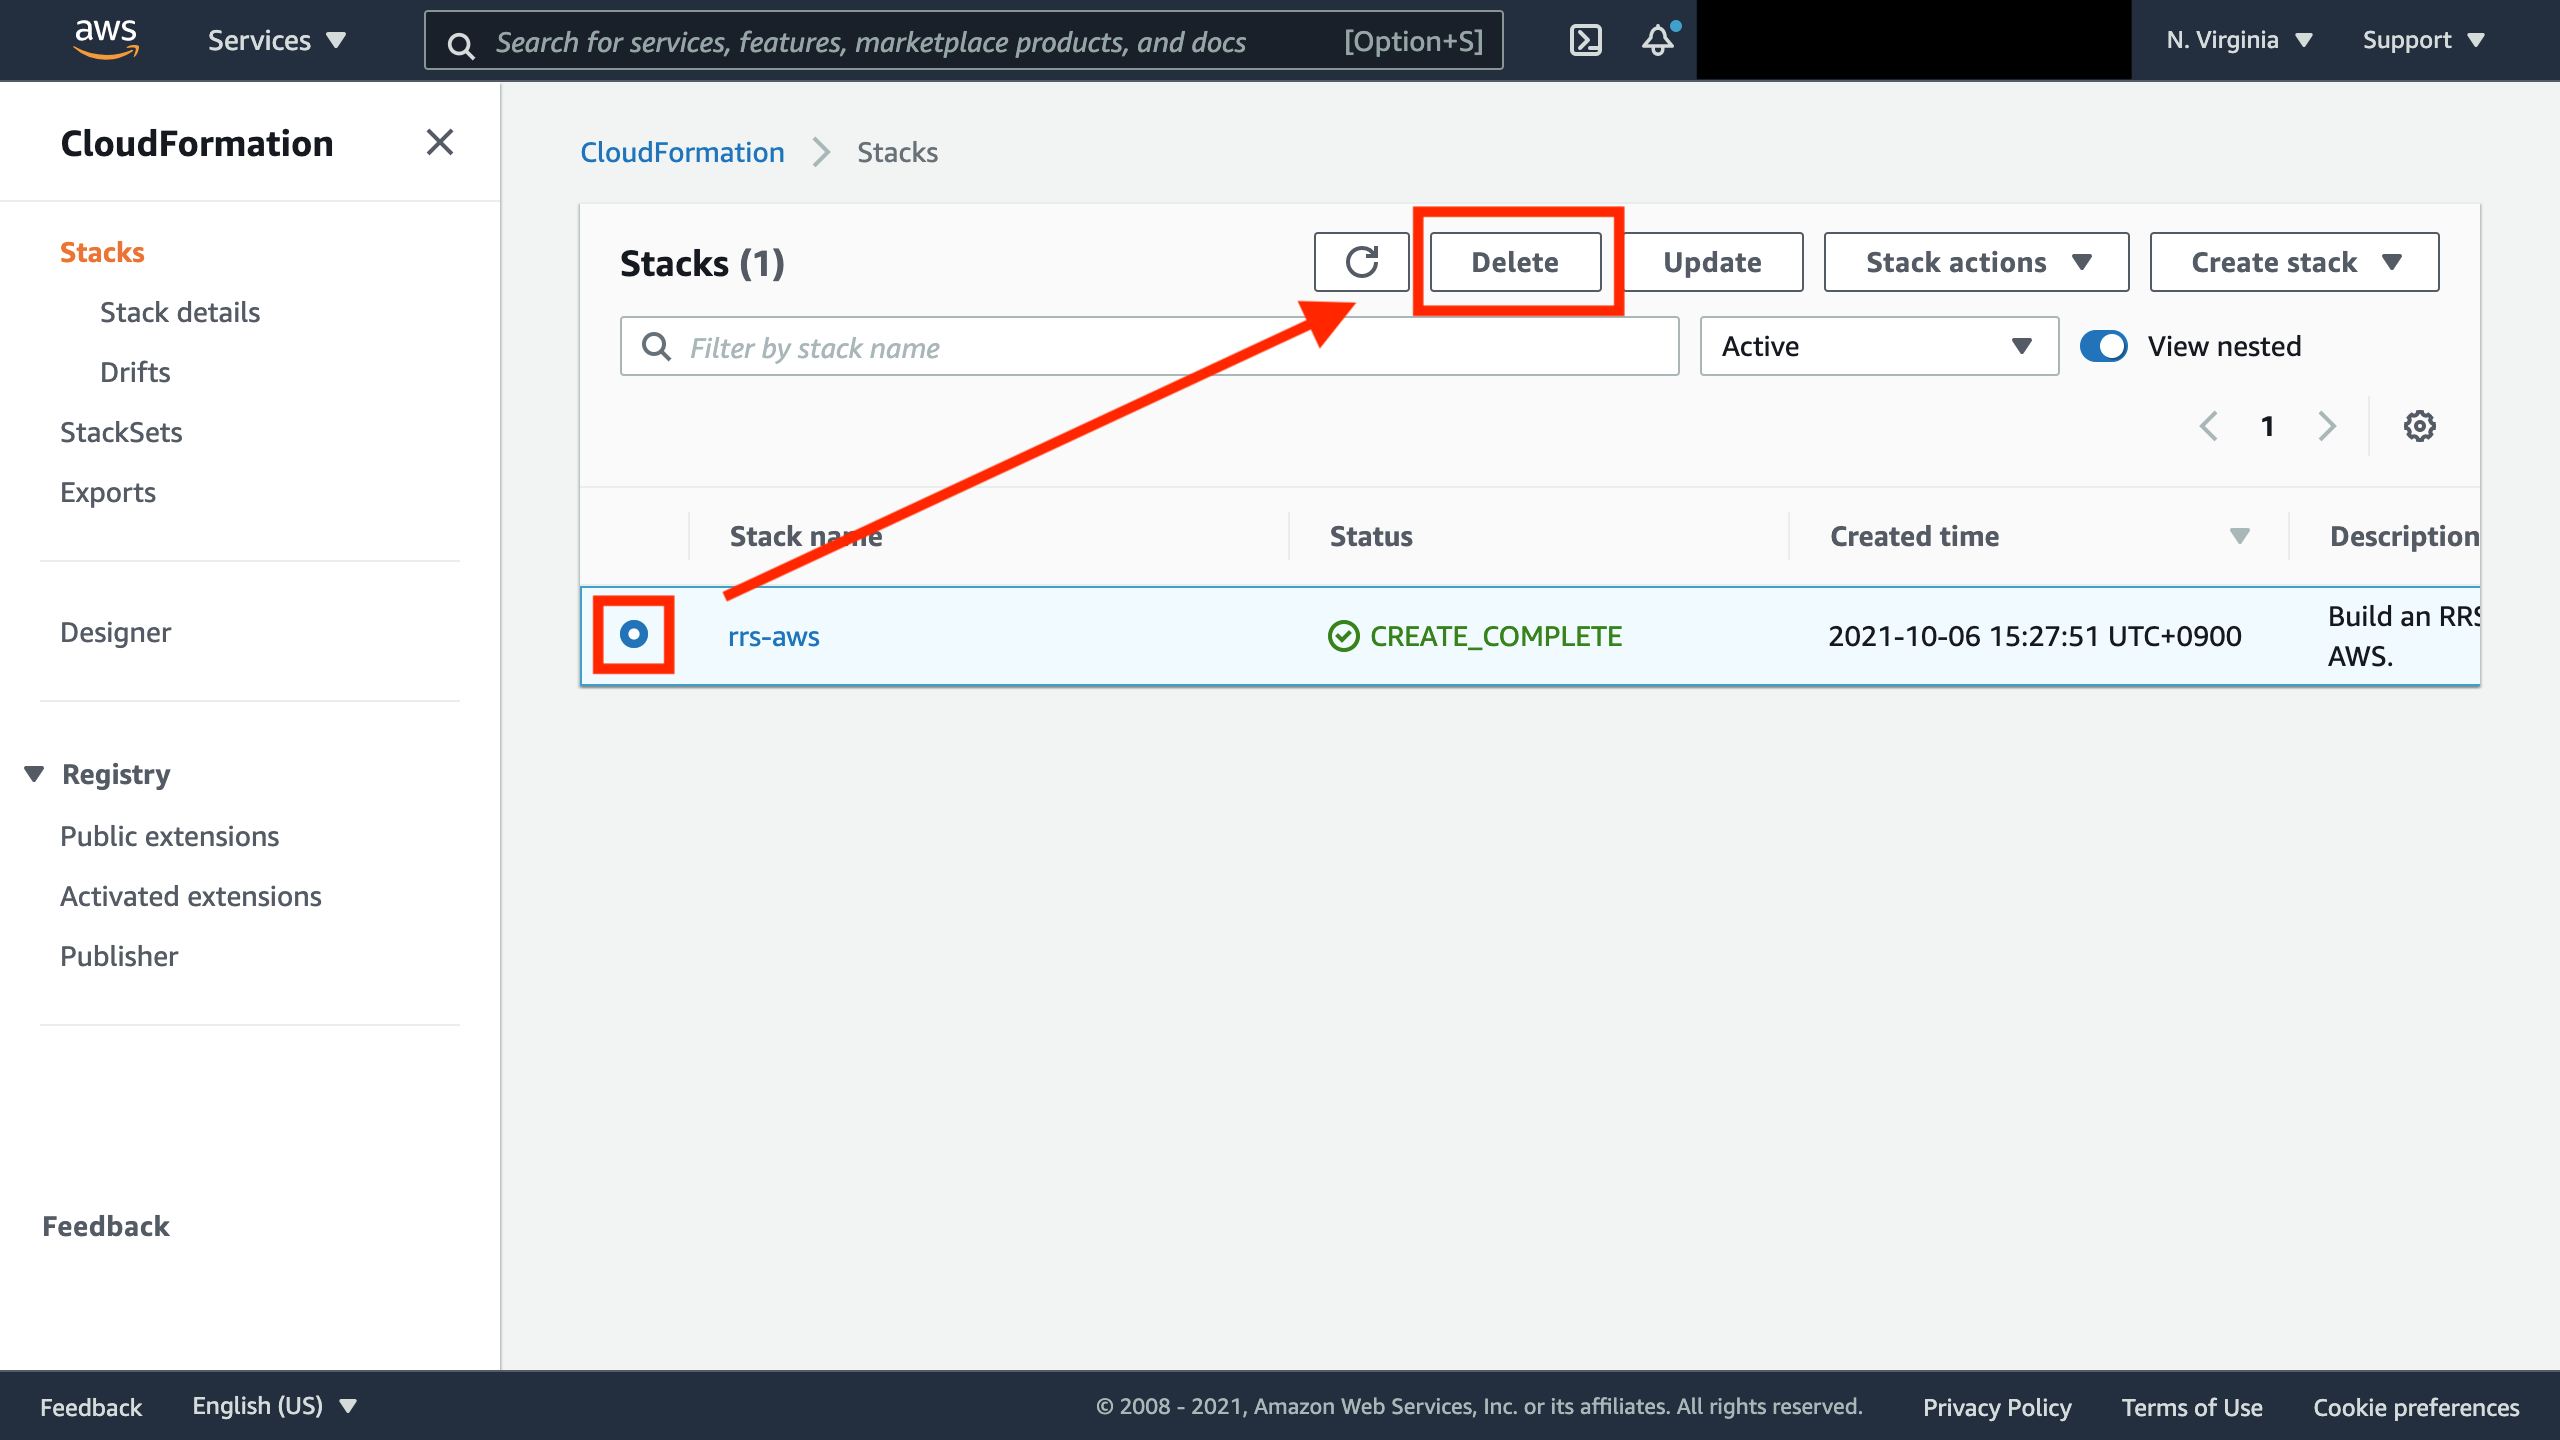
5. Go to [Cloud Formation](https://console.aws.amazon.com/cloudformation/)
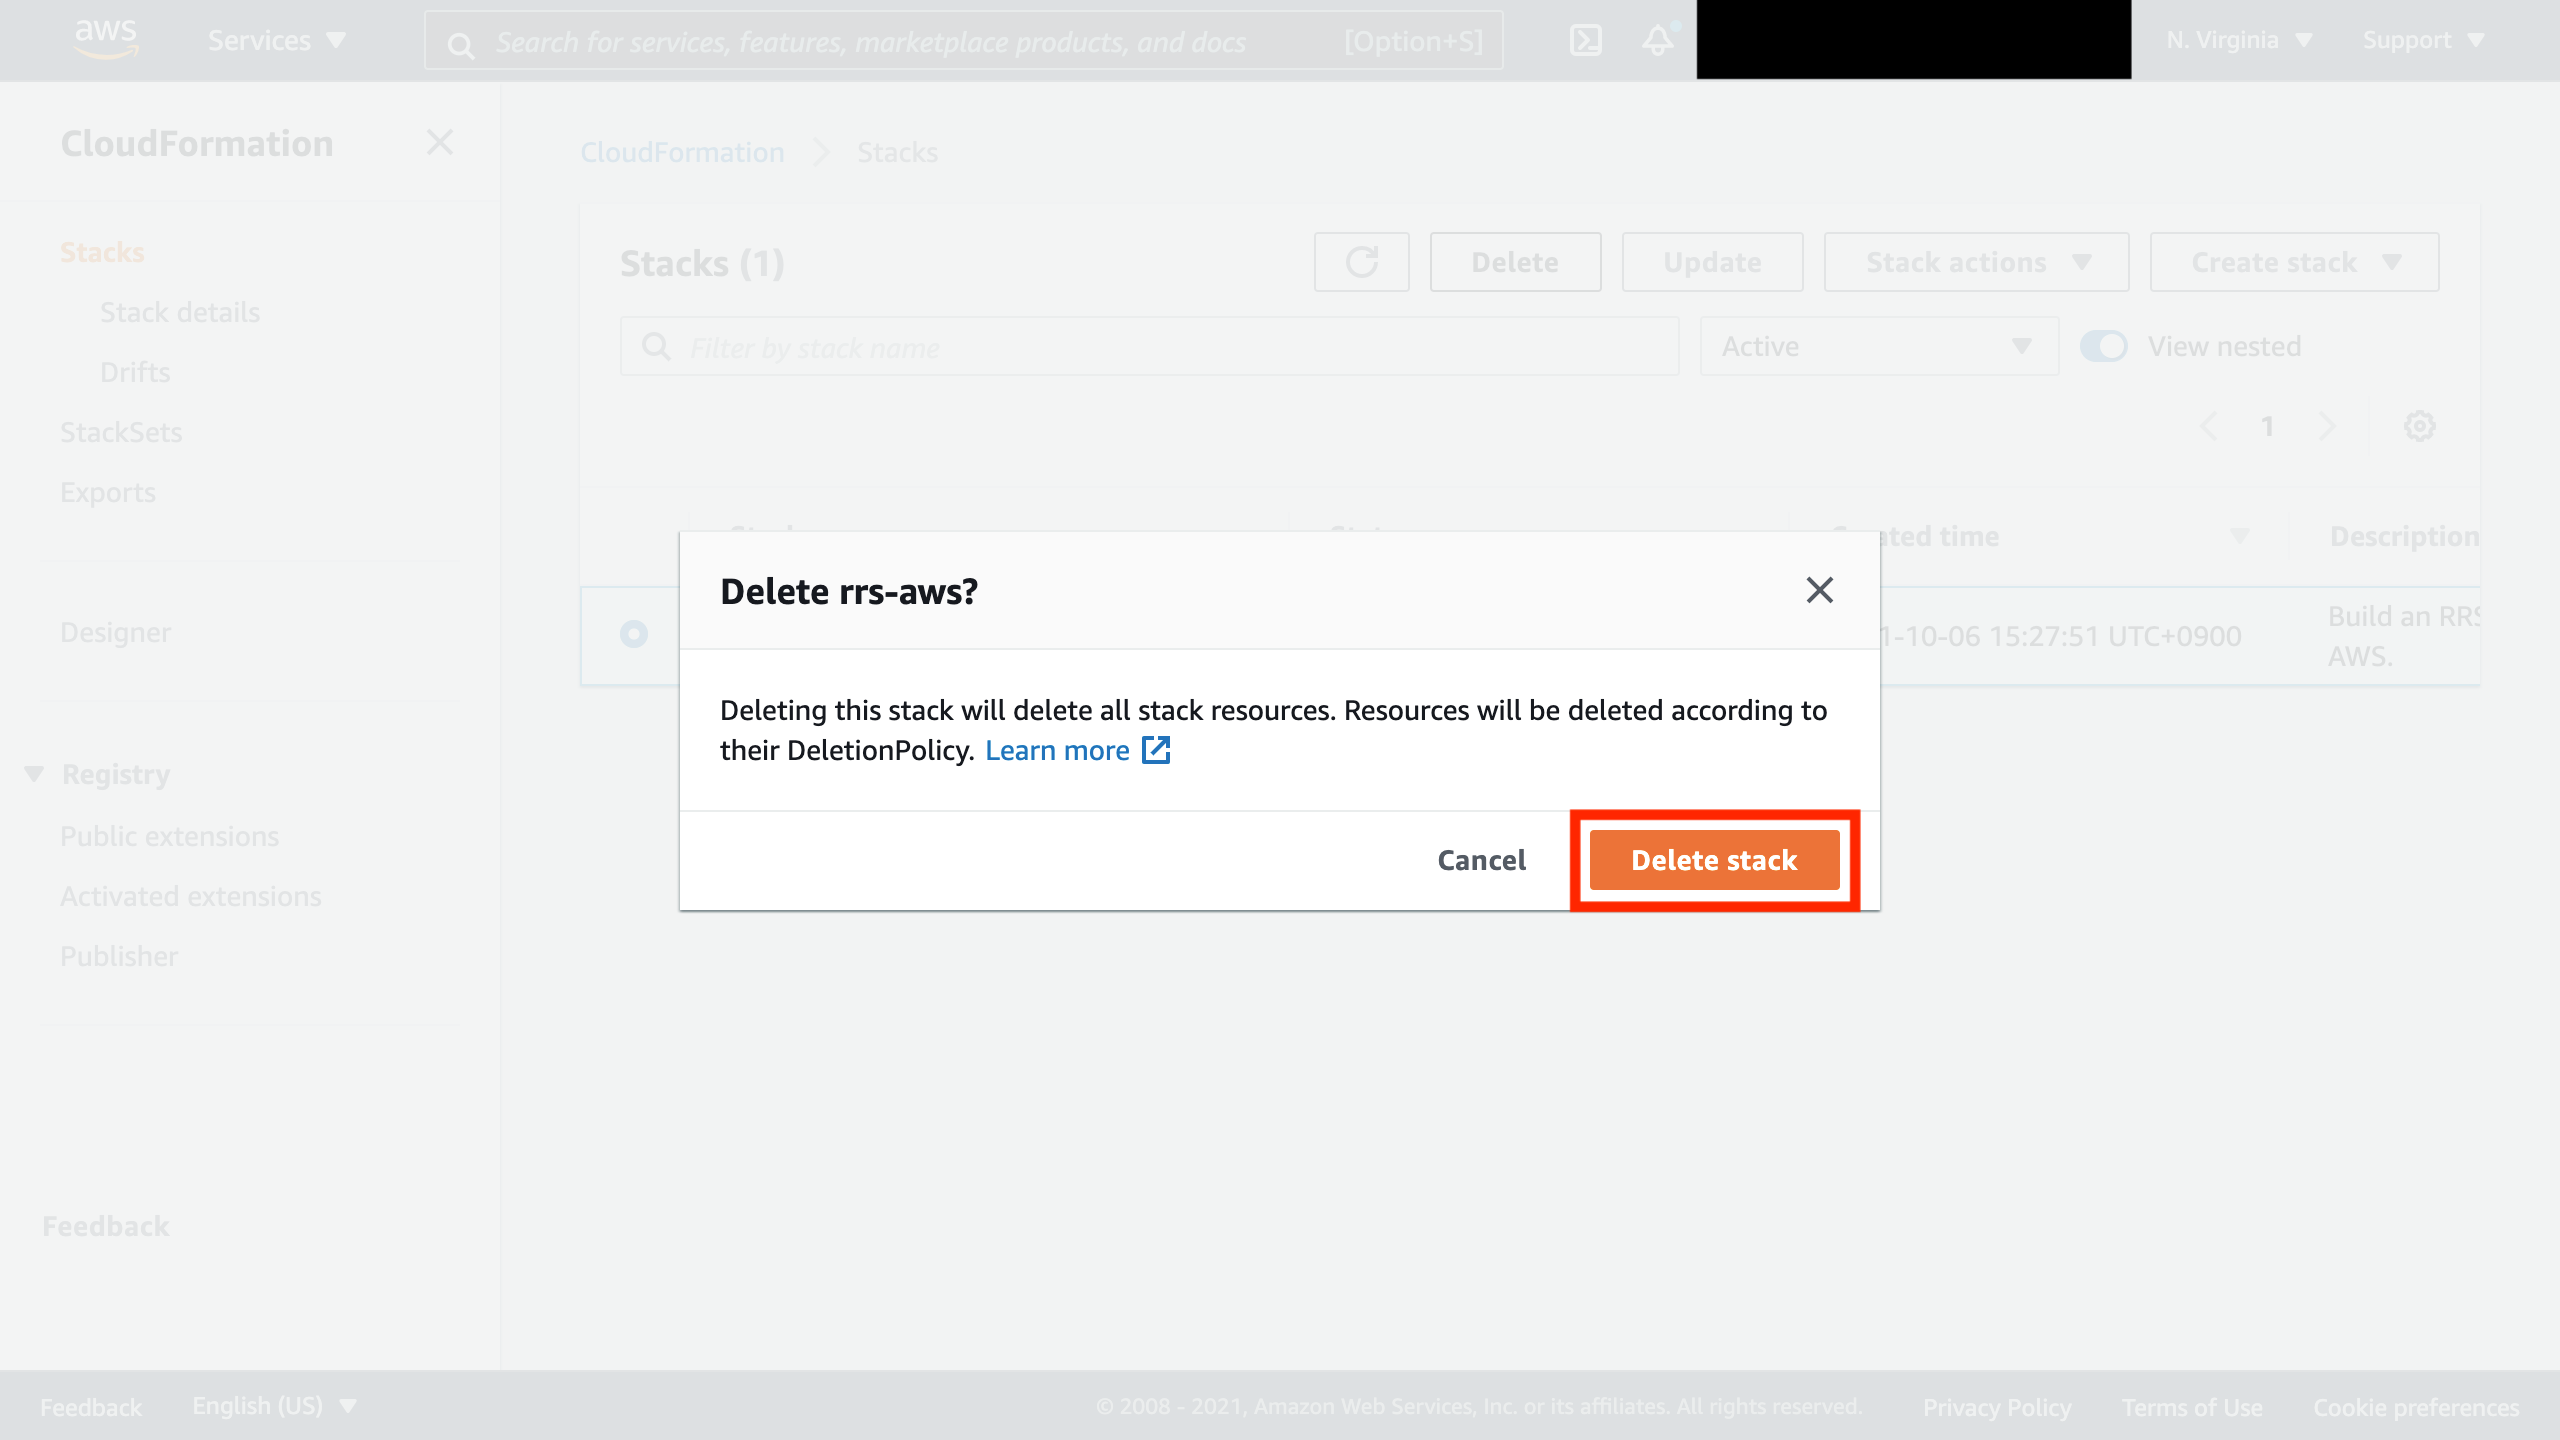
6. Select the appropriate Stack and click "Delete" in the upper right corner
7. Click "Delete"
8. Wait a few minutes for the deletion to complete
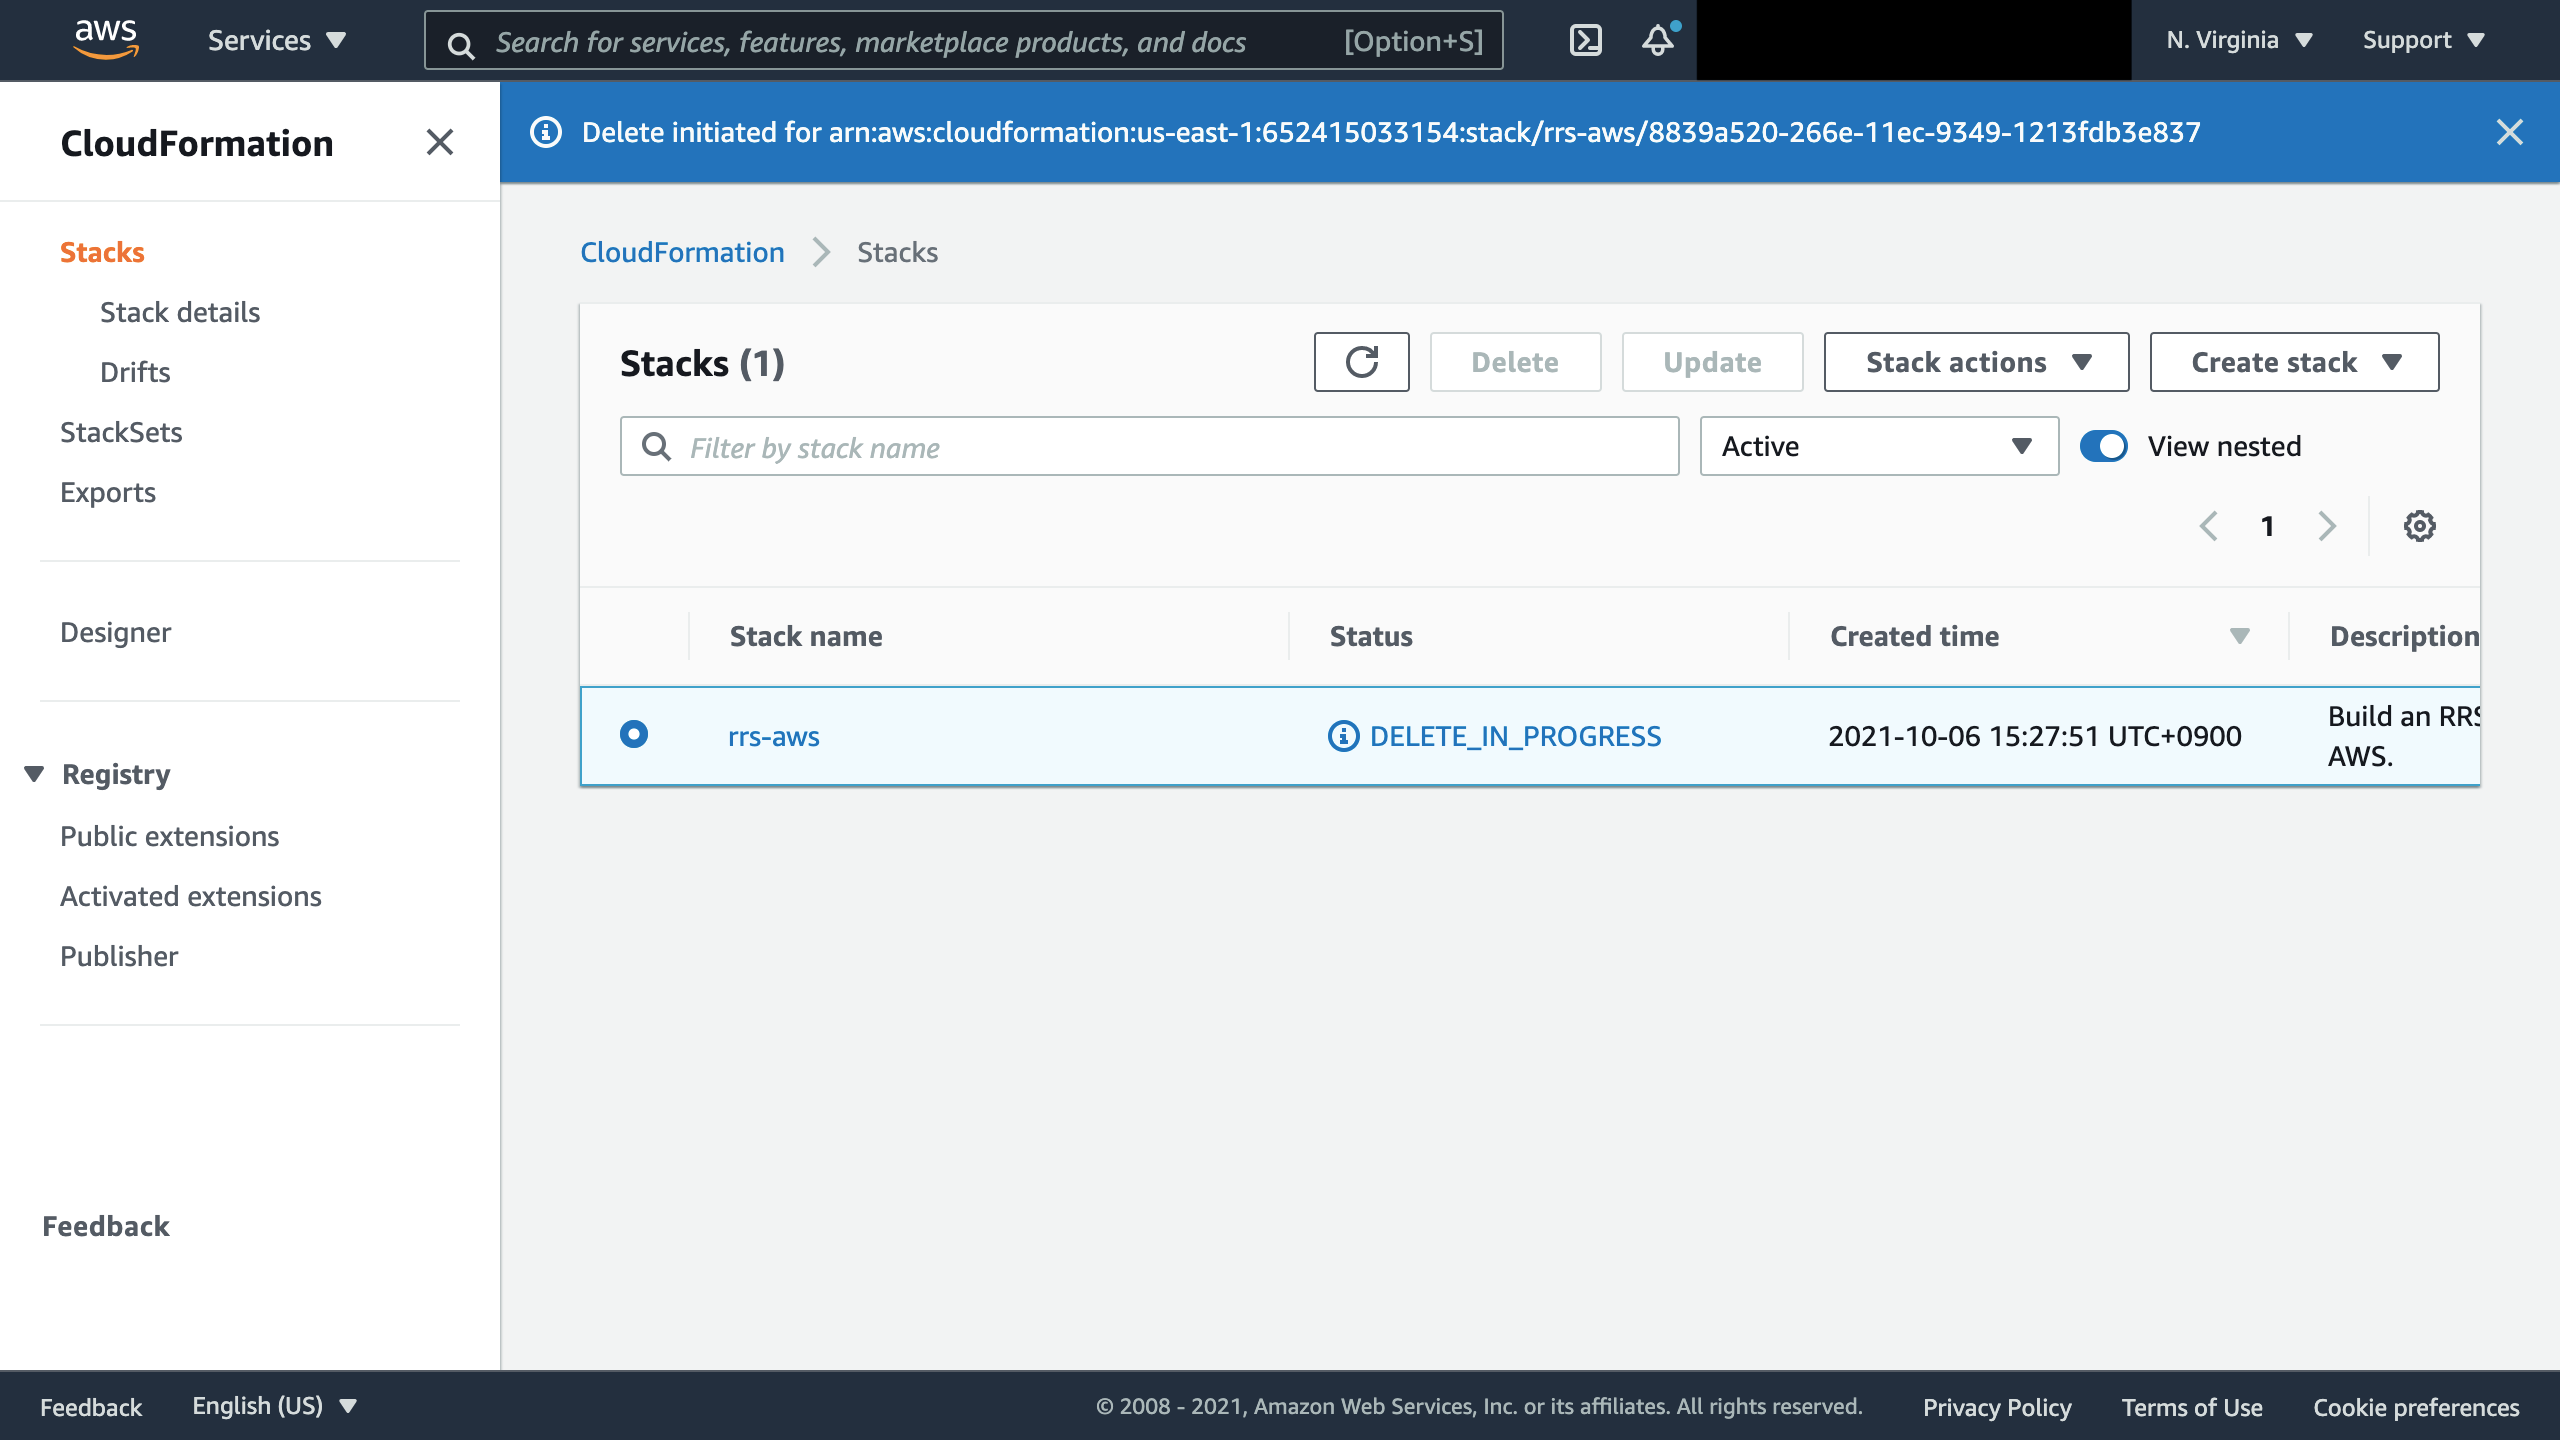
9. Confirm that the corresponding Stack has been deleted.